
Setting up a smart light bulb is straightforward. But most people fail on the first try. Not because they're not technical — because the manual leaves out two critical things: the 2.4 GHz band‑steering trap and the exact pairing‑mode rhythm. Here's how to avoid both.
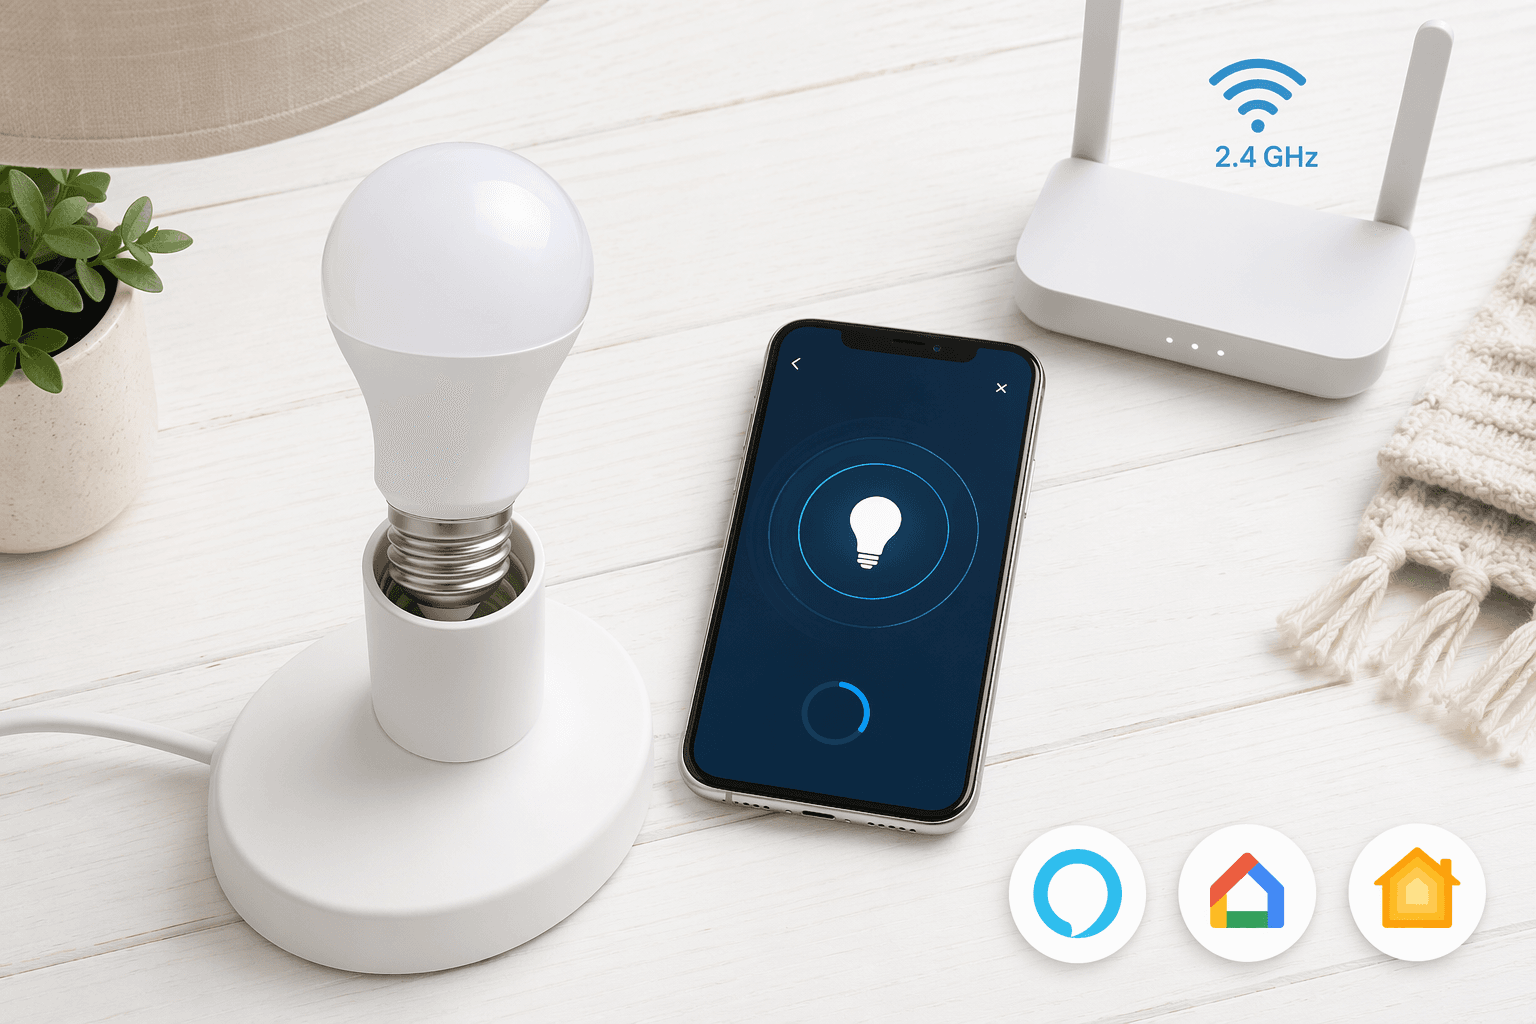
You have the bulb, the lamp, and the phone. What you might not have is a Wi‑Fi network the bulb can talk to. Most smart bulbs — including the WiZ (about $10), the TP‑Link Tapo L535E ($14.99), and the GE Cync ($14.99) — only connect to 2.4 GHz networks. They will not work on 5 GHz, and dual‑band routers with band‑steering cause silent failure: the bulb sees a signal but cannot complete the handshake.
Here is what the manual will not tell you: if your router is set to automatic band selection, the bulb will never see the 2.4 GHz network long enough to pair. You need to either disable the 5 GHz band temporarily or split your SSID into two distinct names (e.g., "Home — 2.4" and "Home — 5"). I'll walk you through both methods in step four. For now, just confirm that you can access your router's admin panel.
- Smart bulb (any brand — the steps are nearly identical)
- Smartphone with Bluetooth enabled (used for initial pairing in most apps)
- The bulb manufacturer's app installed from the App Store or Google Play
- Access to your router's admin page (IP address and admin password)
- A standard lamp or light socket — no dimmer switch (more on that in the FAQ)
Step 1: Screw It In – But Keep the Switch ON
This step seems too obvious to write, yet it is the first thing a new user gets wrong. Screw the bulb into the socket, then flip the wall switch ON. That switch must stay on — permanently. Smart bulbs require constant power to maintain their Wi‑Fi connection. If you turn the wall switch off, the bulb goes completely dark and unresponsive. If you habitually flip the switch when leaving a room, you will have to retrain yourself — or put a sticker over it.
Step 2: Download the App and Create an Account
Open your phone's app store, search for the bulb brand (e.g., “WiZ,” “TP‑Link Kasa,” “GE Cync,” “Smart Life”), and install the companion app. Create an account or sign in. That is it — two minutes, no complexity. The app will ask for location and notification permissions; grant them. Without the app you cannot pair or control the bulb.
Step 3: The Pairing‑Mode Rhythm – Exactly How Many On‑Off Cycles?
This is where brand manuals are vague, and where most first attempts stall. Your bulb needs to be told “I am ready to pair.” The universal method: flip the wall switch on and off repeatedly until the bulb flashes in a specific pattern.
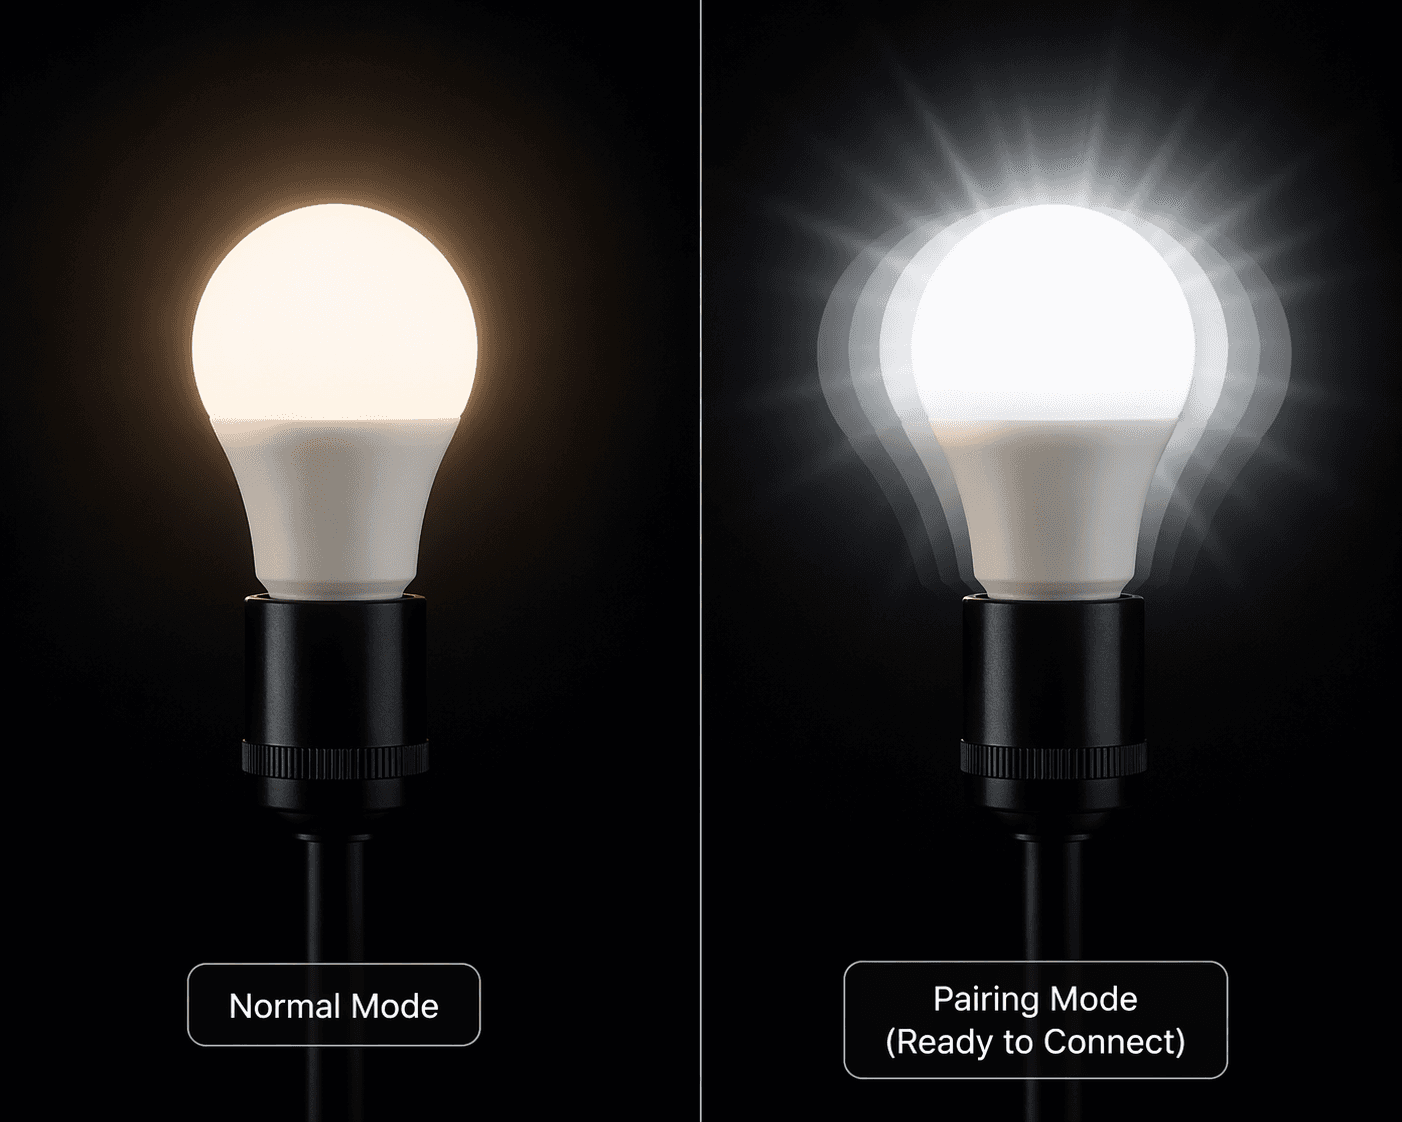
For most Wi‑Fi bulbs, cycle the switch on and off six or seven times — no less than five, no more than eight. When the bulb starts blinking rapidly (roughly twice per second), it is in easy pairing mode and ready to connect. If you cycle five times on a TP‑Link Kasa bulb, you trigger a soft reset (three blinks confirms the reset), not pairing mode. The Kasa bulb needs the standard six‑to‑seven count.
What if the bulb blinks slowly, once every two or three seconds? That is AP (access point) mode. The bulb has created its own mini Wi‑Fi network. You need to go into your phone's Wi‑Fi settings, join the bulb's network (usually named something like “SmartLife-XXXX”), then return to the app and finish pairing. You can reach AP mode by continuing the on‑off cycles — three to seven more cycles after the rapid blink starts, per Sunco's guide — until the rhythm changes.
- Rapid flash (≈2 per second) → Easy mode → Bulb will appear in app within 10 seconds
- Slow flash (≈1 per 2 seconds) → AP mode → Join bulb’s network manually
- No blink after 10 cycles → Factory reset → Hold the reset pin hole (if present) or cycle 10 times; see troubleshooting guide
Step 4: The 2.4 GHz Trap – How to Actually Get Past It
This is the second major failure point — and the one that sends the most people to forums. Your phone may be connected to the 5 GHz band, or the router's band‑steering might shove the bulb's connection attempt onto the wrong frequency. Sunco states it plainly: their smart bulbs are only compatible with 2.4 GHz Wi‑Fi networks. That rule applies to nearly every Wi‑Fi smart bulb on the market.
You have two fixes:
- Temporarily disable the 5 GHz band in your router settings. Log into the admin panel (usually 192.168.0.1 or 192.168.1.1), find the Wi‑Fi settings, and uncheck “Enable 5 GHz” or set the band to 2.4 GHz only. Pair the bulb, then re‑enable 5 GHz. The bulb will stay connected to 2.4 GHz.
- Split the SSID — rename your 2.4 GHz network to something distinct (e.g., “Home-2.4”) and connect your phone to that network before starting the app pairing process. This avoids the band‑steering trap permanently.
Step 5: Name It, Assign a Room, Link to Voice Assistant
The bulb appears in the app as something like “Smart Bulb 4A2B.” Tap it, edit the name to something you'll recognise (“Living Room Floor Lamp”), and assign it to a room. Room assignment is not fluff — it enables voice commands like “Turn off the living room lights” without naming every bulb.
Linking to a voice assistant takes two minutes. Open your voice assistant app, go to “Add Device” or “Skills,” and find your bulb brand. The general pattern: enable the skill (or link the account), log in with your bulb app credentials, and run a device discovery. After 10–15 seconds, your bulbs will appear.
- For Alexa: open Alexa app → More → Skills & Games → search for your bulb brand → Enable → log in → Discover Devices.
- For Google Home: open Google Home app → Add → Set up device → Works with Google → tap your bulb brand → link account → log in.
- For Apple Home: if your bulb supports HomeKit (or Matter), scan the pairing code on the bulb or its packaging. If it is a Matter bulb, you can add it directly to the Home app from the bulb's app.
Once linked, try a voice command: “Alexa, turn on the living room lamp.” If it works, you are done. If not, double‑check that the bulb's skill is enabled and that you are using the same account in both apps.
Now that the basics are working, you might want to explore automations. Check out our Google Home automation recipes and the 2026 smart home automation guide for ideas.
Next Steps: Grouping, Scheduling, and Scenes
You have basic control. To get more out of the bulb, create a group (e.g., “All Living Room Lights”) so one command controls several bulbs. Set a schedule to turn the bulb on at sunset or off at bedtime. Build a scene like “Movie Night” that dims the lights to 20% and sets the colour to warm white. These features live in the bulb app, but after you link to your voice assistant you can trigger them by voice.
For deeper automation — like turning on the lights when you arrive home or dimming them when you say “Goodnight” — look at the automation recipes linked above. They show you exactly how to wire these actions in Alexa Routines or Google Home Automations.
If Something Goes Wrong
Three common failures and their fixes:
- Bulb not found in app → Double‑check your phone is connected to the 2.4 GHz network (not 5 GHz). Re‑enter pairing mode by cycling the switch six to seven times. Ensure Bluetooth is on.
- Bulb keeps disconnecting → The wall switch must stay ON. If you have a dimmer switch, it may be incompatible. Move the bulb to a non‑dimmer socket to test.
- Pairing mode won't start → If the bulb is stuck in a previous state, perform a soft reset (five cycles for TP‑Link, ten cycles for a full factory reset). Then try pairing again.
FAQ: Hub Requirements, Standby Power, and Dimmer Compatibility
- Do I need a hub? Most Wi‑Fi smart bulbs — including WiZ, TP‑Link Tapo, and GE Cync — connect directly to your router without a hub. Hub‑based systems like Philips Hue require a Hue Bridge ($50) for remote control and advanced features, though they also support direct Matter‑over‑Thread pairing with compatible controllers. See our Matter buying strategy article for more on hub‑free vs. hub‑based choices.
- Does the bulb waste electricity when off? Smart bulbs consume a small amount of standby power — typically 0.5 to 2 watts — to keep the Wi‑Fi radio active. At average electricity rates, that costs about $1 to $3 per bulb per year. (Source: Security.org.) Hardly enough to notice, but good to know.
- Can I use a dimmer switch? Only if the bulb is explicitly labeled as dimmer‑compatible. Standard dimmer switches can cause flickering, buzzing, or damage. If you want dimming, buy a smart bulb that supports it in the app and keep the wall switch on at full brightness.
For a deeper look at what a home automation controller does — and whether you need one for your ecosystem — check our structured profile of home automation controllers.
Community Tips
Share platform-specific variations, steps that have changed after app updates, or tips that helped your installation succeed.
Comments
Join the discussion with an anonymous comment.