
How to Set Up Smart Thermostat and Air Purifier for Heatwave
Copyable Home Assistant automations that coordinate a smart thermostat and air purifier through a heatwave — setpoint discipline, PM2.5-triggered fan speed with hysteresis, and free-cooling window guards so the two devices work together instead of against each other.
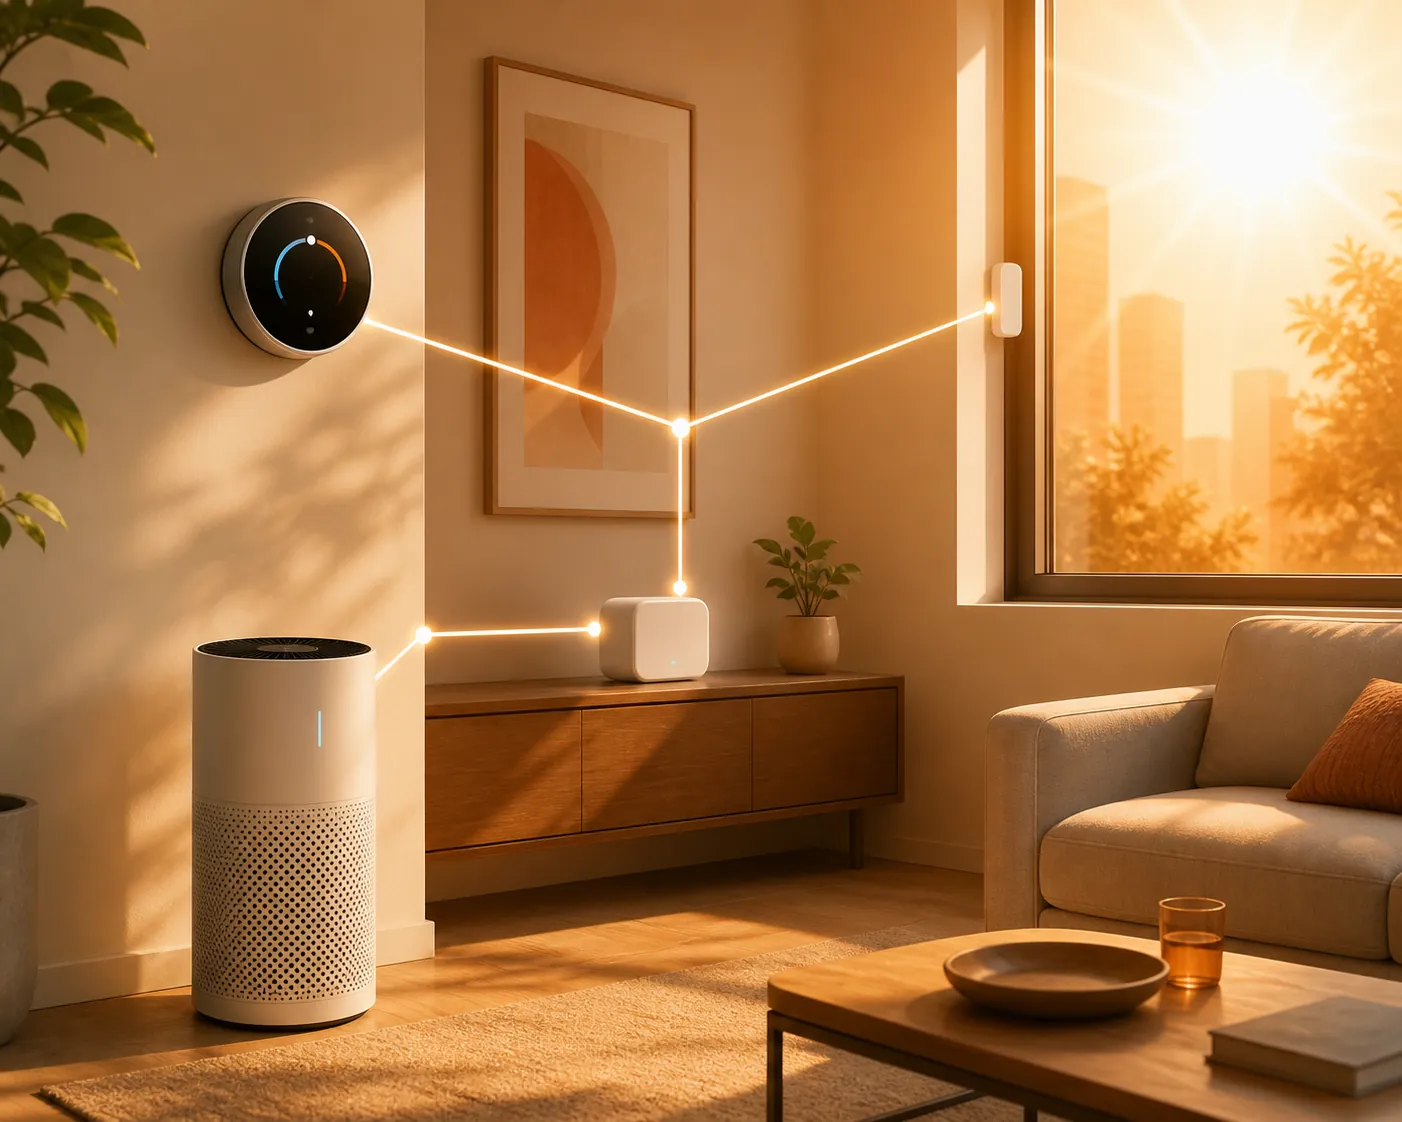
A heatwave setup that pairs a smart thermostat and air purifier fails in boring, livable-house ways before it fails in dramatic ones. The thermostat recovers from an afternoon setback, the purifier hears a cooking spike and ramps to jet-engine speed, someone cracks a window because the hallway feels stale, and now the AC is cooling the neighborhood while the PM2.5 sensor is chasing a plume that will be gone in five minutes.
The useful Home Assistant version is smaller and stricter: one loop keeps the climate entity disciplined, one loop runs the purifier from PM2.5 with hysteresis, and one loop decides whether windows are allowed to help or must stay out of the way. Presence and window state guard all three.
| Recipe status field | Value for this article |
|---|---|
| Hub | Home Assistant automation recipe |
| Verified date context | 2026-08-03 |
| Status label | Needs on-hub reproduction before marking Confirmed |
| Thermostat requirement | A Home Assistant climate entity that accepts service calls such as climate.set_hvac_mode and climate.set_temperature |
| Purifier requirement | A fan/select/switch entity, or a smart-plug fallback for a purifier that safely resumes its last mode after power is restored |
| Air-quality signal | PM2.5 sensor in µg/m³ preferred; avoid inverted AQI logic |
| Guards | Presence group, window/door binary sensors, indoor and outdoor temperature sensors, heatwave helper |
| Companion verification format | Use the same status-metadata discipline as NestGrid’s grid-emergency shedding recipes |
The complete flow before the YAML
Home Assistant’s official climate action documentation is the right anchor for changing thermostat mode from an automation; the action name matters because a recipe that hand-waves this part usually breaks at the first copy-paste attempt.[1] The rest of the setup is deliberately ordinary: helpers, numeric thresholds, timers, and a few refusal rules.
# Heatwave thermostat + purifier coordination: high-level flow
# Status: Needs on-hub reproduction before Confirmed
# Verification context: 2026-08-03

when heatwave_mode turns on:
  if someone_is_home and windows_are_closed:
    set thermostat to cool
    set cooling setpoint to your heatwave target

when PM2.5 stays above high threshold for consecutive readings:
  if heatwave_mode is on:
    set purifier fan tier from PM2.5 band

when PM2.5 drops below lower off threshold for long enough:
  reduce purifier speed or turn purifier off

when outdoor air is cooler than indoor air by your free-cooling gap:
  if AC is not actively needed and outdoor conditions are acceptable:
    allow window-open notification or whole-house ventilation routine

when any cooled-zone window opens:
  pause cooling setpoint changes or raise setpoint guard
  keep purifier logic from overreacting to outdoor/cooking transients

when everyone leaves:
  wait a short grace period
  if still vacant:
    move thermostat to away heatwave setpoint
    keep purifier only if PM2.5 requires it
That is the whole shape. The thermostat does not get to slam colder because the house is hot. The purifier does not get to oscillate because one sensor sample twitched. The windows do not get to become an unmodeled hole in the cooling plan.
Map the entities once, then stop editing IDs in four places
Use a package, blueprint input, or plain YAML variables if you like, but keep the entity map visible. Most bad summer automations are not conceptually wrong; they point at the bedroom PM2.5 sensor while controlling the living-room purifier, or they watch one window sensor while the sliding door is open.
# Replace these entity IDs with your own before enabling.
# Keep this block near the automations for auditability.

input_boolean:
  heatwave_mode:
    name: Heatwave Mode

input_number:
  heatwave_home_cool_setpoint:
    name: Heatwave Home Cool Setpoint
    min: 72
    max: 82
    step: 1
    unit_of_measurement: "°F"
  heatwave_away_cool_setpoint:
    name: Heatwave Away Cool Setpoint
    min: 76
    max: 88
    step: 1
    unit_of_measurement: "°F"

# Example entity map used below:
# climate.main_floor        smart thermostat
# fan.living_room_purifier  smart purifier fan entity
# sensor.living_room_pm25   PM2.5 in µg/m³
# sensor.indoor_temperature indoor temperature
# sensor.outdoor_temperature outdoor temperature
# binary_sensor.main_windows aggregate window/door group
# group.household_presence  people or room presence group
# input_boolean.heatwave_mode heatwave helper
If you already use a broader extreme-weather helper, wire this recipe to that instead of creating a second competing mode. NestGrid’s unified extreme-weather mode pattern is a cleaner parent for heatwave, smoke, and grid-event submodes than a pile of unrelated toggles.
Loop 1: thermostat discipline under presence and window guards
The thermostat loop has one job: keep the house inside the heatwave plan without creating a recovery cliff. Lowering the setpoint far below the desired temperature does not make the system cool faster, and deep setbacks can create rapid-recovery demand at exactly the wrong part of a hot day.[2] For dated setpoint guidance and the awkward source-attribution problem around vanished or conflicting DOE-style numbers, use NestGrid’s smart thermostat heat-dome settings article rather than treating one universal setpoint as settled.
alias: Heatwave - thermostat home discipline
mode: restart
trigger:
  - platform: state
    entity_id: input_boolean.heatwave_mode
    to: "on"
  - platform: state
    entity_id: group.household_presence
    to: "home"
  - platform: state
    entity_id: binary_sensor.main_windows
    to: "off"
    for: "00:03:00"
condition:
  - condition: state
    entity_id: input_boolean.heatwave_mode
    state: "on"
  - condition: state
    entity_id: group.household_presence
    state: "home"
  - condition: state
    entity_id: binary_sensor.main_windows
    state: "off"
action:
  - service: climate.set_hvac_mode
    target:
      entity_id: climate.main_floor
    data:
      hvac_mode: cool
  - service: climate.set_temperature
    target:
      entity_id: climate.main_floor
    data:
      temperature: "{{ states('input_number.heatwave_home_cool_setpoint') | float }}"
The window condition is not decoration. If a cooled-zone window is open, the thermostat loop should stop trying to be clever until the shell of the house is back in the state the automation assumes. A separate window-open guard can raise the setpoint, notify, or simply pause changes depending on how aggressive you want the house to be.
alias: Heatwave - pause cooling discipline when windows open
mode: single
trigger:
  - platform: state
    entity_id: binary_sensor.main_windows
    to: "on"
    for: "00:02:00"
condition:
  - condition: state
    entity_id: input_boolean.heatwave_mode
    state: "on"
action:
  - service: climate.set_temperature
    target:
      entity_id: climate.main_floor
    data:
      temperature: "{{ states('input_number.heatwave_away_cool_setpoint') | float }}"
  - service: persistent_notification.create
    data:
      title: "Heatwave cooling paused"
      message: "A cooled-zone window or door is open. Cooling target was relaxed until the house is closed again."
For vacancy, do not cut over on the first missing phone ping. A 10–15 minute grace period is a common Home Assistant heatwave pattern because it absorbs short exits, bad presence updates, and someone walking the dog without turning the house into an oven.[3]
alias: Heatwave - away setpoint after vacancy grace
mode: restart
trigger:
  - platform: state
    entity_id: group.household_presence
    to: "not_home"
    for: "00:12:00"
condition:
  - condition: state
    entity_id: input_boolean.heatwave_mode
    state: "on"
  - condition: state
    entity_id: group.household_presence
    state: "not_home"
  - condition: state
    entity_id: binary_sensor.main_windows
    state: "off"
action:
  - service: climate.set_hvac_mode
    target:
      entity_id: climate.main_floor
    data:
      hvac_mode: cool
  - service: climate.set_temperature
    target:
      entity_id: climate.main_floor
    data:
      temperature: "{{ states('input_number.heatwave_away_cool_setpoint') | float }}"
If a utility or thermostat program is raising the setpoint during a heatwave and Home Assistant appears to be fighting it, treat that as a demand-response problem first, not a YAML problem. NestGrid’s heat-wave opt-out guide covers that failure mode separately.
Loop 2: PM2.5 purifier control with hysteresis, not twitch control
The purifier loop is where a lot of neat-looking automations become annoying. A community Home Assistant purifier thread shows the better pattern: require PM2.5 to stay above a trigger level for consecutive readings or a persistence window, then run for a defined period, and only step down or stop below a lower threshold.[4] That gap between the on-threshold and off-threshold is hysteresis. Without it, the purifier can bounce between states as sensor readings wobble around one line.
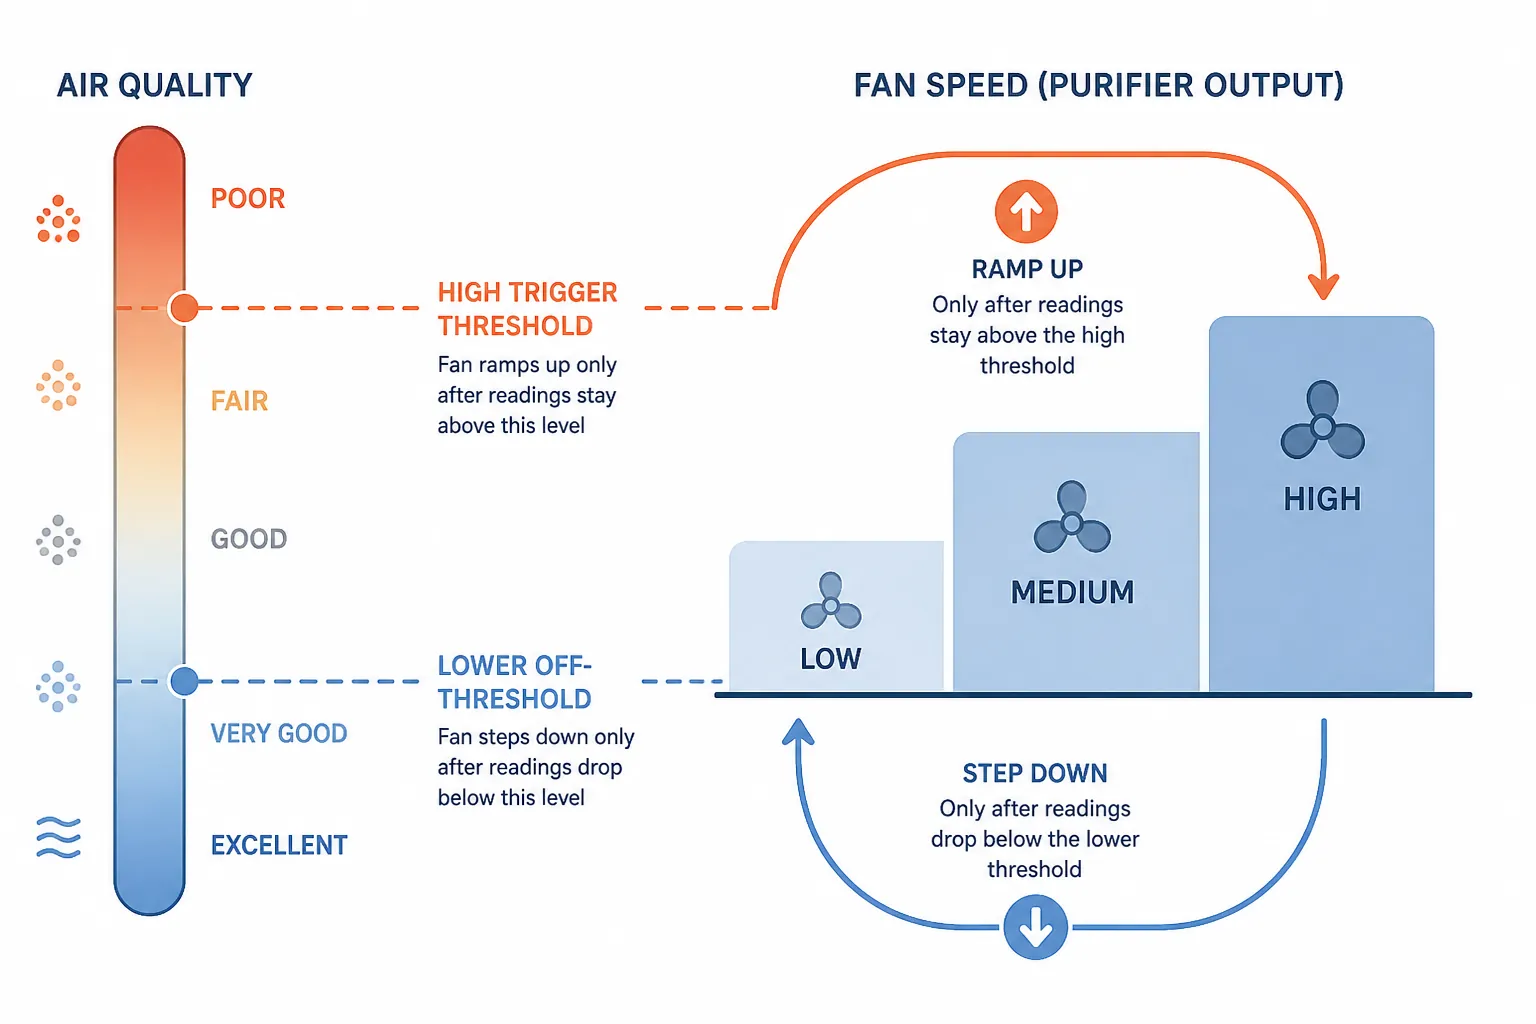
The example below uses PM2.5 in µg/m³. Keep the units explicit. Do not copy recipes that say an AQI drop below a low number should trigger cleaning unless the scale and direction are clearly correct; PM2.5 concentration is less ambiguous for this kind of local control.
| PM2.5 condition | Purifier action | Reason for the guard |
|---|---|---|
| At or below 3 µg/m³ for 20 minutes | Turn off or return to quiet/auto | Lower off-threshold prevents on/off chatter |
| Above 5 µg/m³ for a persistence window such as 4 readings or 4 minutes | Run low or medium | Requires persistence before reacting |
| Above 12 µg/m³ for 5 minutes | Run medium or high | Treats sustained pollution differently from one sample |
| Above 25 µg/m³ for 5 minutes | Run high/turbo | Handles a real indoor spike without waiting for comfort automation |
alias: Heatwave - purifier PM2.5 graduated hysteresis
mode: restart
trigger:
  - platform: numeric_state
    entity_id: sensor.living_room_pm25
    above: 5
    for: "00:04:00"
    id: pm25_elevated
  - platform: numeric_state
    entity_id: sensor.living_room_pm25
    above: 12
    for: "00:05:00"
    id: pm25_high
  - platform: numeric_state
    entity_id: sensor.living_room_pm25
    above: 25
    for: "00:05:00"
    id: pm25_very_high
  - platform: numeric_state
    entity_id: sensor.living_room_pm25
    below: 3
    for: "00:20:00"
    id: pm25_clear
condition:
  - condition: state
    entity_id: input_boolean.heatwave_mode
    state: "on"
action:
  - choose:
      - conditions:
          - condition: trigger
            id: pm25_very_high
        sequence:
          - service: fan.turn_on
            target:
              entity_id: fan.living_room_purifier
          - service: fan.set_percentage
            target:
              entity_id: fan.living_room_purifier
            data:
              percentage: 100
      - conditions:
          - condition: trigger
            id: pm25_high
        sequence:
          - service: fan.turn_on
            target:
              entity_id: fan.living_room_purifier
          - service: fan.set_percentage
            target:
              entity_id: fan.living_room_purifier
            data:
              percentage: 65
      - conditions:
          - condition: trigger
            id: pm25_elevated
        sequence:
          - service: fan.turn_on
            target:
              entity_id: fan.living_room_purifier
          - service: fan.set_percentage
            target:
              entity_id: fan.living_room_purifier
            data:
              percentage: 35
      - conditions:
          - condition: trigger
            id: pm25_clear
        sequence:
          - service: fan.set_percentage
            target:
              entity_id: fan.living_room_purifier
            data:
              percentage: 20
          # If you prefer full off, replace the previous action with fan.turn_off.
          # In smoke-prone or leaky homes, quiet recirculation may be less irritating than repeated restarts.
The thresholds are starting points, not a claim that every room or sensor should behave identically. What should not change is the structure: high trigger, persistence, lower clear threshold, and speed tiers. If cooking spikes dominate the living-room sensor, add a kitchen condition or a short hold rather than raising every threshold until the purifier ignores real pollution.
alias: Heatwave - purifier cooking hold example
mode: restart
trigger:
  - platform: state
    entity_id: binary_sensor.kitchen_cooking_activity
    to: "on"
condition:
  - condition: state
    entity_id: input_boolean.heatwave_mode
    state: "on"
action:
  - delay: "00:20:00"
  - condition: numeric_state
    entity_id: sensor.living_room_pm25
    above: 12
  - service: fan.set_percentage
    target:
      entity_id: fan.living_room_purifier
    data:
      percentage: 65
That cooking-hold block is intentionally hypothetical. Replace the cooking binary sensor with something you actually have: a range hood smart plug, a manual kitchen helper, a high-CO2 cooking proxy if you already trust it, or no condition at all. Do not invent certainty from a weak signal.
If your purifier is a Levoit through VeSync
Home Assistant’s VeSync integration documents PM2.5, air quality, and filter-life entities for supported Levoit models including Core 200S, 300S, 400S, 600S, EverestAir, Vital 100S, Vital 200S, and LV-PUR131S, and the integration is listed with a Cloud Polling IoT class.[5] That is enough to use those entities as a pattern here, not enough to promise local behavior or identical polling latency in your house.
# Example only: adapt to the actual VeSync entity names created on your hub.
# Check Settings > Devices & services > VeSync before copying.

sensor:
  # sensor.levoit_core_400s_pm2_5
  # sensor.levoit_core_400s_air_quality
  # sensor.levoit_core_400s_filter_life

# Use the PM2.5 entity as sensor.living_room_pm25 in the automation above,
# or substitute it directly in each trigger.
If the purifier is dumb but safe on a smart plug
A smart plug can only do one thing: supply or cut power. Use it only with a purifier that safely resumes the desired mode after power is restored. If the purifier stays off after power loss, has an electronic child lock that resets, or complains after every relay cycle, use NestGrid’s smart-plug purifier fallback pattern before putting it into the heatwave recipe.
alias: Heatwave - smart plug purifier fallback
mode: restart
trigger:
  - platform: numeric_state
    entity_id: sensor.living_room_pm25
    above: 5
    for: "00:04:00"
    id: dirty
  - platform: numeric_state
    entity_id: sensor.living_room_pm25
    below: 3
    for: "00:20:00"
    id: clear
condition:
  - condition: state
    entity_id: input_boolean.heatwave_mode
    state: "on"
action:
  - choose:
      - conditions:
          - condition: trigger
            id: dirty
        sequence:
          - service: switch.turn_on
            target:
              entity_id: switch.purifier_plug
      - conditions:
          - condition: trigger
            id: clear
        sequence:
          - service: switch.turn_off
            target:
              entity_id: switch.purifier_plug
If the thermostat is your only air-quality sensor
Ecobee documents a built-in air-quality sensor on the Smart Thermostat Premium.[6] If that is the only air-quality signal available in Home Assistant, use it as a sensor-first trigger, not as proof that the thermostat should own purifier control. Keep the same hysteresis pattern and let the purifier action remain separate.
# Snippet-level pattern only.
# Replace with the actual ecobee air-quality entity exposed on your hub.

trigger:
  - platform: numeric_state
    entity_id: sensor.ecobee_air_quality_pm25
    above: 5
    for: "00:04:00"
If wildfire smoke is the main outdoor threat, the overlap with thermostat fan recirculation belongs in a narrower smoke recipe. NestGrid’s smart thermostat wildfire-smoke protection piece is thermostat-focused; this heatwave recipe adds the dedicated purifier loop and the window/free-cooling guard.
Loop 3: free-cooling and window timing
Free cooling is not a moral position about fresh air. It is a timing condition. Maison et Domotique’s Home Assistant heatwave pattern compares outdoor and indoor temperature, using a temperature gap such as outdoor air being at least 1.5°C cooler than indoor air, and keeps AC operation tied to closed windows.[7] That is the part worth stealing: compare the air you have with the air you would invite in, then keep the thermostat from fighting the decision.
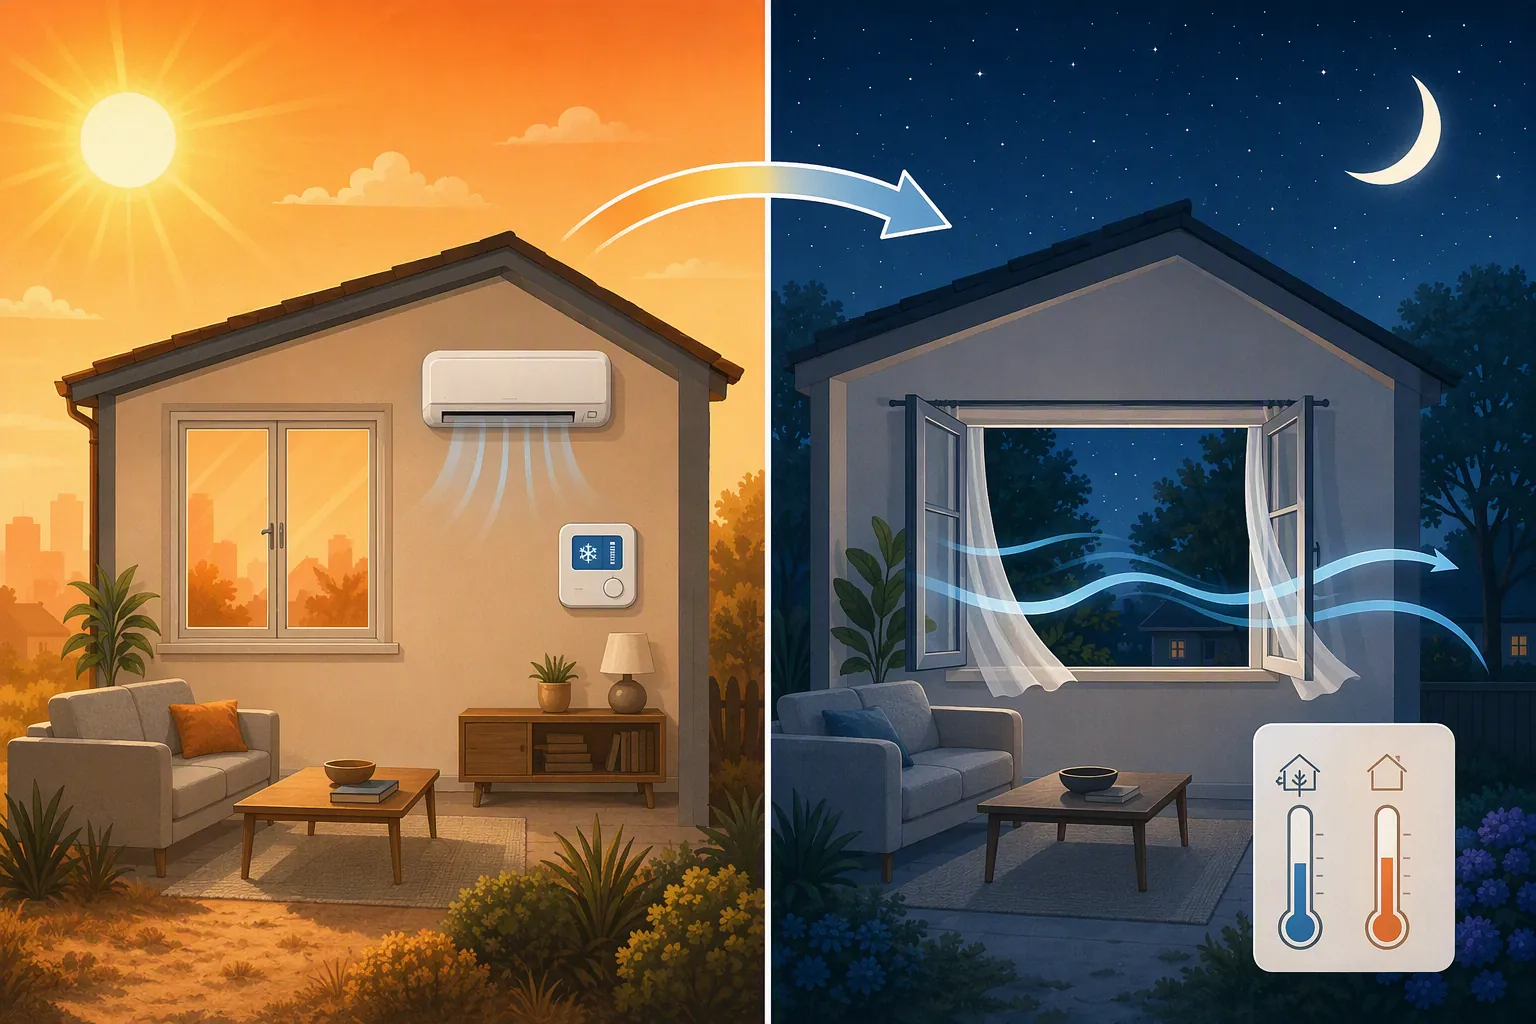
The automation below uses a 3°F gap as a practical Fahrenheit equivalent. If your sensors report Celsius, use a 1.5°C-style gap directly instead of rounding back and forth.
alias: Heatwave - free cooling window opportunity
mode: single
trigger:
  - platform: template
    value_template: >
      {{ states('sensor.indoor_temperature') | float(0)
         - states('sensor.outdoor_temperature') | float(0) >= 3 }}
    for: "00:10:00"
condition:
  - condition: state
    entity_id: input_boolean.heatwave_mode
    state: "on"
  - condition: state
    entity_id: group.household_presence
    state: "home"
  - condition: numeric_state
    entity_id: sensor.outdoor_temperature
    below: 78
  # Optional: add an outdoor PM2.5, smoke, pollen, or humidity guard if you trust that sensor.
action:
  - service: persistent_notification.create
    data:
      title: "Free-cooling window"
      message: "Outdoor air is at least 3°F cooler than indoors. Open selected windows only if outdoor air quality is acceptable. AC discipline will resume after windows close."
Notice that this does not open windows by itself. If you have motorized windows, whole-house fans, or powered dampers, add device-specific safety conditions before any actuation. For most houses, a notification is the right first automation because humans know about a smoky neighbor’s grill, a thunderstorm, or a sleeping child in the room with the noisy window.
alias: Heatwave - resume cooling after free-cooling window closes
mode: restart
trigger:
  - platform: state
    entity_id: binary_sensor.main_windows
    to: "off"
    for: "00:05:00"
condition:
  - condition: state
    entity_id: input_boolean.heatwave_mode
    state: "on"
  - condition: state
    entity_id: group.household_presence
    state: "home"
action:
  - service: climate.set_hvac_mode
    target:
      entity_id: climate.main_floor
    data:
      hvac_mode: cool
  - service: climate.set_temperature
    target:
      entity_id: climate.main_floor
    data:
      temperature: "{{ states('input_number.heatwave_home_cool_setpoint') | float }}"
If your outdoor air can be worse than indoor air, the free-cooling helper needs an outdoor air-quality veto. It is fine for that veto to be conservative. During heat and smoke overlap, a slightly stuffier house is easier to live with than an automation that invited particulates indoors and then asked the purifier to fix the mistake.
# Optional outdoor-air veto pattern if you have a trustworthy outdoor PM2.5 sensor.
# Do not use a nearby indoor sensor as a fake outdoor sensor.

condition:
  - condition: template
    value_template: >
      {{ states('sensor.outdoor_pm25') | float(999)
         <= states('sensor.living_room_pm25') | float(0) }}
For alert-only preparation, NestGrid’s heat-wave temperature alert setup is a lighter path. This recipe assumes the alert has already become an operating mode.
Put the three loops behind one heatwave helper
The helper is not magic; it is an audit switch. When heatwave mode is off, your normal comfort automations can run. When it is on, the house uses the stricter setpoint, purifier, vacancy, and window behavior above.
alias: Heatwave - enable from temperature alert
mode: single
trigger:
  - platform: numeric_state
    entity_id: sensor.outdoor_temperature
    above: 95
    for: "01:00:00"
action:
  - service: input_boolean.turn_on
    target:
      entity_id: input_boolean.heatwave_mode
  - service: persistent_notification.create
    data:
      title: "Heatwave mode enabled"
      message: "Thermostat discipline, purifier hysteresis, and window guards are now active. Verify windows and purifier state."
Use your own heat alert source if you already have one. The point is not that 95°F is universal; it is that the operating mode should be explicit, visible, and easy to turn off when the weather breaks.
Verification checklist before you trust it in a real heatwave
- Record hub version, integration version where available, thermostat firmware/app version, purifier firmware/app version, protocol or IoT class, and verification date.
- Confirm climate.main_floor accepts climate.set_hvac_mode with hvac_mode: cool. Some devices expose mode names differently.
- Confirm climate.set_temperature changes the cooling setpoint you expect, not a heating setpoint or a range endpoint.
- Place the PM2.5 sensor where it represents the purifier zone, not directly in the purifier exhaust, over a stove, or beside a leaky window.
- Test the purifier speed services manually from Developer Tools before letting the automation call them.
- Open one window sensor and confirm the thermostat discipline automation refuses to run or relaxes the setpoint as intended.
- Simulate vacancy, wait through the grace period, and confirm the away setpoint is applied only if the home is still vacant.
- Create a temporary test threshold for PM2.5 or use Developer Tools state simulation to verify the high trigger and lower clear trigger do not oscillate.
- Mark the recipe as Local Confirmed only after it has run on your hub through a normal day and at least one hot-window or purifier-spike event.
For a published NestGrid-style recipe, mirror the metadata style used in Home Assistant grid-emergency auto-shedding: status label first, then the exact hub and device context that made the result true.
Failure modes and fixes
| Symptom | Likely cause | Fix |
|---|---|---|
| Purifier flips between low and off every few minutes | Same threshold used for on and off, or no persistence window | Use a higher trigger threshold, lower clear threshold, and a for: duration before changing state |
| Purifier goes high every time someone cooks | PM2.5 sensor is too close to the kitchen or the automation reacts to one transient | Move the sensor, add consecutive-reading logic, or add a short cooking hold before high speed |
| AC keeps cooling while windows are open | Thermostat automation lacks a window guard or the window group does not include every cooled-zone opening | Aggregate all relevant window and door sensors, then condition thermostat actions on the group being closed |
| House gets too hot when someone briefly leaves | Vacancy action fires immediately | Add a 10–15 minute vacancy grace period before applying away behavior |
| Free-cooling notification appears during smoky or dirty outdoor air | Temperature gap is checked without an outdoor air-quality veto | Add a trusted outdoor PM2.5 or smoke condition, or keep free-cooling manual-only during smoke season |
| Thermostat service call fails on mode name | Device expects a different HVAC mode name such as heat_cool instead of auto, or the integration maps modes differently | Check Developer Tools > States and Services before copying mode names |
| Fan-mode actions fail on Honeywell T10 Pro | Documented device-level fan-mode incompatibility in community adaptive-climate testing | Keep fan-mode changes out of the main heatwave recipe unless verified on your own T10 Pro setup |
| Temperature is wildly wrong after YAML copy | Celsius/Fahrenheit conversion or unit assumption bug | Keep setpoint helpers in the same unit as the climate entity and test a harmless temporary setpoint first |
| Automation appears to fight the thermostat app | Utility demand-response event, vendor schedule, comfort profile, or cloud-side rule changes the setpoint | Disable the competing schedule or handle the demand-response path separately before tuning Home Assistant |
The Honeywell T10 Pro fan-mode issue, auto versus heat_cool naming confusion, and Celsius/Fahrenheit conversion bugs are all documented as practical device-level failures in a Home Assistant adaptive-climate-control blueprint discussion; the useful takeaway is the bug list, not the thread’s broader savings claims.[8]
A heatwave setup works when each loop is allowed to do one job and is stopped from undoing the others. The thermostat holds the cooling plan. The purifier reacts to sustained PM2.5, not noise. The window logic decides when outdoor air is actually useful. Everything else is a guardrail.
References
- climate.set_hvac_mode — Home Assistant
- Smart Thermostat Settings During Heat Waves — Meyer-DePew
- Home Assistant Heatwave Automation: Smart Presence & Temperature Control — LinknLink
- Help for Air Purifier Automation — Home Assistant Community
- VeSync — Home Assistant
- Air quality sensor FAQs — ecobee Support
- Heatwave and home automation: turn Home Assistant into a heat shield — Maison et Domotique
- Blueprint: Adaptive Climate Control - ASHRAE 55 Implementation with Energy Optimization — Home Assistant Community