
Set Up Heat Wave Monitoring for an Elderly Parent's Home
Set up a no-subscription heat alert system this weekend and know from your phone when an elderly relative's home is getting dangerously hot: two Tapo T310 sensors and an H100 hub (about $45) push threshold alerts, with placement rules, tunable thresholds, and a dated delivery test that verifies the alerts reach you before you rely on them.
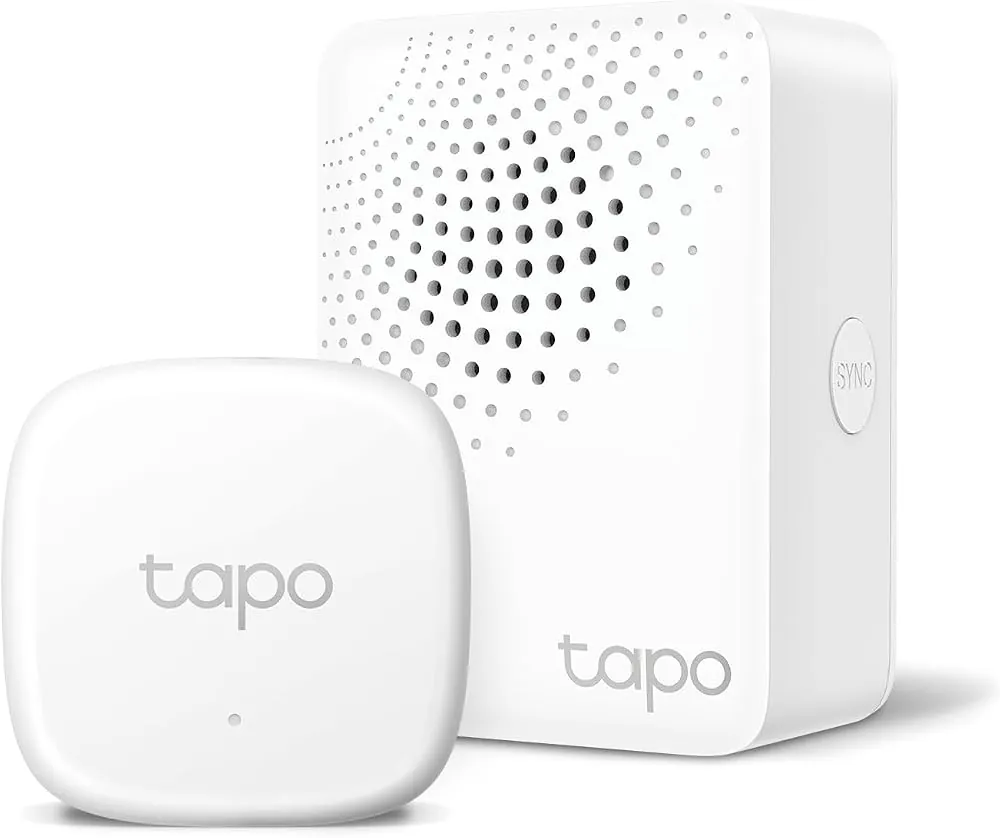
For a weekend setup, the cleanest low-skill build is two TP-Link Tapo T310 temperature/humidity sensors plus one Tapo H100 hub: one sensor for the living area, one for the bedroom, no subscription, and roughly a $40–$45 parts bill based on mid-2026 pricing reported for the sensor and hub. The important catch comes before checkout: buy the hub/app path that can actually send a temperature-triggered alert to your phone. Wirecutter’s 2026 testing named the Tapo T310 a top smart-sensor pick, noted the H100 hub requirement and support for up to 64 devices, and also found that Google Home could not use the Tapo sensor’s temperature reading as an automation trigger, only humidity.[1]
That Google Home limitation is not a footnote. If you are standing in a store aisle or trying to order parts before a hot weekend, “it shows the temperature in an app” is not the same as “it will push an alert to the caregiver at 3 p.m.” For this particular job, the alert path is the product.
This is the plain version of smart home elderly heat wave monitoring: knowing from your own phone when an older relative’s home is getting hotter than the household’s chosen threshold, so someone can check in and act. It is not medical monitoring, and it is not proof the person is safe. Adults aged 65 and older are at higher risk during heat events, and the CDC specifically warns not to rely on a fan as the primary cooling device during extreme heat.[2] The WHO similarly treats heat exposure as a serious health risk and gives practical indoor guidance, including setting air conditioning around 27°C when available and using fans only below about 40°C.[3]
The weekend build, in one pass
| Job | What to do | What can go wrong |
|---|---|---|
| Buy the stack | Use two Tapo T310 sensors and one Tapo H100 hub if you are using the Tapo app alert path. | Buying a sensor because it displays temperature somewhere, then discovering your ecosystem cannot trigger alerts from that value. |
| Place the sensors | Put one in the main living area and one in the bedroom. | A sunny window, kitchen, door draft, or air-conditioner blast can make the number reassuring or alarming for the wrong reason. |
| Choose starting thresholds | Start around the 26–27°C range, then tune for the home, person, and cooling equipment. | Treating a single number as a universal safe/unsafe line. |
| Optional fan assist | Use a smart plug only as a secondary way to turn a fan on remotely or automatically. | Confusing air movement with cooling protection during dangerous heat. |
| Verify delivery | Force the sensor over the threshold, confirm the alert reaches the caregiver phone, and record the test date. | Trusting an automation that has only been configured, not proven. |
Before buying: prove the alert path exists
The Tapo route is attractive because it keeps the parts list small. The T310 is a compact temperature and humidity sensor; the H100 is the hub it needs; the Tapo app is where a beginner can set the notification rule. That is the version to buy if you want a no-subscription, no Home Assistant setup this weekend.
Do not substitute “works with my smart home” for “can alert on temperature.” Wirecutter’s finding matters because Google Home compatibility does not solve this job when the temperature reading cannot be used as the trigger.[1] If the intended setup is “sensor reports to Google Home, Google Home notifies me when the room is too hot,” pause and choose another route before buying.
Aqara is a reasonable runner-up for people who are already willing to buy into Aqara’s hub path, and Wirecutter also treats its sensor as a strong option with its own hub requirement.[1] For this recipe, though, splitting every instruction between Tapo and Aqara would add work at exactly the wrong place. The goal is one ordinary setup that a family caregiver can buy, label, install, and test without turning the parent’s home into a project site.
- Buy two temperature sensors, not one. Heat at the sofa and heat in the bedroom can be different enough to matter.
- Buy the required hub at the same time. For the Tapo T310, that means the H100 hub, not just the sensor by itself.[1]
- Install the app on the caregiver’s phone during setup, not later after the parent has gone home or you have left town.
- Recheck current pricing, hub requirements, and automation support at purchase time. These are product behaviors, and product behaviors change.
Put one sensor where the day is lived, and one where the night is slept
The first sensor belongs in the main living space: the room where your parent watches TV, reads, eats, or sits through the hottest part of the day. The second belongs in the bedroom, because overnight heat is a different problem from afternoon heat. A single hallway sensor can be tidy and almost useless if it misses the room where the person actually spends time.
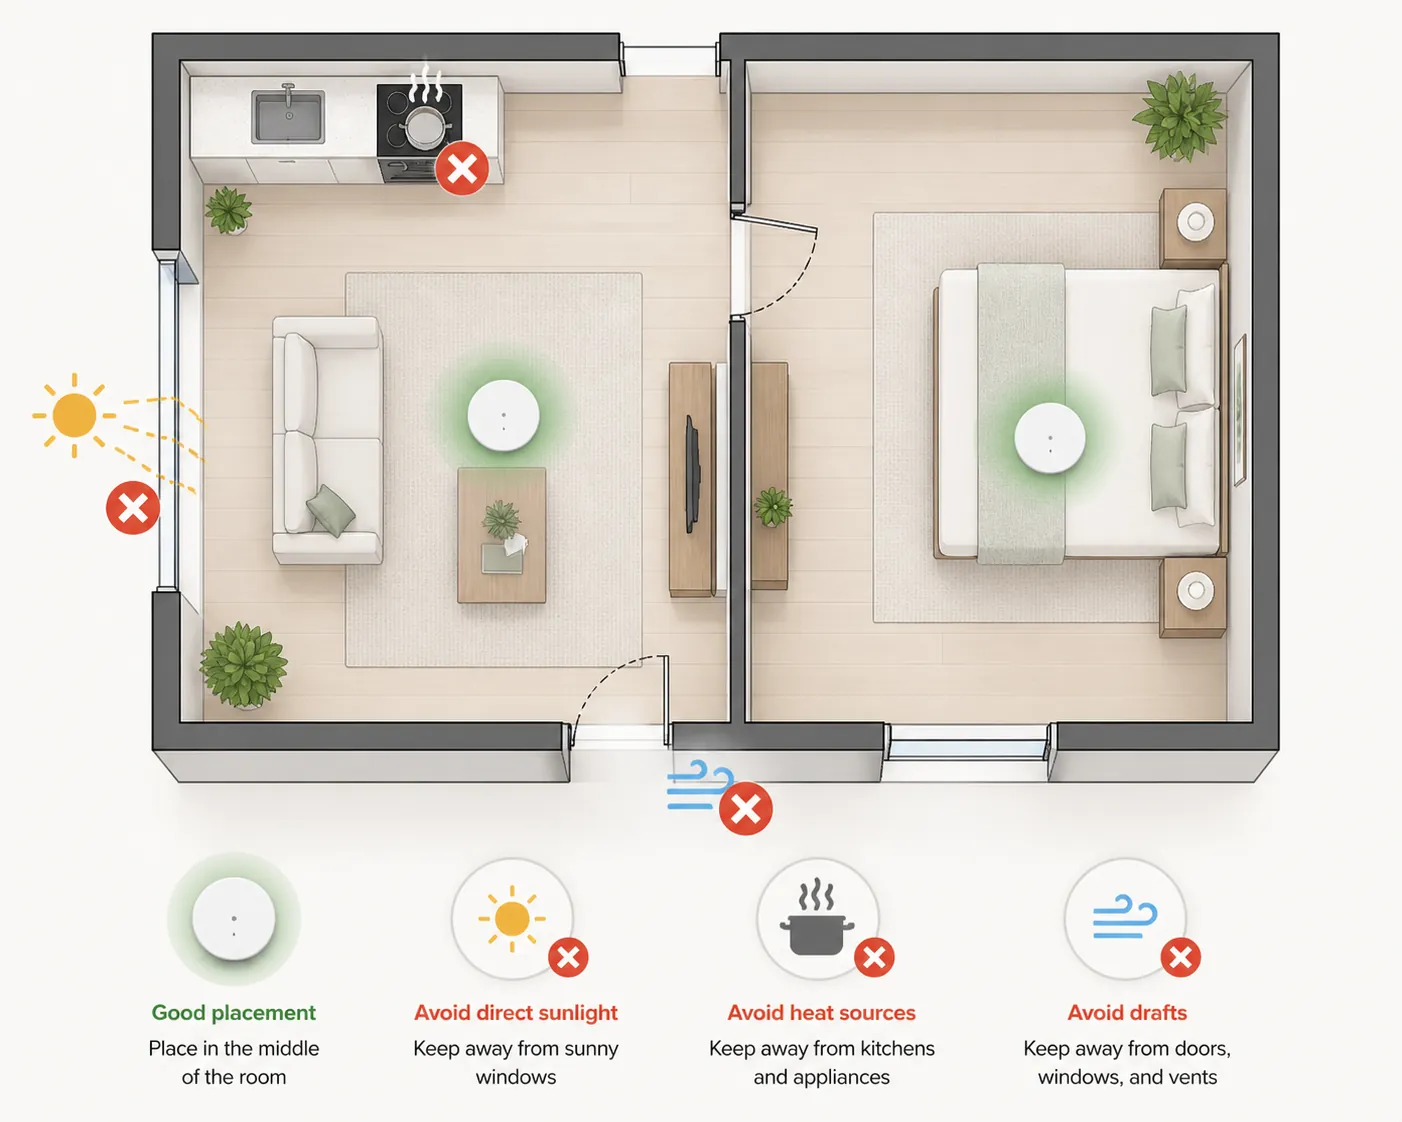
Set each sensor somewhere boring: open to the room air, not hidden in a cabinet, not pressed against electronics, not balanced on a radiator cover, and not sitting in a patch of direct sun. Avoid kitchens, because cooking heat can create false alarms. Avoid windows, door drafts, air-conditioner outlets, and fan blast zones, because they can hide the room’s real condition or exaggerate it.
Label the sensors in the app with names a tired person will understand: “Mom Living Room” and “Mom Bedroom,” not “T310-1” and “T310-2.” When an alert appears, the room name should already answer the first question: where is the heat building?
Choose a starting threshold, then treat it as a prompt
A useful first heat alert threshold is usually in the 26–27°C range, but that sentence needs restraint. The WHO’s public heat guidance includes a 27°C air-conditioning setting when AC is available.[3] A Home Assistant heat-wave recipe uses a 26°C living-room trigger as an example.[4] In the Ethos proof-of-concept heat-alert trial, participants commonly reported using 27°C as an air-conditioning practice.[5] Those are starting points for configuration, not a magic boundary between safe and unsafe.
For a parent with working air conditioning, you might start with an alert just above the normal cooled temperature of the living room, so the notification means “the house is not cooling as expected.” For a home without air conditioning, the same number may produce frequent alerts during a heat wave; that can still be useful if everyone understands that the notification is a check-in trigger, not an accusation that someone set the house up wrong.
If you want the threshold discussion separated from this hardware recipe, use Set Up Your Smart Home for Heat Wave Temperature Alerts as the companion configuration guide. This article’s job is narrower: get two sensors placed, get the alert rule working, and verify that the right phone receives it.
A simple alert rule
- Living room sensor: notify caregiver phone when the temperature rises above your chosen starting threshold.
- Bedroom sensor: use the same starting threshold, or a slightly different one if the bedroom is known to run warmer or cooler.
- Notification text: include the person, room, temperature, and action cue, such as “Mom bedroom is above heat threshold — call and check cooling.”
- After the first hot day: adjust the threshold if it produced useless noise or missed a condition the family wanted to know about.
Do not make the first version clever. One threshold per room is easier to understand, easier to test, and easier to explain to another sibling or neighbor who may be asked to help.
Add a fan on a smart plug only as a secondary assist
A fan on a smart plug can be useful when the parent already uses that fan and you want a remote way to turn it on, or when you want a simple automation that starts air movement after the temperature alert threshold is crossed. It is also easy to overrate. The CDC warns not to rely on a fan as the primary cooling device during extreme heat, and the WHO’s fan guidance is limited to conditions below about 40°C.[2][3]
If you add the plug, use it for a familiar fan in a safe location, with cords out of walking paths and the fan aimed the way the older adult already tolerates. Do not use remote fan control as a substitute for checking whether the air conditioner failed, whether windows are closed against hot outdoor air, whether the person is drinking fluids, or whether someone needs to visit.
For device-choice details, use the smart plug control methods comparison. The heat-monitoring system should still be judged by whether the temperature alert reaches you.
What the Ethos trial does, and does not, prove
There is some useful feasibility evidence that older adults and caregivers can respond to heat alerts. In the Ethos proof-of-concept trial, 78 participants in a subtropical setting used a heat-health alert system; the study reported high self-reported rates of taking action after alerts, including 90% and 94% figures for alert-related actions in the trial’s reported results.[5]
That is encouraging, but it is not proof that a Tapo sensor setup prevents heat illness. The Ethos work was small, self-reported, and context-specific. Use it for the modest conclusion it supports: heat alerts can be understandable enough for people to act on. The harder job in a family home is still making sure the alert is placed well, tuned reasonably, and delivered to someone who will respond.
The dated delivery test
Do not leave the home after setup because the app screen looks right. Run a delivery test while you are still there, while the caregiver phone is on its normal cellular or Wi-Fi connection, and while notifications are allowed through Focus, Do Not Disturb, battery saver, and app permission settings.
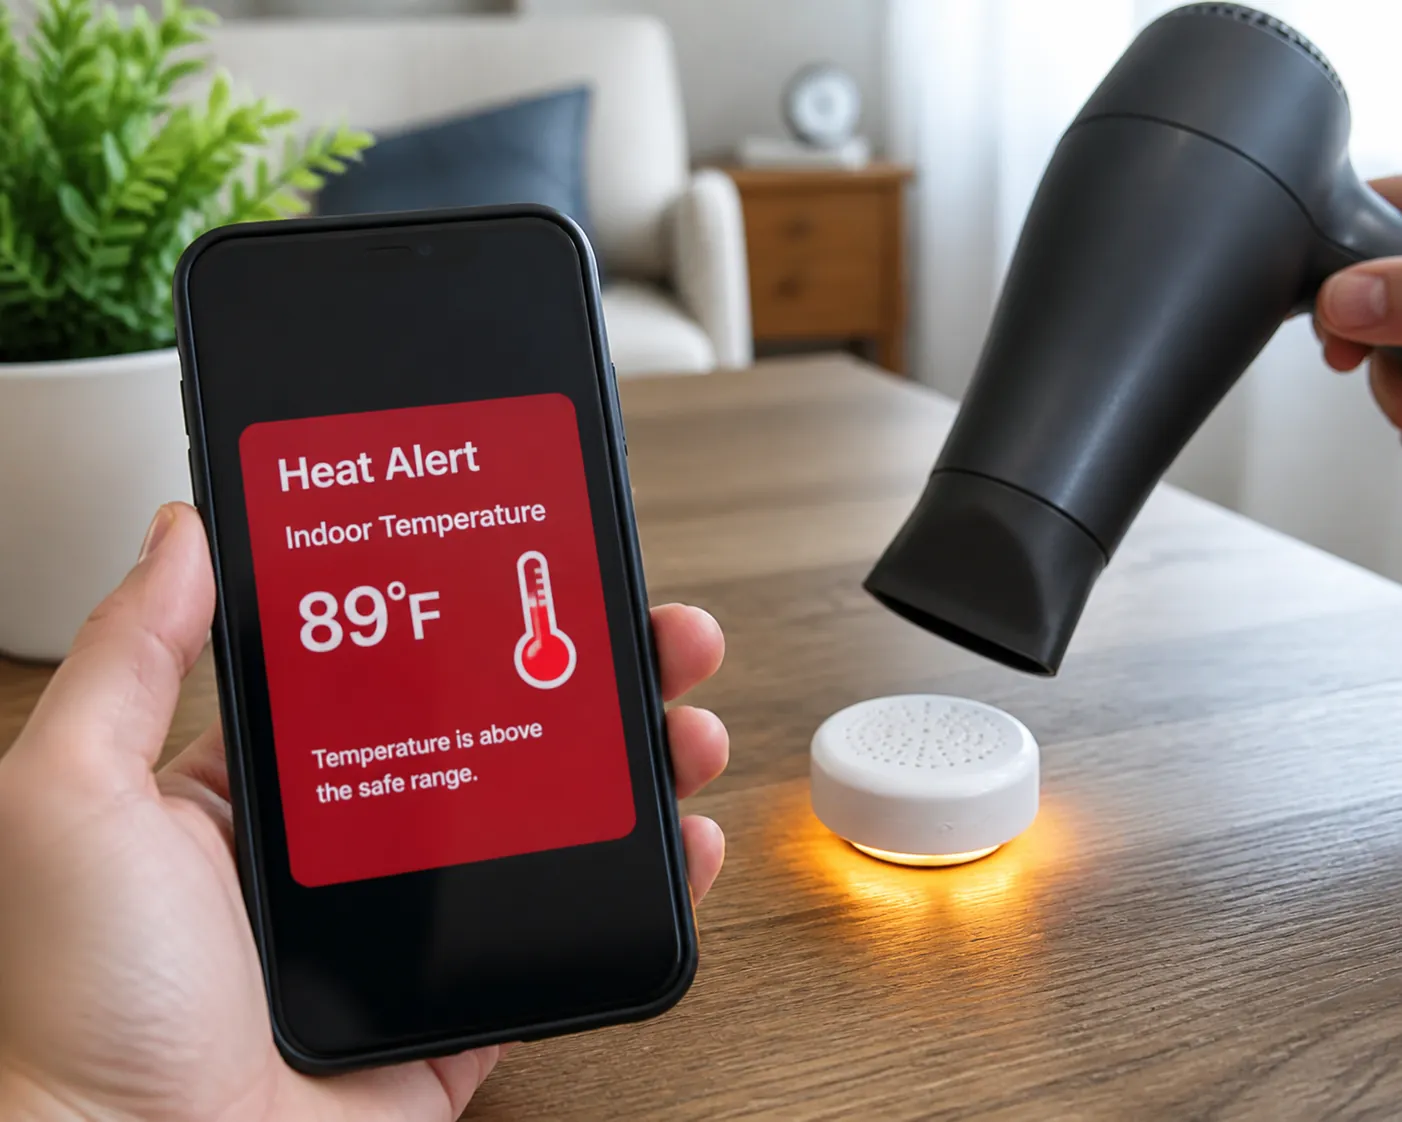
- Set a temporary test threshold just above the room’s current reading, low enough that you can cross it safely during the test.
- Warm the sensor gently until it crosses the threshold. Use a nearby warm hand or brief, careful warm air; do not overheat or damage the sensor.
- Wait for the caregiver phone to receive the push notification. Do not count an in-app temperature change as success.
- Read the notification text aloud and confirm it names the right home, room, and action.
- Repeat for the second sensor. The bedroom alert needs its own proof, not borrowed confidence from the living room.
- Return the thresholds to the real starting values.
- Check that each sensor shows normal battery and connectivity status in the app.
- Write down the test date, the two sensor names, the thresholds, and whose phone received the alert.
The written date is not bureaucracy. It prevents the familiar family argument later: “I thought we tested that.” A useful note can be as plain as: “Aug. 4, 2026 — Mom Living Room and Mom Bedroom both crossed test threshold; alert received on Alex’s iPhone; batteries OK; thresholds reset.”
Do not rely on the system until all of this is true
- Both sensors are named by room.
- Both sensors are placed away from sun, kitchen heat, drafts, and direct cooling or fan airflow.
- The alert threshold is intentional, not a default you forgot to change.
- The caregiver phone received a real push notification after a forced threshold crossing.
- Battery and connectivity looked normal after the test.
- The test date and recipient phone are recorded.
If the alert does not arrive, fix that before doing anything fancier. Check app notification permissions, phone focus modes, hub connectivity, sensor connectivity, and whether the rule is tied to the correct sensor. A heat alert system that works only when someone opens the app is not the system you came to build.
When to step up from the weekend build
Stay with the simple Tapo build if you need one caregiver phone, two rooms, basic temperature thresholds, and no subscription. Step up if you need multiple contacts, richer escalation rules, dashboards, temperature-crossed-threshold logic, or cooling routines that coordinate several devices.
Home Assistant is the usual bridge when the family wants more control. Its temperature crossed-threshold trigger supports automations based on a sensor crossing a configured temperature level, which is the kind of logic a more advanced heat-safety setup may need.[6] If that is the direction you are heading, use Add a Temperature Sensor to Home Assistant, then move to the more complete heat-safety automations for elderly adults, infants, and pets or the smart-home heat dome troubleshooting guide. For cooling-device routines, the heat-wave cooling automations and smart-home cooling heat-wave recipe are the better next stops.
For this weekend, the narrower result is enough: a no-subscription heat watch in the living room and bedroom is reasonable if the hub/app path supports temperature alerts and the notification chain has been tested on the phone that will actually answer.
References
- The 7 Best Smart Sensors of 2026, Wirecutter
- Heat and Older Adults Aged 65+, CDC
- Climate change: Heat and health, WHO
- Heatwave and Home Automation: Turn Home Assistant into a Heat Shield, Maison et Domotique
- Ethos trial, PMC
- Temperature crossed threshold, Home Assistant