
Three smart leak detector flood warning setups
Learn how to build a reliable flood warning system with smart leak detectors using three copyable alert setups for any skill level, from no-hub Wi-Fi to Home Assistant. This guide covers sensor placement, alert escalation, false-alarm mitigation, and a monthly testing cadence so you get notified before water damage happens.
A smart leak detector becomes a flood warning system only after the alert chain is designed. The sensor can do its job perfectly—touch water, change state, send a signal—and the house can still lose if the phone was muted, the alert said “Sensor 4,” the battery died quietly, or nobody knew who was supposed to act.
The useful question is not “which leak detector is best?” It is: when water hits the contacts under the sink, who gets told, what location do they see, what happens if they miss it, and how do you know the setup is still alive next month?
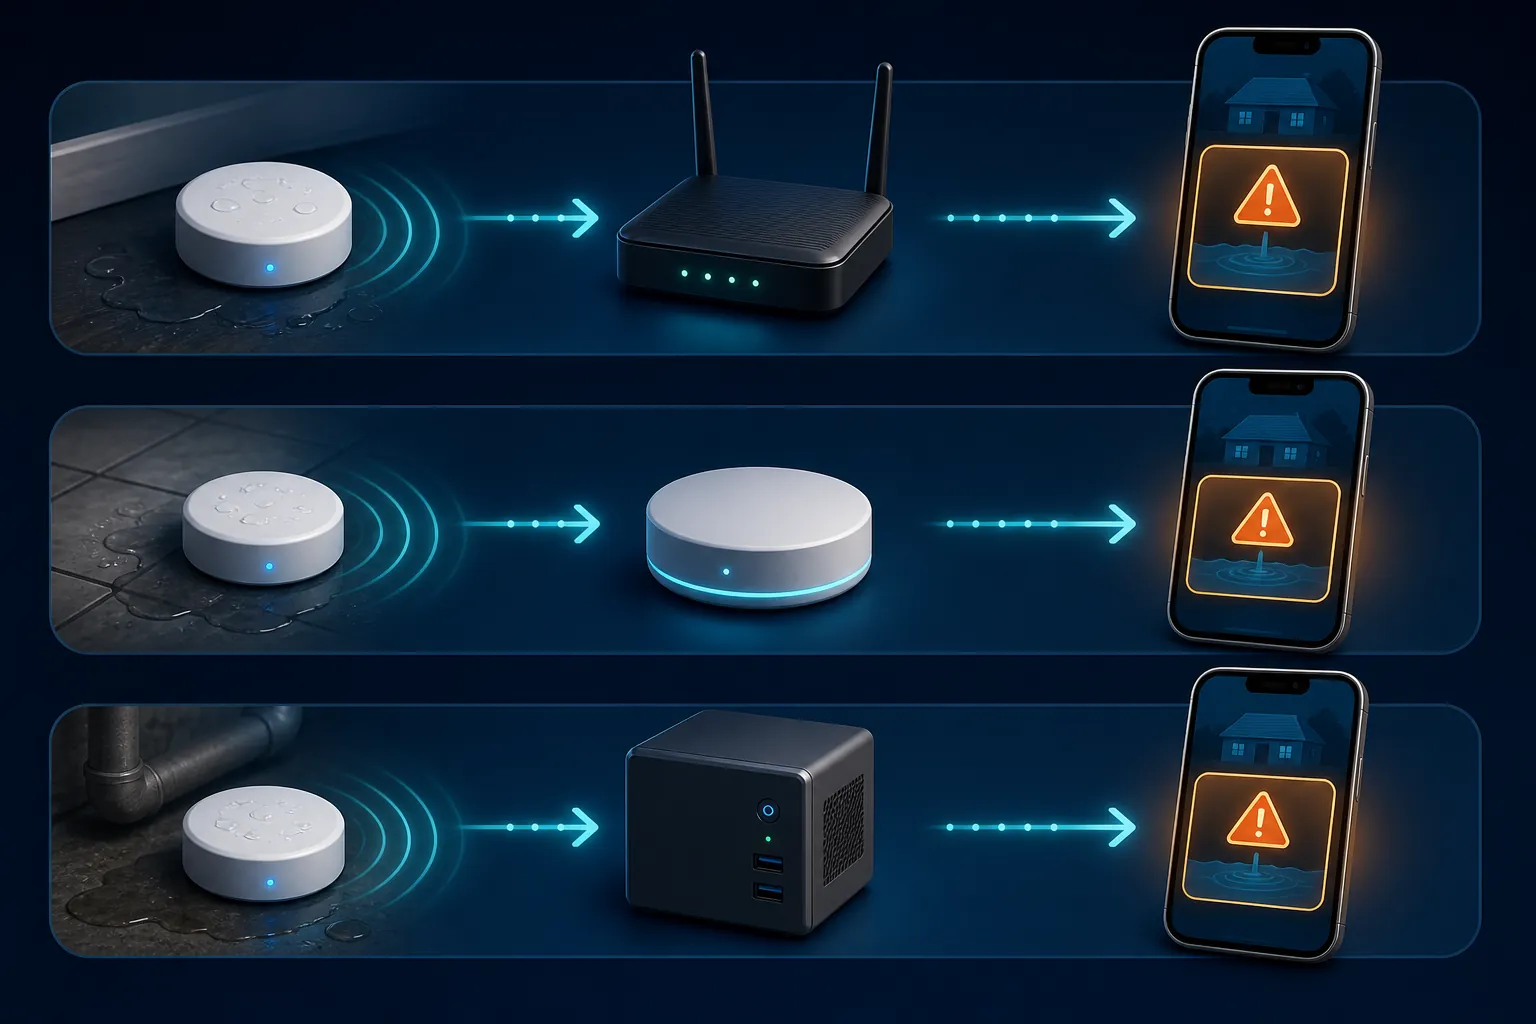
Pick the lane that matches your house
There are three sensible starting points. A no-hub Wi-Fi setup is fine when you want the manufacturer’s app to do most of the work. A hub or ecosystem setup fits homes already using SmartThings, HomeKit, Alexa, Google Home, or a vendor bridge. Home Assistant is for people who want local logic, cleaner escalation, and better visibility into sensor health.
| Setup lane | Best fit | What you must build |
|---|---|---|
| No-hub Wi-Fi | Beginner setup with sensors managed in one vendor app | Clear names, shared household alerts, offline and battery alerts, and a manual escalation habit |
| Hub or ecosystem | Homes already using a smart-home platform | One clean source of alerts, per-sensor rules, optional siren or shutoff automation, and duplicate-alert cleanup |
| Home Assistant | Power users who want explicit logic and local dashboards | Individual sensor triggers, templated location messages, escalation, leak counts, battery automation, and offline monitoring |
All three setups share the same bones: place the sensors where water appears first, name each one by the place a human would check, send the first alert to the people who can act, escalate when that alert is ignored, monitor low battery and offline states, control nuisance alerts, and test the whole path on a schedule.
Place sensors where the first puddle starts
A leak sensor belongs where water can reach it before water reaches drywall, flooring, or a finished ceiling below. That usually means the floor of the cabinet under each sink, the pan or floor near a water heater, behind or beside the washing machine, next to the dishwasher, behind toilets, near basement floor drains or sump areas, and anywhere a slow drip could run out of sight.

Placement changes the alert message. “Laundry washer left rear” is more useful than “Water Sensor 2.” If a sensor has a remote probe cable, put the body where it will not sit in standing water and run the probe to the low point. If the sensor itself must sit on the floor, make sure the contacts touch the surface and are not perched on grout, a cabinet lip, or a mat that delays contact.
- Use room-first names: “Kitchen sink leak,” “Hall bath toilet leak,” “Water heater pan leak.”
- Avoid generic device names: “Aqara leak 3,” “D-Link sensor,” or “Basement thing” will slow someone down during a real alert.
- If two sensors are in the same room, add the exact fixture: “Laundry washer leak” and “Laundry utility sink leak.”
- Name the notification the same way the sensor is named, so the app, hub, and household instructions all match.
Setup 1: no-hub Wi-Fi leak alerts
This is the cleanest setup for someone who does not want a hub. Keep it boring and explicit. The vendor app is the control plane, so the job is to make that app reach the right phones, with names nobody has to decode.
- Install one sensor at each high-risk location and rename it immediately by fixture: “Kitchen sink leak,” not the default device name.
- Invite every responsible adult to the app account or home group. Do not rely on one person’s phone as the only receiver.
- Enable water-detected notifications for each sensor, then check whether the app also offers email, SMS, siren, critical alert, or persistent notification options.
- Enable low-battery and offline notifications if the app provides them. A quiet dead sensor is worse than no sensor because it gives false confidence.
- Write a household rule for escalation: if the first person sees an active leak alert and is not home, they call the person who is home, a neighbor, landlord, or local emergency contact.
- Wet-test each sensor after setup and once a month. Confirm the sensor name, phone notification, and sound behavior, not just the tiny LED on the sensor.
Do not assume every Wi-Fi leak detector handles offline warnings the same way. Wirecutter’s 2026 testing treated low-battery and offline notifications as a core criterion; in its measurements, one D-Link setup produced water-alert pushes in 3–5 seconds, while offline alerts varied by model from 36 minutes to 12 hours [1]. That is a good reminder to test the boring states, not just the dramatic puddle state.
A simple no-hub escalation can be manual and still be reliable. The app tells both adults. If nobody is home, the first person who sees it calls the second person and then the neighbor with a key. If the alert is from “Water heater pan leak,” the person on site knows where to go first and whether the main water shutoff may be involved.
Setup 2: hub or ecosystem alerts without duplicate noise
A hub setup gives you more choices: phone notifications, speakers, lights, sirens, scenes, and sometimes a water shutoff valve. The trap is that built-in safety alerts and custom automations can both fire, or one can silently override the other.
SmartThings is the useful cautionary example. Its leak-sensor notifications can come from wet/dry device alerts, per-sensor notification toggles, and the SmartThings Home Monitor Leak block, so users can end up with duplicated alerts or with a sensor excluded from the safety alert path if they do not know which layer is responsible [2].
- Choose one primary alert path first. For SmartThings, decide whether SmartThings Home Monitor or your custom routine is the official leak-warning channel.
- Turn on wet alerts only where you expect them. If the platform has per-sensor notification toggles, verify every leak sensor is included.
- Use a custom automation for household-specific behavior: turn on utility-room lights, speak “Water detected at kitchen sink,” or sound a siren during waking hours.
- If a shutoff valve is connected, make the rule specific: close the valve only for sensors where automatic shutoff is safe for your plumbing and household.
- Send a second notification after a short delay if the sensor is still wet. The second alert should say it is still wet, not pretend this is a brand-new event.
- Keep offline and low-battery warnings separate from water alerts, so maintenance messages do not train the household to swipe away emergency warnings.
A hub is also where automatic shutoff becomes realistic. If you add a valve, treat it as a separate safety device, not a magic ending to the leak-detector project. Put valve behavior in writing: which sensors close it, who can reopen it, and what happens if the valve closes while nobody is home. For more water-and-weather automations, the same discipline applies in storm damage protection recipes.
Setup 3: Home Assistant alert chain for leak sensors
Home Assistant is where the alert chain can be made explicit enough to trust. One Aqara SJCGQ11LM leak sensor connected through Zigbee2MQTT produced Home Assistant app notifications 2–3 seconds after the sensor was dipped in water in a documented test [3]. That does not prove every Zigbee mesh, phone, or notification service will be that fast. It does prove the right kind of thing: sensor wet, automation fired, notification received.
A fuller Home Assistant leak setup can track the moisture binary sensor, battery percentage, a leak-count entity per sensor, and a templated alert that uses the sensor’s area name; the same recipe separates low-battery handling into its own sub-15% battery automation [4]. That separation matters because “replace the battery under the guest bath sink” should not look or sound like “water is on the floor under the guest bath sink.”
There is one Home Assistant edge case worth handling before it bites you. A community-discovered limitation with group triggers is that a group may only fire for the first wet sensor while that first sensor remains wet, so concurrent leaks can be missed if the group is the only trigger. The safer pattern is to list each leak sensor individually in the state trigger and avoid a narrow from: "off" dependency, because a sensor can wake up already wet [5].
Use groups for dashboards if you like. For the alert automation, list the sensors.
alias: Leak alert - named sensors
mode: parallel
trigger:
  - platform: state
    entity_id: binary_sensor.kitchen_sink_leak_water_leak
    to: "on"
  - platform: state
    entity_id: binary_sensor.laundry_washer_leak_water_leak
    to: "on"
  - platform: state
    entity_id: binary_sensor.water_heater_pan_leak_water_leak
    to: "on"
action:
  - variables:
      wet_sensor: "{{ trigger.entity_id }}"
      wet_name: "{{ trigger.to_state.name }}"
      wet_area: "{{ area_name(trigger.entity_id) or trigger.to_state.name }}"
      leak_counter: >
        {{ {
          'binary_sensor.kitchen_sink_leak_water_leak': 'counter.kitchen_sink_leak_count',
          'binary_sensor.laundry_washer_leak_water_leak': 'counter.laundry_washer_leak_count',
          'binary_sensor.water_heater_pan_leak_water_leak': 'counter.water_heater_pan_leak_count'
        }.get(trigger.entity_id) }}
  - if:
      - condition: template
        value_template: "{{ leak_counter is not none }}"
    then:
      - service: counter.increment
        data:
          entity_id: "{{ leak_counter }}"
  - service: notify.mobile_app_primary_phone
    data:
      title: "Water leak detected"
      message: "{{ wet_name }} is wet in {{ wet_area }}. Check this location now."
      data:
        push:
          sound: "default"
  - delay: "00:05:00"
  - condition: template
    value_template: "{{ is_state(wet_sensor, 'on') }}"
  - service: notify.household_phones
    data:
      title: "Leak still active"
      message: "{{ wet_name }} is still wet after 5 minutes. Escalate to someone who can enter the home."
That template is deliberately plain. It does not depend on a group changing state, and it does not require the prior state to be “off.” Add every real leak sensor as its own trigger. Replace the phone notify services with your own devices or notification group. If you use areas in Home Assistant, put each sensor in the room or fixture area you want spoken in the alert.
Battery and offline automations should be separate
Low battery and unavailable-state warnings are maintenance alerts. They deserve their own automation, their own wording, and usually a less frantic sound. The rule is simple: a water alert interrupts dinner; a battery alert becomes a task.
alias: Leak sensors - low battery
mode: single
trigger:
  - platform: numeric_state
    entity_id:
      - sensor.kitchen_sink_leak_battery
      - sensor.laundry_washer_leak_battery
      - sensor.water_heater_pan_leak_battery
    below: 15
action:
  - service: notify.household_phones
    data:
      title: "Leak sensor battery low"
      message: "{{ trigger.to_state.name }} is below 15%. Replace it before the next monthly leak test."

alias: Leak sensors - offline
mode: parallel
trigger:
  - platform: state
    entity_id:
      - binary_sensor.kitchen_sink_leak_water_leak
      - binary_sensor.laundry_washer_leak_water_leak
      - binary_sensor.water_heater_pan_leak_water_leak
    to: "unavailable"
    for: "00:10:00"
action:
  - service: notify.household_phones
    data:
      title: "Leak sensor offline"
      message: "{{ trigger.to_state.name }} has been unavailable for 10 minutes. Check battery, range, and Zigbee mesh health."
If your setup uses Zigbee, a weak mesh can look like a bad sensor. A leak detector behind a washer or inside a sink cabinet may need a nearby powered Zigbee router device to stay reliable. The alert chain includes radio health, whether or not the dashboard makes that obvious.
Escalation is part of the system, not an afterthought
The first alert should go to the person most likely to act quickly. The second alert should go wider if the leak remains active. The third step should leave the smart-home app entirely: call someone, unlock a door for a neighbor, or decide whether a valve should close.
| Event | First response | Escalation |
|---|---|---|
| Sensor becomes wet | Push alert to primary phones with exact location | If still wet after a short delay, notify household group or trigger siren/light |
| Nobody is home | Primary person calls someone with access | Neighbor, landlord, family member, or emergency contact checks the named location |
| Sensor remains wet | Repeat as “still wet,” not a new generic alert | Consider shutoff valve action if configured and safe |
| Sensor battery is low | Maintenance notification | Replace battery before relying on the sensor again |
| Sensor is offline | Maintenance notification after a delay | Check battery, Wi-Fi/Zigbee range, hub status, or router power |
Away-from-home behavior deserves its own pass. A leak under the kitchen sink at 2 p.m. on a workday is a different problem from the same leak while someone is upstairs. If your platform supports presence, you can make away-mode alerts louder, broader, or paired with a smart lock plan. The same away logic shows up in a broader vacation mode automation recipe, where the important part is not the label “vacation,” but who can act when the house is empty.
Keep false alarms from training people to ignore water alerts
False alarms are not just annoying. They weaken the warning chain. Once the household learns that a leak alert usually means a damp mop, a bumped probe, or a sensor sitting where shower spray reaches it, the next real alert has to fight the habit of dismissal.
- Move sensors away from routine splashes unless that splash is exactly what you want to detect.
- Use remote probes in cabinets where the sensor body can be kicked, soaked, or buried under cleaning supplies.
- Treat one nuisance alert as useful feedback. Treat repeated nuisance alerts as a broken design.
- Do not solve false alarms by muting the whole app. Fix placement, naming, sensitivity if available, or escalation rules.
- Keep maintenance alerts visually and audibly different from leak alerts.
One practical split: water detected gets urgent wording and immediate household attention; battery and offline messages get task wording. If everything screams, nothing screams.
Test the path, not just the sensor
A monthly wet-probe test should prove the complete chain. Touch the contacts with a damp cloth or dip the probe as the manufacturer allows. Watch the app or hub state change. Confirm the notification arrives on the right phones. Read the message out loud and make sure it names the location clearly. Then dry the sensor and confirm it returns to normal.
Z-Wave Alliance water-leak guidance recommends periodic wet testing, responding to low-battery warnings, and exercising automatic shutoff valves about every six months to help prevent seizure when a valve is part of the system [6]. That valve exercise is easy to skip because nothing looks wrong. Put it on the same calendar as filter changes, smoke alarm checks, or seasonal maintenance.
| Cadence | What to check |
|---|---|
| After installation | Wet each sensor, verify the exact alert text, confirm every intended phone receives it, and check dry recovery |
| Monthly | Wet-test the sensor or probe, confirm notifications, review battery levels, and remove nuisance-alert causes |
| After router, hub, or phone changes | Retest notifications, app permissions, critical alert settings, and household sharing |
| About every six months if using a shutoff valve | Exercise the valve according to the manufacturer’s instructions and confirm the automation still behaves as intended |
The right smart leak detector flood-warning setup is the simplest one that reliably tells the right people, names the wet location clearly, escalates when ignored, reports when it is unhealthy, and gets tested on a schedule.
References
- The Best Smart Water-Leak Detector, Wirecutter
- Leak Detector Notifications, SmartThings Community
- Water leak notification HomeAssistant, m0agx.eu
- Flood and Leak Detection Software, ezhart.com, Oct 2025
- What’s the best way to notify if water leak sensors trigger?, Home Assistant Community, May 2025
- Water Leak Detection Systems: Protecting Your Home from Costly Damage, Z-Wave Alliance