
How to Set Up Smart Home Gear on Starlink
A setup recipe for running a smart home on Starlink, covering the 2.4 GHz band-split fix for IoT pairing, bypass-mode routing for hub-heavy homes, and remote access options that work without port forwarding. Every step carries a status label and verification date.
What changes when Starlink is the home internet
Starlink does not require a special smart-home architecture. A lock, thermostat, leak sensor, camera, smart plug, Zigbee hub, Thread border router, or Home Assistant box does not care that the internet comes from a dish instead of a cable drop. The trouble usually comes from three Starlink-specific decisions: how the Wi-Fi bands are presented during pairing, whether the Starlink router stays in charge or gets bypassed, and how remote access works when port forwarding is not available.
Use the table as a setup snapshot, not as a promise that every app screen will look identical forever. Where the available source does not disclose a Starlink router firmware or app version, the row says so. That matters more than pretending a version was tested.
| Starlink-specific check | Status | Hub / device context | Version or app note | Verified | Do this |
|---|---|---|---|---|---|
| 2.4 GHz-only device pairing | Workaround | Wi-Fi IoT devices; Gosund smart-plug failures are community-corroborated, not a lab confirmation | Starlink app setting: “Split 2.4/5 GHz networks”; source does not disclose router firmware or app version | 2026-08-02 | Split the 2.4 GHz and 5 GHz networks before pairing devices that only support 2.4 GHz. [1][2] |
| Remote access | Workaround | Home Assistant, cameras, hubs, or router admin screens that you want to reach from away from home | Starlink support states that Starlink WiFi routers do not support port forwarding or firewall rules; exact app/router version not disclosed | 2026-08-02 | Use outbound remote access such as Nabu Casa, Tailscale, or a re-verified public IPv4 option on a suitable plan. Do not plan around inbound port forwarding on the Starlink router. [3] |
| Bypass mode with a third-party router | Workaround | Hub-heavy homes, VLAN setups, Home Assistant users, and homes that need stronger Wi-Fi than the Starlink router provides | Home Assistant Starlink integration and community bypass-mode routing notes; exact Starlink firmware not disclosed | 2026-08-02 | Use bypass mode only when the third-party router will manage the network, then add the Starlink status static route if Home Assistant needs dish data. [4][5][6] |
| Local Zigbee, Z-Wave, Thread, and Matter automations | Confirmed at protocol level | Hub- or mesh-based smart-home devices; not dependent on a specific Starlink router mode | Not a Starlink firmware feature; Home Assistant lists the Starlink integration as Local Polling | 2026-08-02 | Keep automations local where possible. Starlink quality affects cloud services and remote viewing more than local sensor-to-hub behavior. [4][7] |
| Cameras and video doorbells | Performance caveat | Ring, Blink, Wyze, Google Nest, and similar cloud cameras are not blocked by Starlink as an ISP class | Performance varies by location, congestion, hardware generation, and Wi-Fi coverage | 2026-08-02 | Plan around upload bandwidth and router placement, not a special camera-compatibility rule. |
The copyable setup sequence
- Install and test Starlink first. Confirm the Starlink app shows the system online before adding smart-home troubleshooting to the pile.
- Decide whether the Starlink router is enough. If this is a cabin with a few smart plugs, a thermostat, and a door lock, start with the Starlink router. If the house already has mesh Wi-Fi, VLANs, wired access points, or Home Assistant, plan for bypass mode and a third-party router.
- Split the 2.4 GHz and 5 GHz networks before pairing old or low-cost Wi-Fi IoT devices.
- Pair Wi-Fi smart devices while your phone is connected to the 2.4 GHz SSID.
- Put hubs, bridges, and Home Assistant on the most stable part of the LAN, preferably wired to the router or a reliable switch.
- If using bypass mode, add the static route that lets Home Assistant read Starlink dish data.
- Choose remote access as an outbound service or tunnel. Do not open a port and wait for Starlink to behave like a standard cable modem.
- Only after the network is stable, add cameras and test upload-heavy behavior from the actual places where cameras will be mounted.
If you are still choosing your first ecosystem, pause here and use a basic starter plan such as this first smart-home setup guide. Starlink-specific fixes are easier when the hub, voice assistant, and device mix are not changing at the same time.
The 2.4 GHz pairing fix
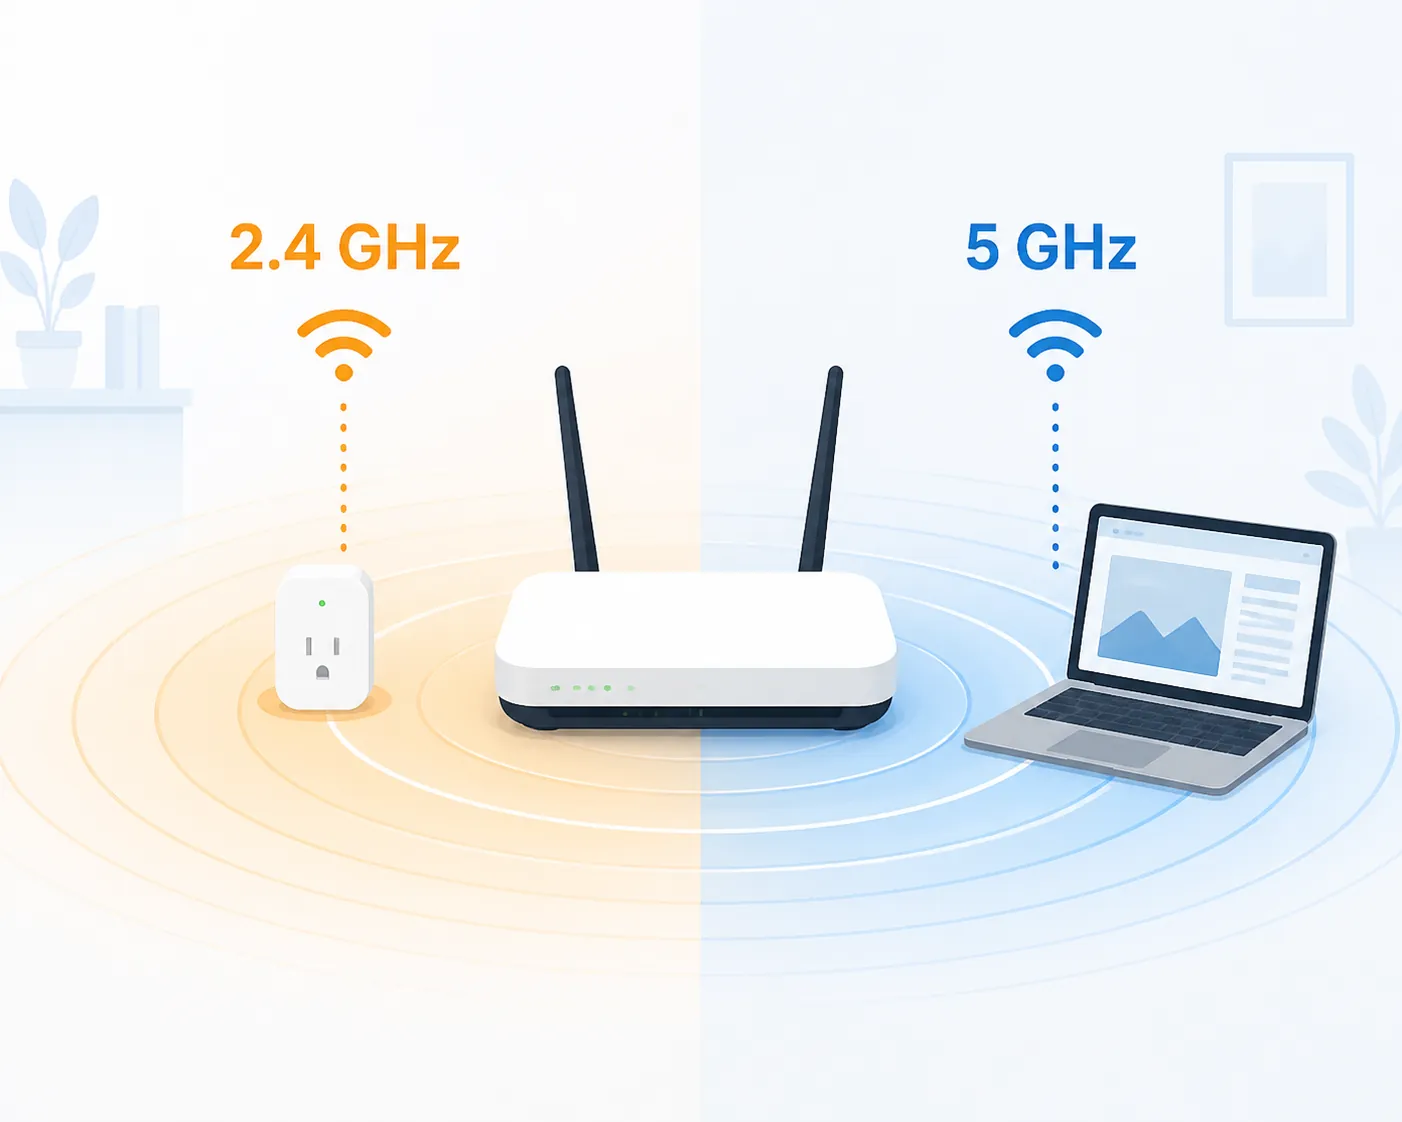
The most annoying Starlink smart-home failure is also the most ordinary: a 2.4 GHz-only smart plug, bulb, or sensor refuses to pair while your phone is sitting on a combined Wi-Fi network. Many IoT devices still require 2.4 GHz for setup. If the phone app tries to hand the device a combined SSID while the phone is effectively using the 5 GHz side, pairing can fail even though nothing is wrong with the plug.
Starlink’s support material identifies a “Split 2.4/5 GHz networks” option, and Starlink community reports describe device-connection problems that match this pattern. Treat that as a configuration workaround with official setting support and community corroboration, not as proof that one specific plug model has been exhaustively tested on every Starlink router generation. [1][2]
Pairing steps
- Open the Starlink app and go to the Wi-Fi network settings.
- Turn on the option to split the 2.4 GHz and 5 GHz networks.
- Give the 2.4 GHz network an obvious name, such as one ending in “-24.” Avoid clever names while troubleshooting.
- Connect your phone to the 2.4 GHz network before opening the smart-device pairing app.
- Pair the device normally.
- After pairing, check the manufacturer’s app and the router client list, if available, to confirm the device is connected to the 2.4 GHz SSID.
- Leave the networks split if the device becomes unreliable after merging them again.
The part people skip is step four. If your phone is still on the 5 GHz network, the app may keep trying to provision the device with the wrong path. That is when people start factory-resetting a plug that was not broken.
For a new Starlink home, it is usually cleaner to keep three names straight: one 2.4 GHz SSID for IoT pairing, one 5 GHz SSID for phones and laptops near the router, and one guest network if you need visitor access. The exact names do not matter. What matters is that the person standing next to the thermostat can tell which network the phone is using.
Keep local devices local
Zigbee, Z-Wave, and Thread/Matter devices are the least dramatic part of a Starlink smart-home setup because they do not ride Starlink for every local action. A leak sensor talking to a hub, a Thread motion sensor talking through a border router, or a Z-Wave switch controlled by a local automation is using the home network and the hub’s logic first. Thread Group’s Matter-and-Thread material describes the local mesh role of Thread, and Home Assistant classifies its Starlink integration as Local Polling, which is the right mental model here: the ISP is not the automation engine. [4][7]
That does not mean every brand app works offline. Cloud notifications, voice-assistant commands, firmware downloads, and remote camera viewing still need internet. But the more you move everyday rules onto a local hub, the less a brief Starlink interruption matters for basic behavior inside the house.
If you are building around Matter and Thread, the router choice is only one piece. The border router matters too; this Thread border router explainer and the 2026 Thread border router comparison are better places to sort out that layer.
When bypass mode is worth the trouble
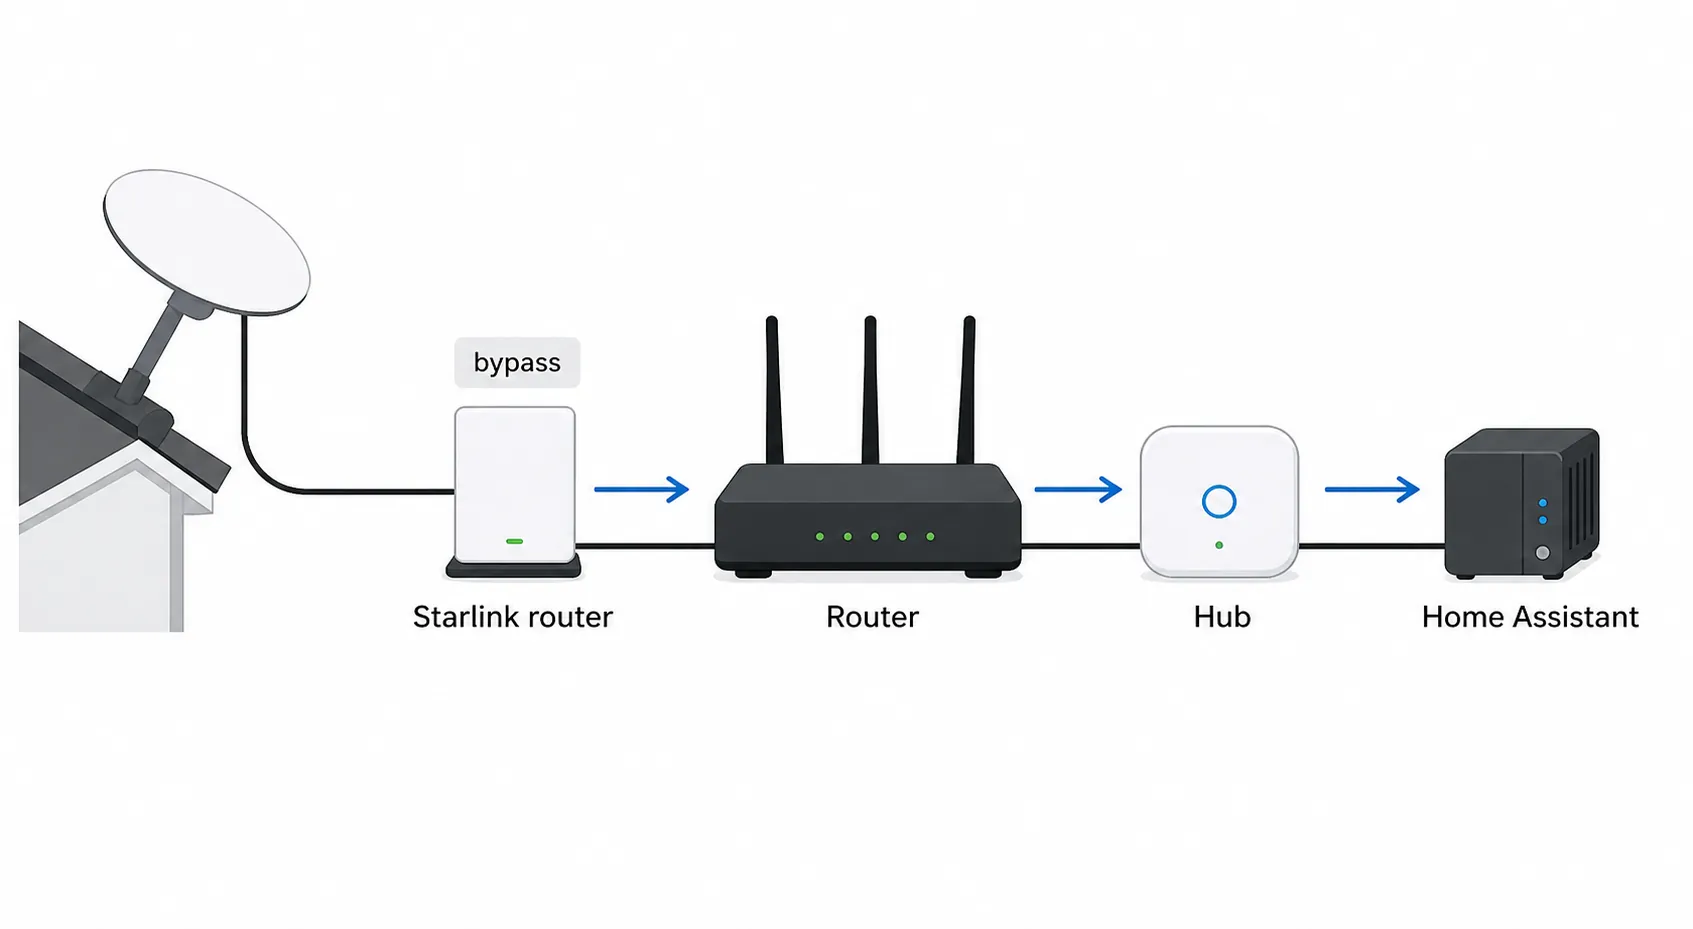
Bypass mode is not a badge of seriousness. It is useful when the Starlink router is the wrong device to manage the network. If you only have the Starlink router, a few Wi-Fi plugs, and app-based cameras, stay there until you have a reason to change. Adding another router just creates another place to misconfigure DHCP, NAT, and Wi-Fi names.
Bypass mode starts to make sense when the home already has a real LAN: wired access points, mesh nodes that are not Starlink’s, VLANs for IoT isolation, a Home Assistant server, PoE cameras, or hubs that need stable wired placement. In that layout, the third-party router becomes the router. Starlink becomes the internet link.
| Stay with the Starlink router when… | Use bypass mode when… |
|---|---|
| You are setting up a small cabin or rural home with mostly cloud app devices. | You already own a router or mesh system that covers the house better. |
| You do not need VLANs, custom firewall rules, or advanced routing. | You want to isolate IoT devices on a separate network. |
| You are not running Home Assistant or local services that need predictable routing. | Home Assistant, NAS, cameras, or hubs need stable wired LAN behavior. |
| You want the fewest moving parts. | You are comfortable being responsible for the router configuration. |
If VLANs are the reason you are bypassing the Starlink router, plan that network separately instead of improvising it during a device-pairing session. A beginner-safe path is covered in this smart-home VLAN setup guide.
The Home Assistant static-route gotcha
Here is the bypass-mode failure that looks like a broken integration: internet works, the smart home works, but Home Assistant cannot read Starlink status data. Home Assistant’s Starlink integration is local polling, and bypass-mode guides and community configurations point to the same fix: add a static route for Starlink’s management subnet, 192.168.100.0/24, pointing to 192.168.100.1 on the managing router. [4][5][6]
| Static-route field | Use this value |
|---|---|
| Destination / network | 192.168.100.0/24 |
| Gateway / next hop | 192.168.100.1 |
| Interface | The WAN or Starlink-facing interface on the third-party router |
| Purpose | Lets Home Assistant and router tools reach Starlink status data while the Starlink router is bypassed |
| Status | Workaround; verified against Home Assistant documentation and community configuration notes on 2026-08-02, with no Starlink firmware version disclosed by the sources |
Router interfaces name this differently. UniFi, MikroTik, Asus, TP-Link Omada, Firewalla, pfSense, and OpenWrt all have their own vocabulary. Do not hunt for a “Home Assistant” setting. You are adding a route on the router that now manages the LAN.
After adding the route, restart or reload the Home Assistant Starlink integration and check whether the sensors populate. If they do, stop changing things. If they do not, check the route, interface, and whether another firewall rule is blocking traffic to that management subnet before touching the smart-home devices.
Remote access: stop looking for port forwarding
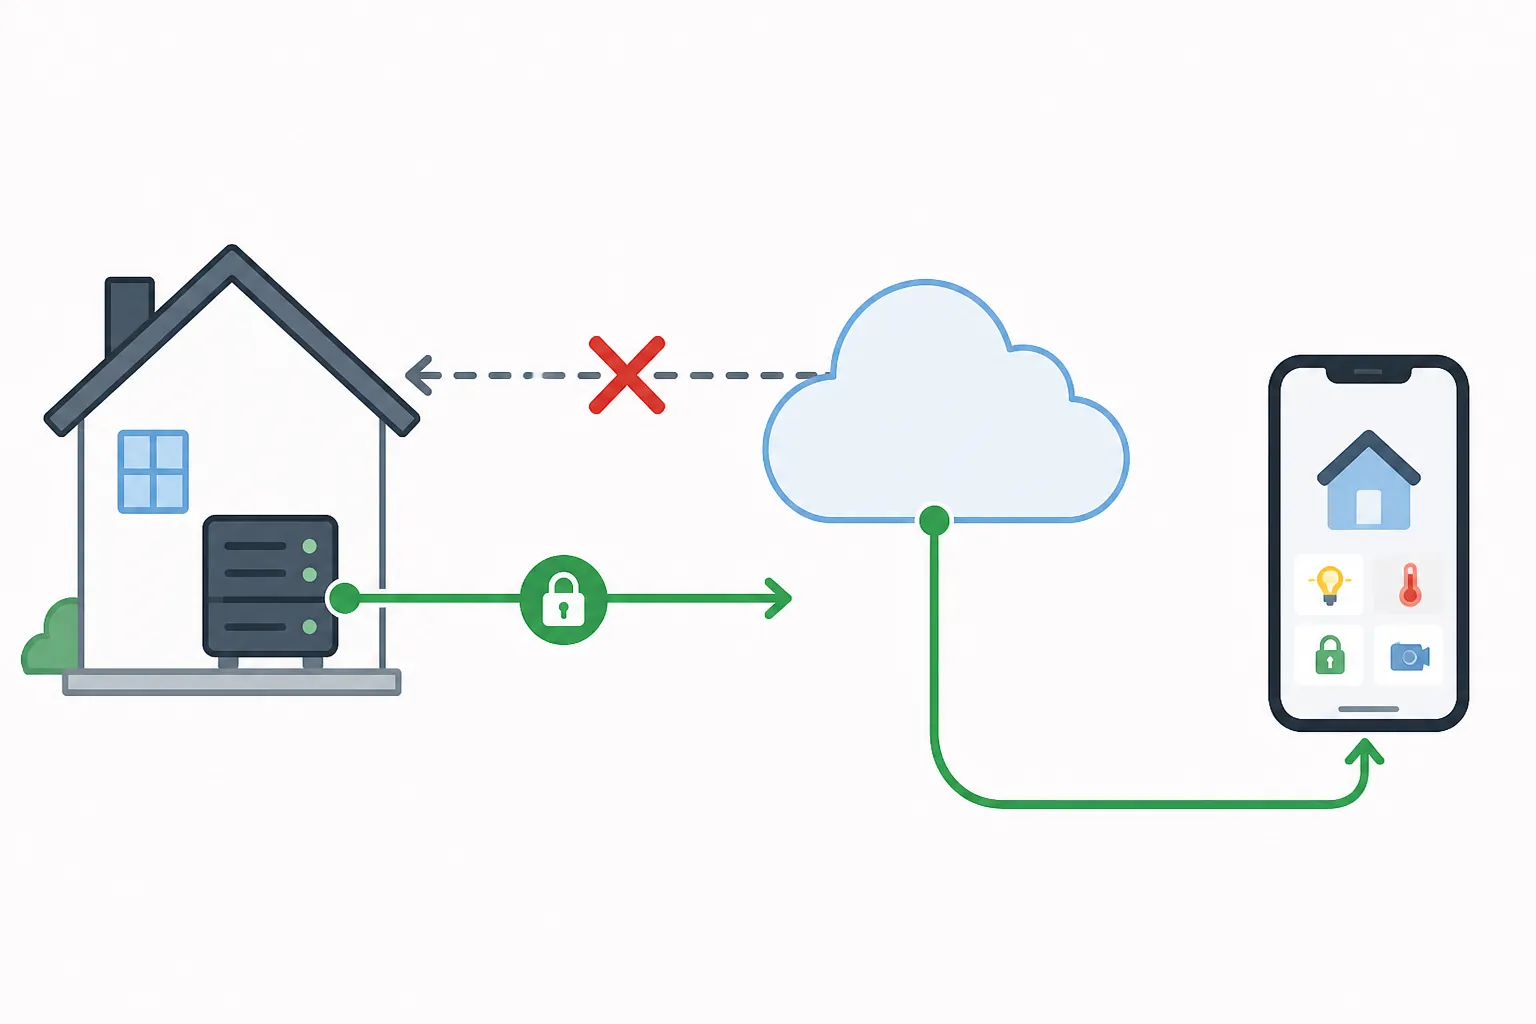
On a standard Starlink-router setup, inbound port forwarding is the wrong plan. Starlink support states that its WiFi routers do not support port forwarding or firewall rules. That is separate from whether your smart home works locally; it affects how you reach the home from outside. [3]
The fix is to stop thinking in terms of “open a port to my house” and choose an outbound remote-access method. The home network starts the connection outward, and your phone or browser meets it through that service. That model fits Starlink much better than trying to make the dish behave like a public, port-forwardable cable modem.
| Remote-access option | Best fit | What changes | Status and verification |
|---|---|---|---|
| Nabu Casa for Home Assistant | Home Assistant users who want the least router work | Home Assistant connects outward to the cloud service; you do not expose a local port on the Starlink router | Workaround; treated as the simplest Home Assistant-specific path on 2026-08-02 |
| Tailscale | DIY users who want private access to Home Assistant, a NAS, or other internal services | Devices join a private mesh VPN; Starlink does not need to accept inbound connections | Workaround; Home Assistant community users report reaching Home Assistant through Starlink with Tailscale. [8] |
| Priority-plan public IPv4 | Users who specifically need a reachable public IPv4 and understand router/firewall exposure | Requires a suitable Starlink plan and your own router; public IPv4 is described as dynamic, not static, in the available 2024–2025 guidance | Investigating for 2026 pricing and plan policy; older sources describe extra-cost Priority options and public IPv4 caveats that must be rechecked before buying. [9][10] |
| Traditional port forwarding on the Starlink WiFi router | Not the right fit for standard Starlink router users | The Starlink WiFi router does not provide the required port-forwarding/firewall controls | Do not plan around it; official support statement reviewed 2026-08-02. [3] |
For most households, the decision is simple. If all you need is Home Assistant from your phone, use Nabu Casa or Tailscale. If you need to reach several internal services and you are comfortable managing device access, Tailscale is usually the more flexible tool. If a vendor or self-hosted service truly requires inbound public IPv4, re-check Starlink’s current plan rules and treat that as a networking project, not a smart-plug setting.
Do not expose Home Assistant directly to the internet just because a tutorial for cable internet did it that way. Starlink’s constraints are doing you a favor here: use an authenticated tunnel or managed remote-access service, then keep the local controller boring.
Home Assistant on Starlink
Home Assistant does not need Starlink to be special. Put the Home Assistant machine on the LAN, keep hubs on stable wired or strong wireless links, and let automations run locally where the integrations support it. The Starlink-specific pieces are the bypass-mode route for dish telemetry and the remote-access method for reaching Home Assistant when you are away.
- If you are not using bypass mode, set up Home Assistant normally and add the Starlink integration if you want dish status data.
- If you are using bypass mode, add the static route before blaming the Home Assistant integration.
- If you need remote Home Assistant access, choose Nabu Casa or Tailscale before trying public-IP workarounds.
- If automations must survive internet interruptions, prefer local integrations and local radio protocols over cloud-only device logic.
Once the base integration is stable, the fun part can wait until after the network stops being the suspect. Home Assistant power users can then move on to richer automations, voice control, or local assistant experiments such as this DeepSeek V4 Home Assistant Assist setup.
Cameras are an upload problem, not a Starlink compatibility problem
Smart cameras and video doorbells are where Starlink feels least like a simple “yes, it works” answer. The practical limit is upload. Ookla reported a U.S. Starlink median upload speed of 14.84 Mbps for Q1 2025, while PCWorld’s single-household Starlink account described about 15 Mbps typical upload with peaks around 30 Mbps. Those are useful reference points, not guarantees for your tree-covered cabin, congested cell, or particular hardware generation. [11][12]
A few motion-triggered cameras can be fine. A pile of always-uploading cameras, high-resolution live viewing, or constant cloud recording is a different load. If camera behavior is poor, test in this order: Wi-Fi signal at the camera, upload speed from the same side of the house, camera resolution and recording settings, then the cloud-camera vendor’s own service status. Do not start by replacing the smart-home hub.
- Mount cameras where the home Wi-Fi is strong, not merely where the Starlink dish has a good view of the sky.
- Prefer motion-triggered recording over unnecessary continuous upload when bandwidth is tight.
- If using a third-party router or mesh, verify that cameras roam to the intended access point instead of clinging to a weak signal.
- For remote cabins, test live view from off-site before relying on a camera as the only way to confirm conditions.
This is also where Starlink router placement shows up. A dish with clear sky does not automatically mean the indoor router is in the right spot for a garage camera, pump-house sensor, or far-end doorbell. If the smart-home failures are all at the edge of the building, solve Wi-Fi coverage before blaming satellite internet.
What the finished Starlink smart home should look like
The simplest finished version is a Starlink router with split Wi-Fi bands, 2.4 GHz IoT devices paired deliberately, and remote access handled by each vendor’s app or by a managed Home Assistant path. That is enough for many cabins and rural homes.
The more advanced version is Starlink in bypass mode, a third-party router managing the LAN, hubs and Home Assistant on stable wired links, a static route to Starlink status data, and outbound remote access through Nabu Casa or Tailscale. That is the version for people who want VLANs, local automations, and predictable routing.
After that, Starlink stops being the interesting part. Local protocols remain local, 2.4 GHz pairing has a repeatable fix, hubs route correctly, and remote access no longer depends on port forwarding. For everyday smart-home use, that makes Starlink effectively behave like any other broadband link, with upload-heavy cameras as the main caveat rather than a compatibility blocker.
When the network is stable, then add the useful stuff: leak shutoff routines, freeze alerts, arrival lighting, vacation modes, and the rest of the automations that make a rural home easier to leave alone. This 2026 starter automation stack is a better next step than renaming the Wi-Fi for the fourth time.
References
- How do I split my 2.4 GHz and 5 GHz networks?, Starlink Support
- Starlink Device Connecting Issues, Starlink Community Forums
- Starlink WiFi router port forwarding and firewall rules support article, Starlink Support
- Starlink, Home Assistant
- Guide: Integrating Starlink into Home Assistant, Maison et Domotique
- Starlink Integration, Home Assistant Community
- Thread with Matter: Better Connections, Smarter Homes, Thread Group
- How to reach Home Assistant through Starlink, Home Assistant Community
- Can You Get a Static IP from Starlink?, DISHYtech
- How to Get a Public IP with Starlink, jmcglock
- Starlink U.S. Performance 2025, Ookla
- I got Starlink internet at home — I wish I knew these key details first, PCWorld