
How to Use a UPS to Protect Your Smart Home During Power Shutoffs
This UPS sizing and deployment recipe identifies the four core devices (modem, router, hub, network switch) that need battery backup and shows how a single 850–1000VA unit keeps your smart home running through the majority of residential power shutoffs.
The weak point in a smart home during a power shutoff is usually not the lock, the contact sensor, or the lamp module. It is the small pile of boxes near the broadband entry point. If the ONT or modem loses power, the router disappears. If the router disappears, the hub may still be technically alive but unreachable. If the hub loses power too, local automations, Zigbee or Z-Wave coordination, and dashboards can all go quiet at once.
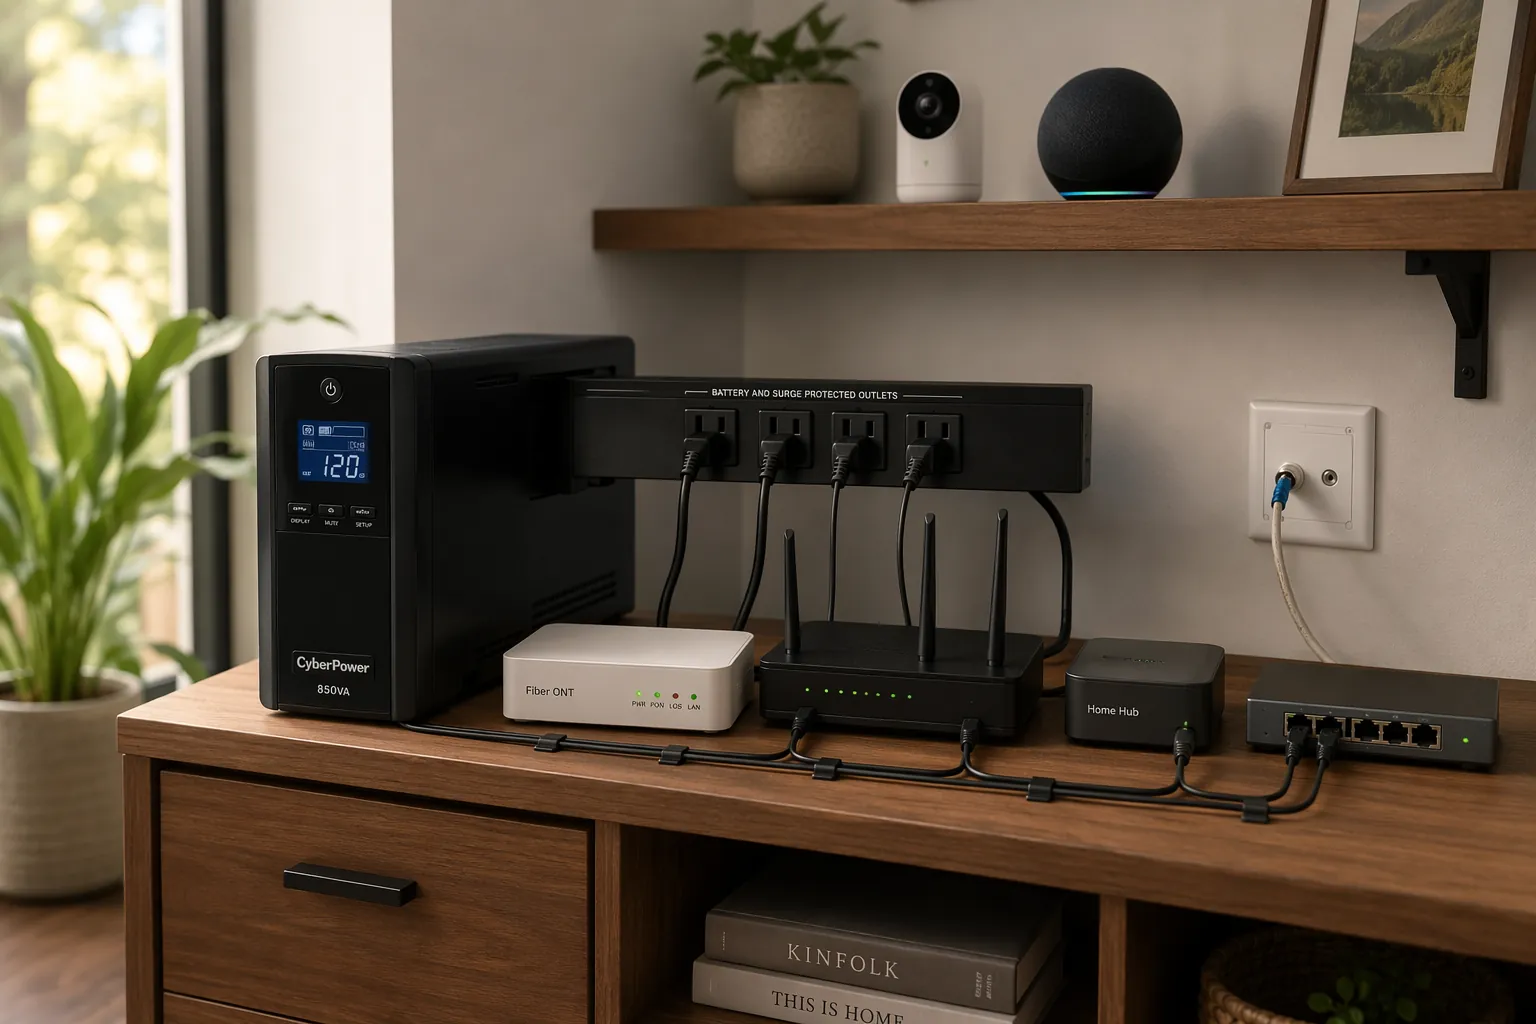
So the practical answer to how to protect a smart home during a power shutoff is narrower than most people expect: keep the core stack powered. For many homes, that stack is four devices: ONT or modem, router, smart-home hub, and sometimes a small network switch. Those boxes do not draw much power, which is exactly why a modest UPS can do useful work before anyone starts pricing whole-home batteries.
| Core device | Typical power draw | Why it gets battery backup |
|---|---|---|
| ONT or modem | 8-12W | Keeps the internet handoff alive |
| Router | 10-15W | Keeps Wi-Fi, DHCP, and local network routing alive |
| Smart-home hub | 3-6W | Keeps automations and device coordination running |
| Small network switch | 10-25W | Keeps wired hubs, bridges, or access points connected |
That table is the reason this recipe works. A UPS that would be laughably small for a desktop gaming PC can be entirely sensible for a modem, router, hub, and switch. The job is not to keep every smart device awake. The job is to keep the network and the controller from vanishing.
Size the UPS for the Core Stack, Not the Room
For this use case, 850-1000VA is the useful center. A 650VA unit can be enough if you only need shorter backup and your stack is lean. A 1500VA unit makes sense if you knowingly want more runtime, have a larger switch, or prefer extra margin. But for a typical smart-home owner with one broadband device, one router, one hub, and maybe one small switch, 850VA or 1000VA is the place where cost, size, outlet count, and runtime usually line up.
| UPS size | Best fit | Expected runtime tier for the core stack |
|---|---|---|
| 650VA | Shorter backup, very small stack | About 40-60 minutes |
| 850VA | Practical minimum for a fuller core stack | About 60-90 minutes |
| 1000VA | Best middle choice for most households | About 90-120 minutes |
| 1500VA | Longer runtime or extra margin | About 2-3 hours |
The independent benchmark worth keeping in mind is Wirecutter's 2026 UPS testing of the CyberPower LE1000DG: it kept a 20W modem-and-router load running for 3 hours, while a 300W load lasted 12 minutes. [2] That is not a promise that every 1000VA UPS will give your house 3 hours. It is a useful demonstration of the thing that matters here: small network loads stretch UPS runtime dramatically, while large loads collapse it.
This is also why cameras, smart displays, voice assistants, and decorative lighting should not sneak onto the battery outlets just because there is an empty socket. A single extra device may look harmless, but the whole point is to spend the battery on the devices that keep everything reachable. If a camera has its own battery, fine. If a voice assistant dies during the outage, annoying. If the router dies, the system is gone from the app.
What to Buy
Look for a line-interactive or standby UPS in the 850-1000VA range with enough battery-backed outlets for the core stack. The exact brand matters less than the basics: replaceable battery if possible, an LCD or software readout for runtime, surge-only outlets separated from battery-backed outlets, and a USB data port if you plan to connect it to Home Assistant, a NAS, or a small server.
- Choose 650VA only if your goal is short backup and your core stack is just a modem, router, and low-power hub.
- Choose 850VA if you want the practical lower-middle size for a modem, router, hub, and small switch.
- Choose 1000VA if you want the safer default without moving into a much larger unit.
- Choose 1500VA if you already know you want multi-hour runtime or have a heavier switch, gateway, mini PC, or NAS in the same stack.
Do not size the UPS from the number printed on the router power brick alone. That number is the adapter's maximum output rating, not necessarily the router's steady draw. If the UPS has a load display, the first unplug test will tell you more than the label.
Put the UPS Where the Network Starts
The UPS belongs near the broadband entry point: the fiber ONT, cable modem, gateway, router shelf, structured wiring panel, or whatever corner of the house already has the ugly but important boxes. XDA's deployment guidance lands on the same practical rule: place the UPS where the ONT or modem, router, and hub physically concentrate, rather than hiding it in a more convenient room and trying to stretch the setup back with extension cords. [3]
If those devices are scattered, fix the layout before blaming the UPS size. The clean version is boring: short power cords, short Ethernet runs, labels on the plugs, and the battery outlets reserved for the boxes that keep the network alive. A UPS under a desk across the room powering a monitor and a speaker is not protecting the smart home.
Plug In the Four Devices in This Order
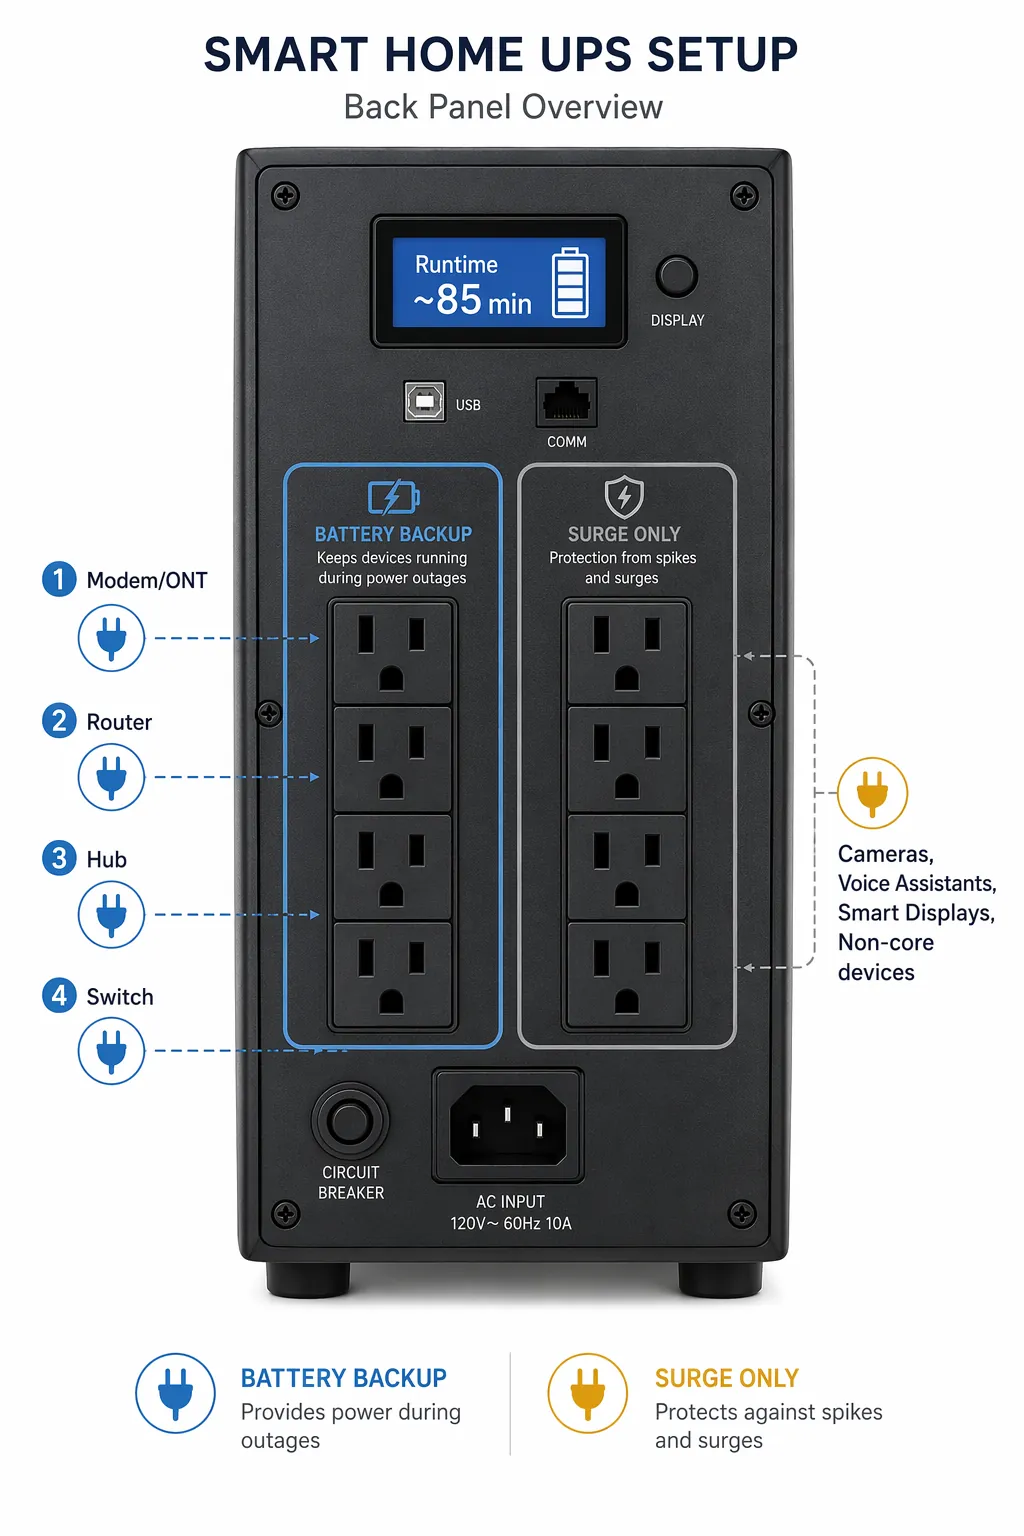
Most consumer UPS units divide outlets into two groups: battery plus surge, and surge only. The labels are easy to miss. Turn the unit around, read the outlet markings, and use the battery-backed side for the core stack only.
- Plug the ONT or modem into battery-backed outlet #1.
- Plug the router into battery-backed outlet #2.
- Plug the smart-home hub into battery-backed outlet #3.
- Plug the network switch into battery-backed outlet #4, if the hub, bridges, or access points depend on it.
Everything else should go on surge-only outlets or stay off the UPS entirely: indoor cameras, smart displays, voice assistants, media streamers, chargers, lamps, speakers, and little convenience gadgets that make the shelf look complete. A security camera may feel more important than a switch, but if that switch is what connects the hub or router path, the switch wins.
There is one exception worth thinking through: if a critical bridge, such as a Hue Bridge or similar ecosystem bridge, is separate from your main smart-home hub and must stay online for automations you actually care about, treat it like part of the hub layer. Then remove something less important or buy a UPS with enough battery-backed outlets. Do not solve it by adding a power strip full of random devices to one battery outlet.
Keep Surge Protection in Its Lane
A UPS is not the same thing as whole-home surge protection, and whole-home surge protection is not the same thing as battery backup. The UPS keeps selected low-wattage devices powered when utility power drops. Surge protection helps absorb voltage spikes. Many UPS units include outlet-level surge protection, which is useful, but it does not turn the unit into a panel-level protection system.
If you want panel-level surge protection, treat that as electrical work. In most jurisdictions, installing equipment at the service panel is a licensed-electrician job, not a weekend smart-home accessory project. For this recipe, the DIY part is simple: plug the core network stack into the UPS correctly and keep the load small.
Optional: Let Home Assistant See the UPS
The hardware recipe works without automation. The modem, router, hub, and switch do not need a clever routine to stay powered; they need battery-backed outlets. Still, if your Home Assistant host, NAS, or small server is near the UPS, a USB connection and Network UPS Tools can add useful visibility.
NUT integration can expose UPS battery status, remaining runtime, line-power status, and graceful shutdown signaling to Home Assistant or the host system. Those sensors can also feed outage-detection automations, such as sending a notification when the house switches to battery or shutting down a server before the UPS is exhausted. XDA and HomeTechHacker both describe this as an optional smart-home layer rather than the thing that makes the UPS protective in the first place. [1][3]
If you do add NUT, keep the first pass modest: verify that Home Assistant can read the UPS status, confirm the runtime estimate appears, and set graceful shutdown behavior for any computer that needs it. Leave power-restore cleanup automations for a separate pass. Getting the hub back online is one job; forcing every light, plug, and sensor back into the preferred state after power returns is another.
Run the One-Minute Test
After the UPS is charged and the core stack is plugged into the battery-backed outlets, test it the plain way. Do not wait for the next storm, utility repair, or mystery blink at 2 a.m.
- Unplug the UPS from the wall, not the devices from the UPS.
- Confirm the ONT or modem stays powered.
- Confirm the router stays powered and Wi-Fi remains available.
- Confirm the hub and switch stay powered.
- Read the estimated runtime on the UPS display or connected software.
- Plug the UPS back into the wall.
That displayed runtime is more useful than a box claim because it reflects your actual stack. It is still an estimate. Battery age, room temperature, charging state, and the exact draw of your devices can all shorten the result, so repeat the test occasionally, especially after replacing network gear or moving devices onto the UPS.
If the core stack stays online and the runtime estimate fits the kind of short shutoff you are trying to ride through, the smart home has the protection this recipe is meant to provide. The network and hub stay alive. Making every device return to the right state after power comes back is the next recipe, not a reason to skip this one.
References
- How to Choose the Right UPS for a Smart Home, HomeTechHacker
- The 3 Best Uninterruptible Power Supplies (UPS) of 2026, Wirecutter
- This simple UPS setup makes your smart home unbreakable, XDA