This is not the ChatGPT app taking over your house. In Home Assistant, ChatGPT-style control means the official OpenAI integration acts as a conversation agent inside Assist, using an OpenAI API key from platform.openai.com. A ChatGPT Plus subscription is not required, and the billing is API usage billing, not the consumer ChatGPT plan. [1]
That distinction matters before you start using AI chatbots to control smart home devices. The useful version is not “AI controls everything.” It is: Home Assistant receives a natural-language command, decides whether built-in Assist can handle it locally, and sends only the harder language interpretation work to an OpenAI model that can touch only the entities you deliberately expose.
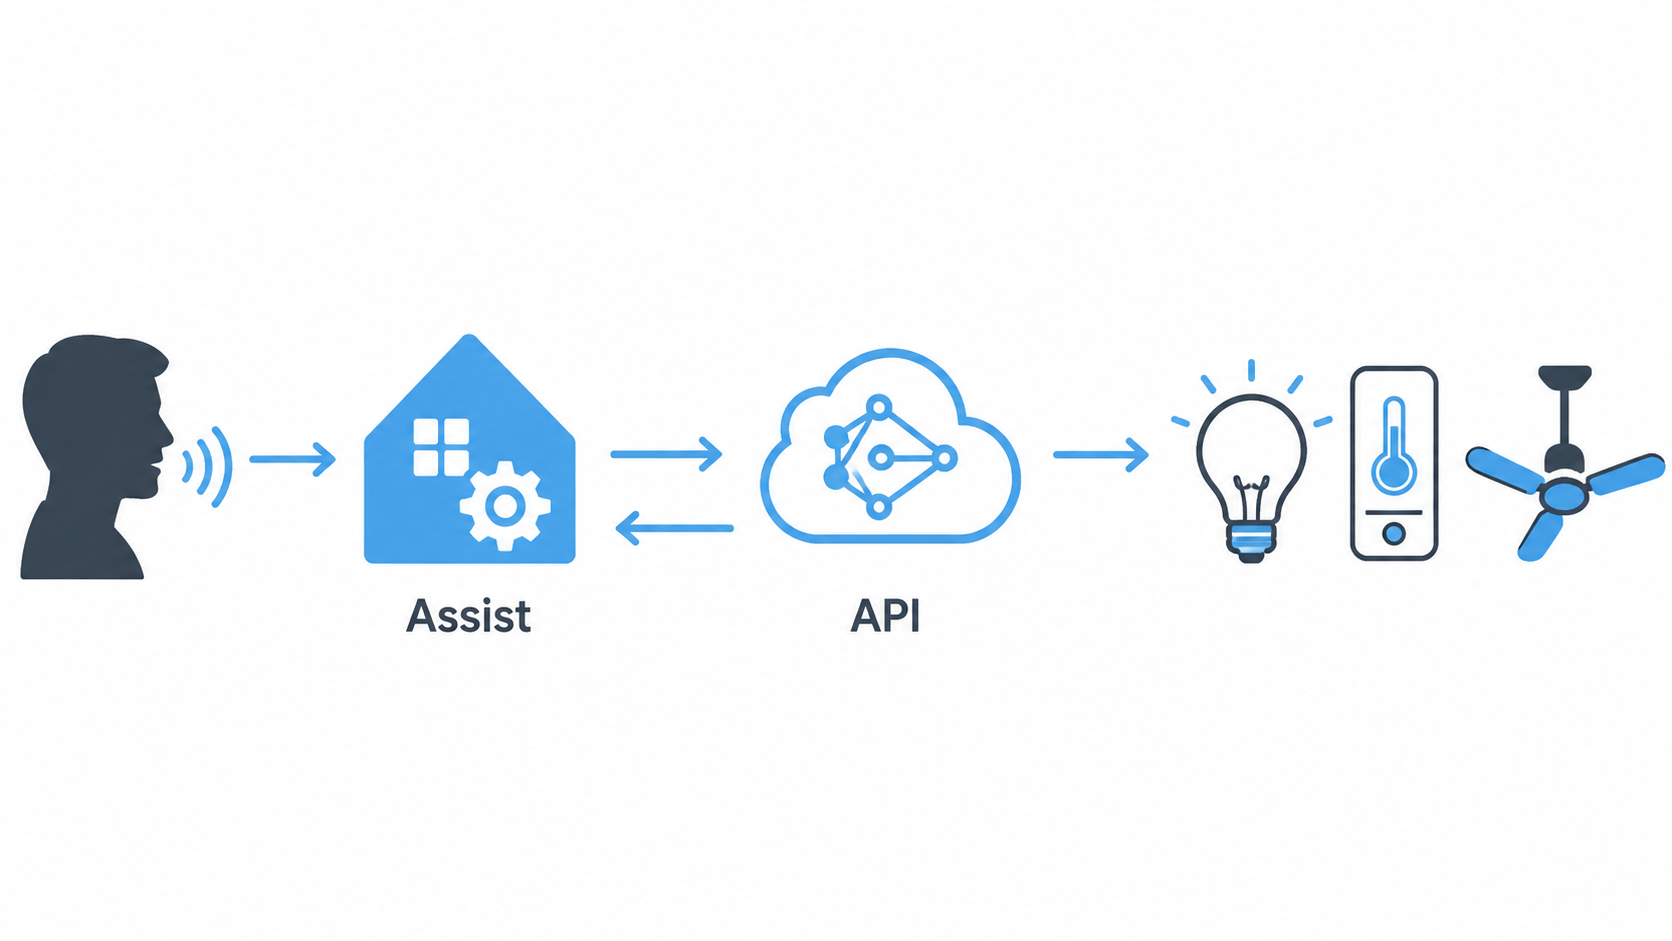
The appealing part is obvious: “make the bedroom feel cozy” can become a reasonable combination of warmer lights, lower brightness, and maybe a climate adjustment. The part worth slowing down for is less glamorous: which model is being called, how many entities are included in the prompt, whether locks and alarms are excluded, and what stops a weekend experiment from becoming a monthly surprise.
What You Need Before Adding OpenAI to Home Assistant
This recipe assumes you already have Home Assistant running and that your lights, switches, climate devices, and other core entities are visible there. If you are still choosing hardware or deciding whether Home Assistant is the right base layer, start with The Beginner's Guide to Home Automation in 2026 first. If your devices are Matter-based and not yet commissioned, handle that through How to Set Up Matter in Home Assistant before adding an AI conversation layer.
- A working Home Assistant instance with Assist available.
- An OpenAI platform account and an API key from platform.openai.com.
- A manually configured OpenAI billing cap before you start testing.
- A short list of rooms, device names, and device nicknames you actually use.
- A willingness to expose fewer entities than Home Assistant technically offers.
The API key and billing cap are not administrative trivia. The SmartHomeScene setup guide specifically calls out that the official integration uses an OpenAI API key and that the billing cap must be set manually. [1]
The Setup Flow
The full path is short enough to fit on one screen, but two steps deserve more care than they usually get: choosing exposed entities and writing the system prompt.
| Stage | What you are deciding |
|---|---|
| Create the OpenAI API key | Which account pays for API usage, and what monthly cap protects it |
| Install the OpenAI integration | Which OpenAI model Home Assistant will call as a conversation agent |
| Assign the conversation agent | Which Assist pipeline uses OpenAI, and whether local handling is preferred first |
| Expose entities | Which lights, switches, climate devices, and helpers the model can see or control |
| Write the system prompt | How room names, nicknames, preferences, and safety boundaries are described |
| Test and trim | Which commands work, which entities are noisy, and whether token use stays reasonable |
| Add AI Tasks later | Whether proactive summaries, camera snapshot analysis, or notifications are worth enabling |
1. Create an API Key and Set the Billing Cap First
Go to the OpenAI platform, create an API key, and store it somewhere temporary while you configure Home Assistant. Do not paste a long-lived API key into notes, automations, dashboards, or screenshots. Home Assistant only needs the key when you add the integration.
Before sending your first command, set a monthly API billing cap in the OpenAI platform account. The cost estimate that makes this setup attractive assumes deliberate limits: gpt-4o-mini, moderate daily use, local fallback for simple commands, a trimmed entity list, and controlled prompt size. [1]
2. Add the OpenAI Conversation Integration
In Home Assistant, go to Settings, then Devices & services, add a new integration, and search for OpenAI Conversation. Paste the API key when prompted. Once it is added, Home Assistant can use OpenAI as a conversation agent through Assist rather than through the ChatGPT web or mobile app. [1]
For the first build, choose gpt-4o-mini if your goal is inexpensive natural-language control. The cost estimate here is tied to that model choice; switching to a larger model changes the cost assumptions. [1]
3. Assign It to an Assist Pipeline
Next, assign the OpenAI conversation agent to the Assist pipeline you plan to use from your phone, browser, dashboard, voice satellite, or smart speaker bridge. If you already have a reliable Assist setup for plain commands like “turn on the kitchen light,” keep that path intact.
Enable the “Prefer Handling Commands Locally” option. With that toggle, simple supported commands can be handled by Home Assistant’s built-in Assist path instead of making an API call. The SmartHomeScene guide lists this as one of the main cost-reduction techniques for the integration. [1]
Expose Fewer Entities Than You Think You Want
Entity exposure is where the setup either becomes useful or turns into a confused house-shaped autocomplete demo. Home Assistant may know about hundreds of entities: battery sensors, update entities, diagnostic helpers, automations, scripts, unavailable devices, old bulbs, renamed plugs, and one sensor you added during a power-monitoring experiment and forgot about.
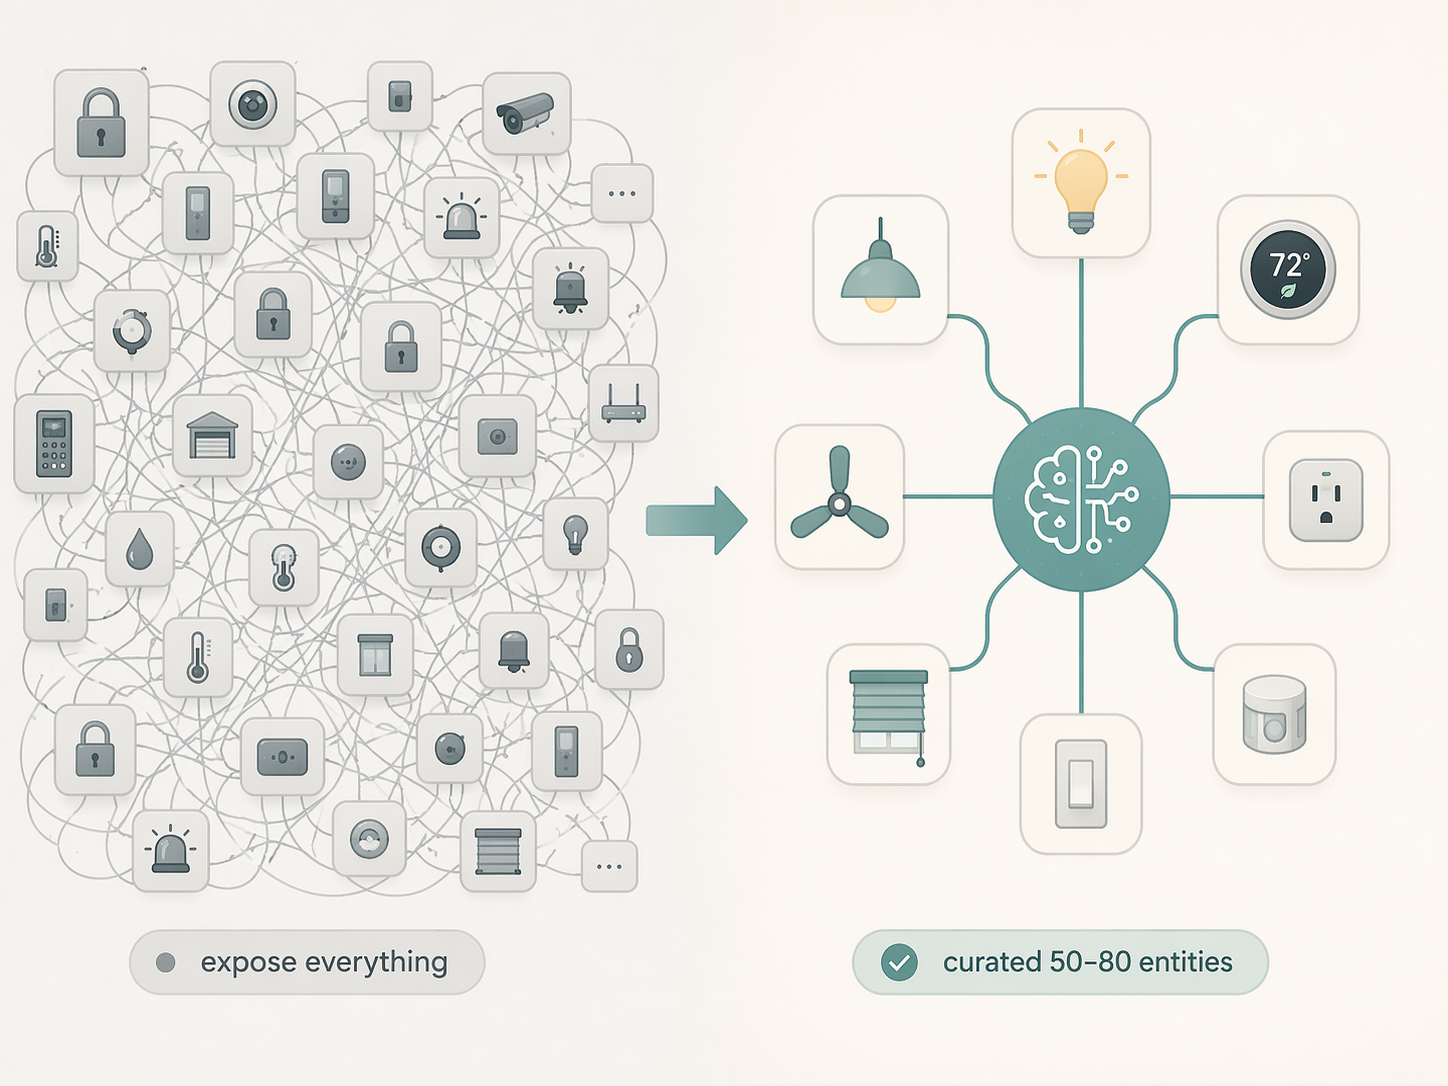
Do not expose all of that. The practical target is a deliberate list of about 50–80 useful entities instead of everything. The guide’s reason is not just safety; over-exposing entities can slow responses and raise costs because more context has to be included when the model decides what to do. [1]
Start with devices whose mistakes are easy to undo: lights, switches, fans, media players if you use them often, and climate devices where your household already accepts automation. Leave locks, alarms, garage doors, cameras, and security-critical scripts out of the starter configuration. You can still control those through normal Home Assistant dashboards, automations, and manual confirmations.
| Good first candidates | Usually skip in the first build |
|---|---|
| Room lights and light groups | Door locks |
| Smart plugs used for lamps or fans | Alarm control panels |
| Thermostats and climate entities | Garage doors and gates |
| Fans and simple switches | Camera streams and security snapshots |
| Scene scripts you already trust | Old helpers, diagnostics, and test entities |
The boring cleanup work pays off quickly. Rename entities so the model sees “bedroom lamp” rather than a manufacturer string. Group lights by room where possible. Hide duplicate entities created by integrations. Remove test helpers from the exposed list. If a human would hesitate over the name, the model may hesitate too.
A useful starter exposure list might look like this in plain English:
- Downstairs: entry light, hallway light, living room lights, kitchen lights, dining pendant, thermostat, living room fan.
- Bedroom: ceiling light, bedside lamps, reading lamp, bedroom thermostat or climate zone, fan.
- Office: desk lamp, overhead light, smart plug for task lighting, climate sensor if it is actionable.
- Scenes: movie mode, bedtime lights, morning lights, away lighting simulation if already tested.
- Excluded: locks, alarm, garage door, camera feeds, raw motion sensors, battery sensors, update entities.
That list is not universal. A small apartment may need far fewer than 50 entities. A larger house may exceed 80 after room groups and climate zones. The point is to expose the devices you would comfortably let a guest operate after a one-minute explanation, not every state Home Assistant can observe.
Write the Prompt Like a Routing Map, Not a Personality
The system prompt is not decorative. It is where you teach the assistant that “downstairs” means the living room, kitchen, dining area, entry, and hallway; that “cozy” means warm color temperature and lower brightness; and that “bedroom lamps” should not include the closet light. SmartHomeScene’s guide emphasizes prompt customization for room names, device naming, home layout, and user preferences because it improves command accuracy. [1]
A prompt cannot guarantee perfect behavior. It can, however, reduce guesswork and make ambiguous commands less expensive to interpret. Keep it specific enough to route commands, but not so long that every request drags a household manual through the API.
You are the Home Assistant voice agent for this home.

Use these room meanings:
- Downstairs means entry, hallway, living room, kitchen, and dining area.
- Bedroom means primary bedroom only, not guest room or office.
- Office means the work room at the front of the house.

Use these preferences:
- "Cozy" lighting means warm white, low to medium brightness, and no overhead lights unless no lamps are available.
- "Bright" means useful task lighting, not maximum brightness unless explicitly requested.
- At night, avoid turning on hallway or bedroom lights above low brightness unless asked.

Use these device nicknames:
- "Sofa lamp" means the living room floor lamp.
- "Bedside lamps" means both primary bedroom table lamps.
- "Work lights" means office desk lamp and office overhead light.

Safety boundaries:
- Do not control locks, alarm systems, garage doors, gates, or cameras.
- If a command is ambiguous, ask a clarifying question instead of guessing.
- Prefer existing Home Assistant scenes when they match the request.
That example is intentionally plain. The goal is not to make the assistant charming; the goal is to keep “turn off everything downstairs except the hallway” from becoming a tour of every exposed entity that happens to contain a similar word.
Test Commands in Three Tiers
Once the integration, pipeline, entity exposure, and prompt are in place, test in a boring order. Do not begin with “make the house perfect for movie night while I carry groceries.” Start with commands where you can tell immediately whether routing, exposure, and fallback are working.
- Local obvious commands: “turn on the kitchen light,” “turn off the office lamp,” “set the bedroom fan to low.”
- Room and exception commands: “turn off everything downstairs except the hallway,” “make the office brighter,” “turn on only the bedside lamps.”
- Preference commands: “make the bedroom feel cozy,” “set the living room for movie night,” “make downstairs bright enough for cleaning.”
Watch what Home Assistant actually does, not just whether the response sounds confident. If the wrong light turns on, fix the entity name or prompt mapping. If the model keeps seeing irrelevant entities, trim exposure. If a simple command takes the cloud path, check the local handling toggle and Assist pipeline behavior.
For the first few days, keep a tiny failure log: command, expected result, actual result, likely cause. Most early problems are not philosophical AI problems. They are naming, grouping, exposure, or prompt problems.
What the Under-$3 Monthly Estimate Really Assumes
The attractive number is under $3 per month for moderate daily use with gpt-4o-mini. The assumptions behind it are specific: typical home-control interactions around 500–1500 tokens per command, roughly 20–30 commands per day, a trimmed exposed-entity list, local fallback for simple commands, and a manually set billing cap. [1]
| Cost lever | What changes in practice |
|---|---|
| Model choice | gpt-4o-mini is the cost anchor for the under-$3 estimate; larger models change the math |
| Exposed entity count | More exposed entities can increase prompt context and slow responses |
| System prompt length | A concise room map is cheaper than a long household essay |
| Command volume | A few tests per day and dozens of household commands per day are different usage patterns |
| Local fallback | Simple commands handled locally avoid API usage |
| Max token caps | Caps reduce the chance of long, unnecessary responses |
| AI Task cooldowns | Proactive automations need limits so they do not run repeatedly on noisy triggers |
The number is useful as a planning anchor, not a promise from the universe. A house that exposes every entity, uses verbose prompts, sends every “turn on the lamp” command to the API, and adds camera analysis automations on motion triggers will not behave like the moderate-use scenario.
If you want a clean first-month read, set the billing cap low, use gpt-4o-mini, keep the exposed list tight, and avoid proactive AI Tasks until the conversation agent behaves for normal commands. Then review OpenAI platform usage after a few days of real household use rather than judging from a single setup session.
Add AI Tasks Only After the Basic Agent Behaves
Home Assistant’s AI direction is not limited to reactive voice commands. Its AI Tasks work can analyze camera snapshots, generate natural-language notifications, summarize sensors, and send proactive alerts. [2][3]
That is interesting, but it belongs after the base path is boringly reliable. A good second-layer automation might summarize non-security sensors once in the evening, or describe a camera snapshot only when a manually selected automation requests it. A bad starter automation calls an AI task every time a noisy motion sensor flips.
Use cooldowns on AI Task automations. SmartHomeScene lists cooldowns as a cost-control technique, and they matter more for proactive automations than for manual voice commands because automations can fire when nobody is paying attention. [1]
- Reasonable early AI Task: a once-daily natural-language summary of temperature, humidity, and energy sensors.
- Reasonable early AI Task: a notification that explains which non-critical device was left on overnight.
- Wait on: camera snapshot analysis tied to frequent motion triggers.
- Wait on: security, lock, alarm, or garage-door decisions without explicit human confirmation.
If you already like recipe-style Home Assistant work, this is a natural branch from automations such as energy-monitoring smart plug recipes, camera-free presence automations, or a vacation mode automation. The difference is that AI Tasks need cost and frequency limits in addition to normal automation logic.
Where Local LLMs Fit
OpenAI is not the only path. Local LLMs through Ollama are an advanced alternative for users who want zero API cost and more privacy, and SmartHomeScene notes that local models can be used as a local LLM route. [1]
The tradeoff is that local does not automatically mean simpler. You need hardware, model management, performance tuning, and patience when a local model misunderstands a command a cloud model handles easily. If you are already experimenting with edge AI hardware, the local path pairs naturally with a setup like NVIDIA Jetson-powered local AI in smart homes.
For this recipe, OpenAI is the cleaner first build because it gets the conversation path working quickly. Once your entity exposure, prompts, and fallback behavior are proven, swapping or adding model paths becomes a controlled experiment instead of debugging five unknowns at once.
A Short Note on Alexa, Gemini, Siri, and Why Home Assistant Still Matters Here
Alexa+, Gemini for Home, Siri’s newer AI work, and other proprietary assistants are relevant context, but they are not the control surface in this recipe. The practical difference with Home Assistant is that you decide the routing, exposed entities, local fallback behavior, and model path. XDA described Home Assistant’s 2025 AI capabilities as moving quickly compared with the big voice-assistant platforms, especially because Home Assistant users can combine AI features with their own automations. [3]
That does not make Home Assistant magical. It makes it inspectable. If a command behaves badly, you can look at the exposed entities, the Assist pipeline, the prompt, the automation trace, and the API usage. That is the kind of control that matters after the first impressive demo is over.
Final Verification
Before calling the setup finished, run a small acceptance test. Use the same commands twice: once when you are watching the Home Assistant dashboard and once from the actual voice or text input you plan to use daily.
- A simple light command works and, where possible, is handled locally.
- A room command touches only the expected room entities.
- A preference command such as “cozy” maps to your prompt’s definition.
- Locks, alarms, cameras, and other excluded devices are not available to the conversation agent.
- OpenAI usage appears in the platform account, and the monthly billing cap is active.
- Any proactive AI Tasks have cooldowns and are not tied to noisy triggers.
If those checks pass, ChatGPT-style control becomes a useful layer on top of Home Assistant: good for natural language, room-level intent, and occasional summaries, while Home Assistant remains the system deciding what is exposed, what stays local, and what can be reversed.
References
- Home Assistant ChatGPT Integration, SmartHomeScene.
- AI in Home Assistant, Home Assistant, September 11, 2025.
- Alexa and Google Home's AI didn't revolutionize the smart home, but Home Assistant did, XDA.
Implementation Notes
Share platform-specific tips, report that a recipe no longer works after a platform update, or contribute variations for different device combinations.
Comments
Join the discussion with an anonymous comment.