
What This Recipe Does — and Why the Two-Device Combination Matters
Most smart home owners set up their thermostat schedule and their light automations separately, then manually trigger both each night. This recipe collapses those into a single action: one trigger that simultaneously drops your thermostat to a sleep setpoint and walks your lights through a warm-dim-to-off sequence.
The pairing matters because the two devices reinforce each other. Cooler air reduces the time your body needs to reach the core temperature drop that initiates deep sleep. Dimming to warm amber light in the 30 minutes before sleep reduces melatonin suppression caused by blue-spectrum light. Neither action alone is as effective as both together — and neither requires more than a few seconds once the automation is running.
On the energy side, the U.S. Department of Energy estimates that turning your thermostat back 7–10°F for 8 hours a day can save up to 10% annually on heating and cooling costs. That saving is fully automatic once this recipe is in place.
The recipe works on Alexa, Google Home, HomeKit, and Home Assistant. Initial configuration takes under 15 minutes on any of these platforms.
What You Need Before You Start
Verify you have the following before following any platform steps. If you are still choosing a thermostat, the smart thermostat buyer guide covers compatible models matched to HVAC type and ecosystem.
| Device type | Minimum requirement | Notes |
|---|---|---|
| Smart thermostat | Wi-Fi connected, controllable via your chosen platform | Must support remote setpoint changes from Alexa, Google Home, HomeKit, or Home Assistant. Examples: Ecobee, Nest, Honeywell T9, Wyze. |
| Smart lights | At least one smart bulb, smart switch, or light strip in the bedroom | Color-temperature control (tunable white) is recommended but not required — devices without it will still dim. |
| Platform account | Active account on Alexa, Google Home, Apple Home, or Home Assistant | Both devices must be linked to the same platform account. |
| Hub (conditional) | Required only for Zigbee or Z-Wave devices | Wi-Fi bulbs (Philips Hue bridge optional, Wyze, LIFX, Govee) and Wi-Fi thermostats work without a hub on all four platforms. |
Recipe Anatomy: Trigger, Conditions, and Action Sequence
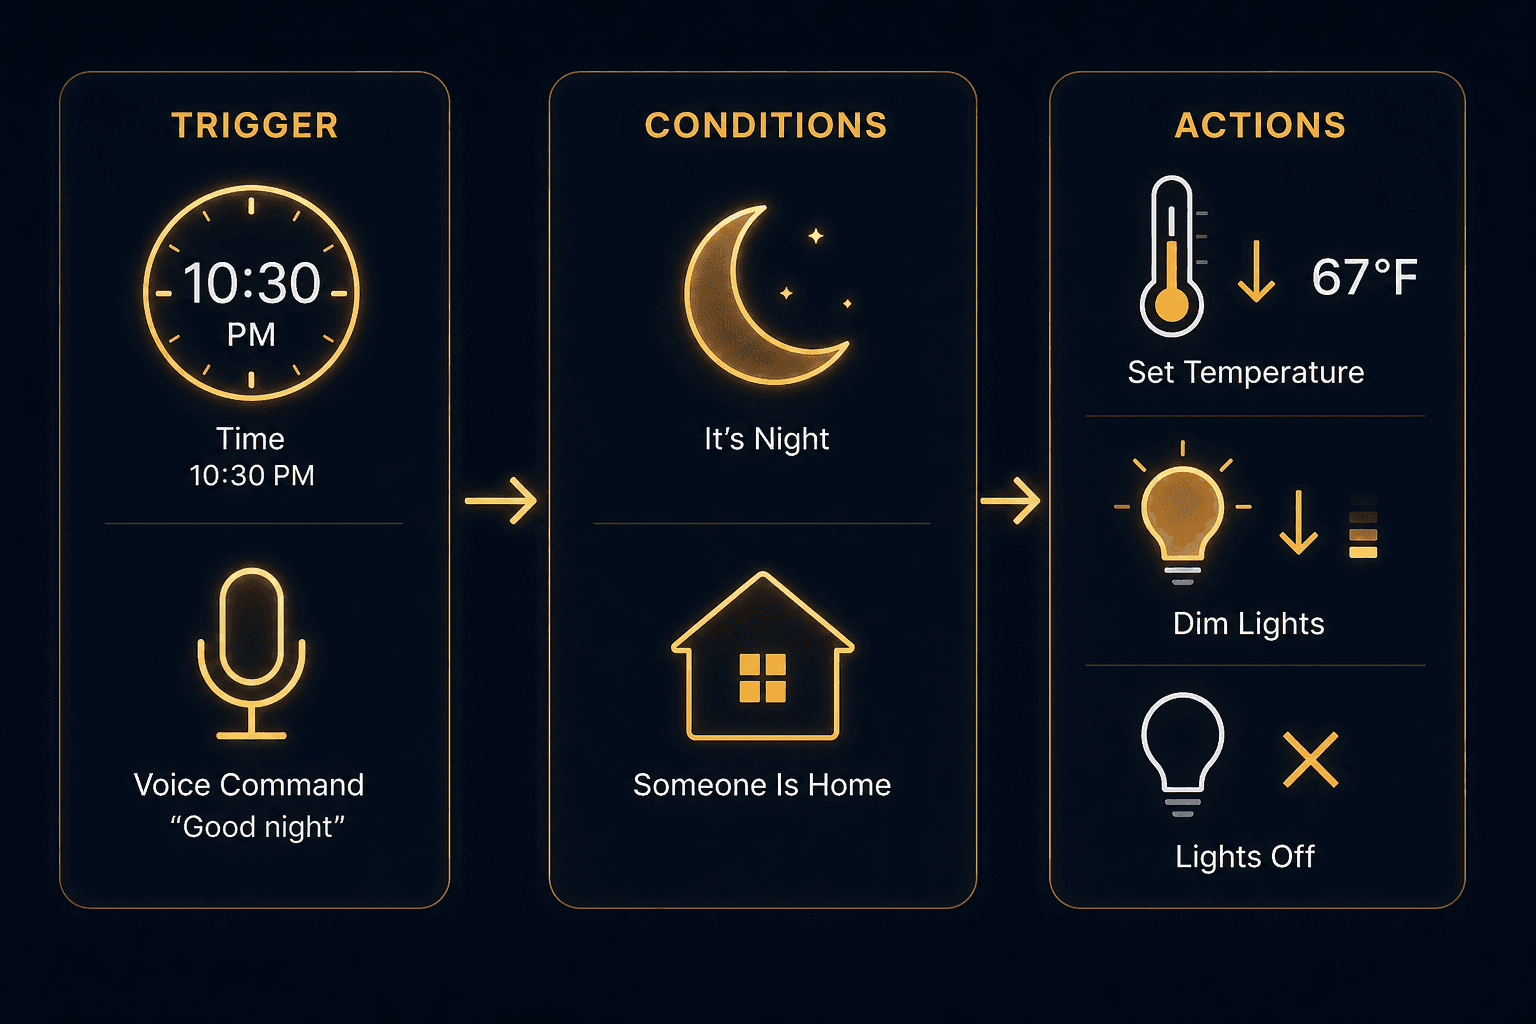
Every platform uses the same underlying IF/THEN logic. The trigger fires the routine; optional conditions guard against it running at the wrong time; the action sequence executes in order. Once you understand this structure, the platform walkthroughs below are just UI paths to the same result.
| Trigger type | Example | Platform support |
|---|---|---|
| Scheduled time | 10:00 PM every night | All four platforms |
| Voice command | "Good night" / "Sleep my lights" | Alexa, Google Home, HomeKit (Siri), Home Assistant |
| Smart button | Nightstand button press | All four platforms (requires compatible button device) |
| NFC tag | Phone taps tag on nightstand | HomeKit via iPhone Shortcuts; Android via Tasker or NFC Tools |
Optional condition guards prevent the routine from firing unexpectedly:
- Only run if at least one household member is home (presence-based condition)
- Only run after sunset (time-window condition)
- Only run if the thermostat is currently in heat or cool mode (mode-based condition, useful for heat-pump households)
The action sequence runs in this order:
- Set thermostat sleep setpoint to 65–68°F (18–19°C)
- Set bedroom lights to 2200–2700K color temperature at 20% brightness (or maximum warm setting if tunable white is not available)
- Dim bedroom lights gradually to 0% over 30 minutes
- Turn bedroom lights off (or leave at 5% if using a nightlight carve-out — see the light action detail section below)
Thermostat Action Detail: Sleep Setpoint, Timing, and the Heat-Pump Caveat
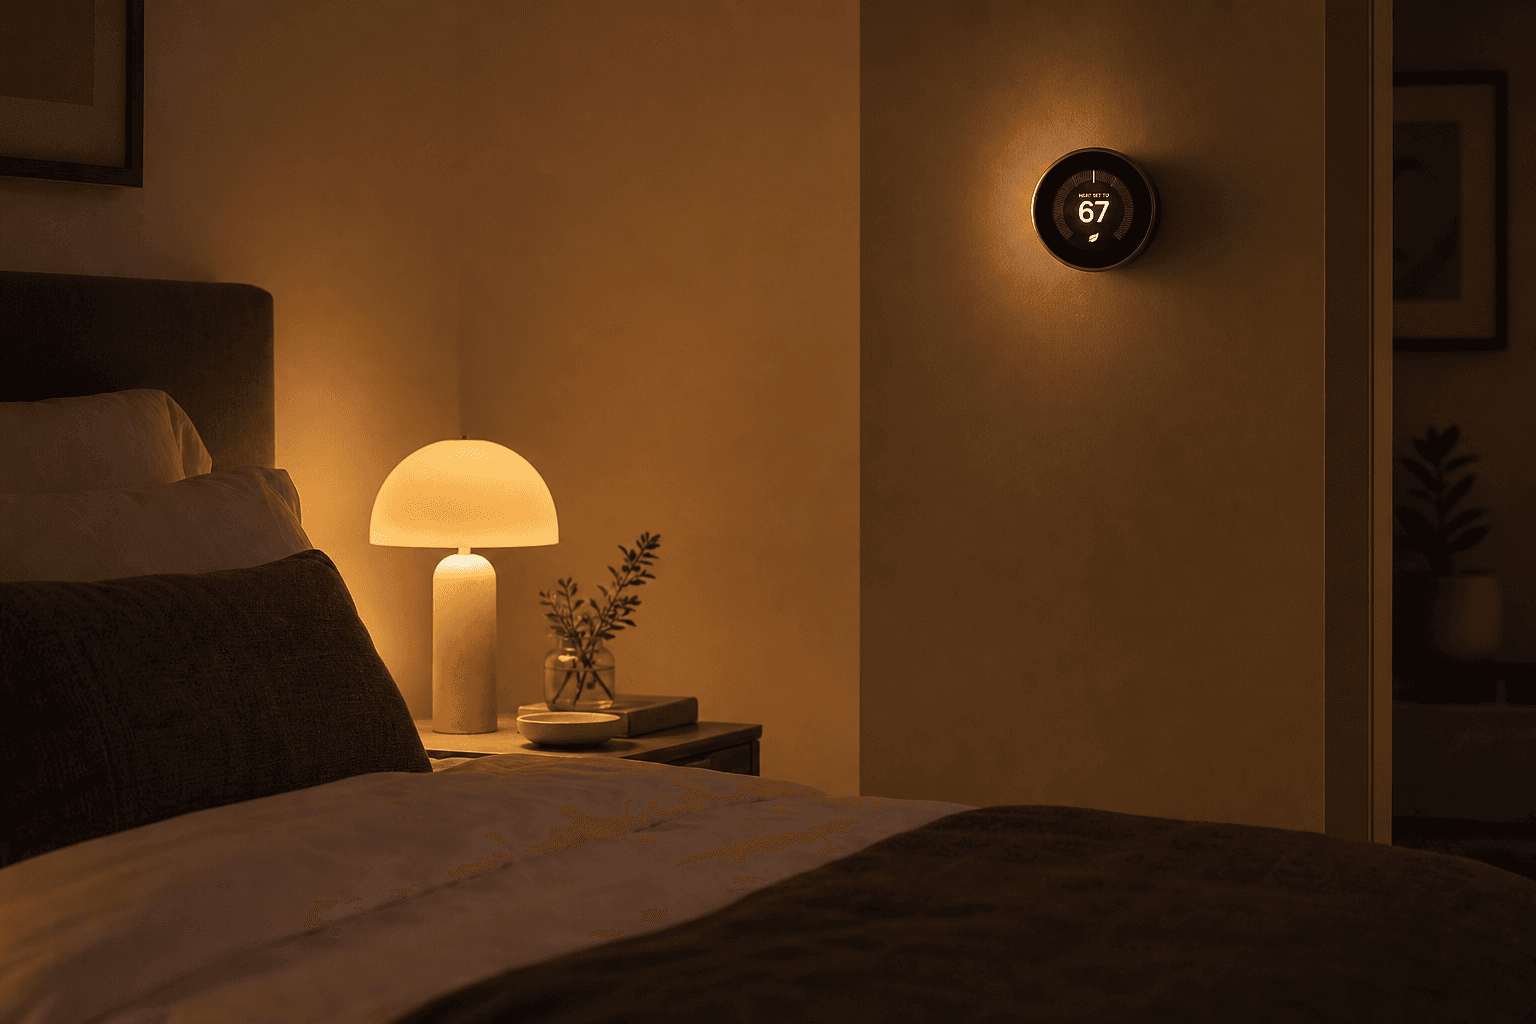
Set your thermostat's sleep setpoint to 65–68°F (18–19°C). Research cited in sleep physiology literature consistently identifies this range as optimal for slow-wave sleep — the restorative phase that dominates the first half of the night. The body's core temperature drops during sleep onset, and a cooler ambient environment accelerates that process.
Timing the trigger matters for forced-air and radiant systems. Set the automation to fire 20–30 minutes before your target sleep time so the room reaches the setpoint before you are in bed, not after. Radiant floor heating and some heat-pump systems have longer response times and may need a 30–45 minute lead.
To confirm your thermostat supports platform control, open your platform's app and verify the thermostat appears as a controllable device — not just a viewable one. The Ecobee SmartThermostat Premium is a concrete example that supports setpoint control across all four platforms covered in this recipe.
- Sleep setpoint: 65–68°F (18–19°C)
- Trigger lead time: 20–30 minutes before target sleep time for most systems; 30–45 minutes for radiant or heat-pump systems
- Morning recovery setpoint: configure a separate wake-up automation (or use the thermostat's built-in schedule) to return to your daytime setpoint 30–60 minutes before you wake
Light Action Detail: Color Temperature, Brightness, and the Nightlight Carve-Out
The light action has two goals: reduce blue-spectrum light exposure during the wind-down period, and eliminate all light once you are in bed. Both are grounded in documented photobiology.
Research by Zeitzer et al. (Journal of Physiology, 2000) found that even 100 lux of light exposure can suppress melatonin onset by up to 90 minutes. This is the reason a gradual dim sequence — not an instant-off — is recommended: it allows melatonin to begin rising while you are still winding down, rather than requiring you to sit in the dark before sleep.
| Setting | Recommended value | Rationale |
|---|---|---|
| Color temperature | 2200–2700K (warm amber) | Minimises blue-spectrum light that suppresses melatonin; supported by circadian lighting research |
| Starting brightness | ≤20% | Below the threshold where significant melatonin suppression occurs |
| Dim duration | 30 minutes | Gradual transition supports natural melatonin rise; abrupt off can feel jarring |
| Final state | Off (or 5% nightlight carve-out) | Full darkness supports sleep maintenance; 5% preserves safe navigation |
Devices without color-temperature control (non-tunable white bulbs, standard smart switches) will still dim — they simply cannot shift to warmer Kelvin values. The dimming benefit alone is meaningful; the color-temperature shift adds an additional layer.
Platform Walkthroughs: Alexa, Google Home, HomeKit, and Home Assistant
Each subsection below covers the full configuration path for one platform. The action sequence and recommended settings are identical across all four — only the UI path differs. Follow the section for your platform and skip the others.
Alexa Routines
- Open the Alexa app and tap More → Routines → + (Create Routine).
- Tap When this happens and choose your trigger: Schedule (set your target time, e.g., 10:00 PM), or Voice (set the phrase "Good night" or "Bedtime").
- Tap Add action → Smart Home → Thermostats. Select your thermostat, choose Set Temperature, and enter your sleep setpoint (e.g., 67°F).
- Tap Add action → Smart Home → Lights. Select your bedroom light group. Set Brightness to 20% and, if your bulbs support it, set Color Temperature to Warm White or the lowest Kelvin option available.
- To add a gradual dim: tap Add action → Wait, set a 30-minute delay, then tap Add action → Smart Home → Lights again and set Brightness to 0% (off). This creates a two-step dim sequence.
- Tap Save. Test by saying "Alexa, run [routine name]" or waiting for the scheduled time.
Google Home Routines with Gentle Sleep
Google Home includes a built-in Gentle Sleep feature that handles the warm-dim sequence automatically. Gentle Sleep sets lights to a warm white color and dims them over 30 minutes. It works with all lights, switches, and plugs set up as type 'Light' in the Google Home app — devices without color support will still dim.
- Open the Google Home app and tap Routines → + (Add a routine).
- Under Starter, choose Time of day (e.g., 10:00 PM) or Voice (e.g., "Good night").
- Tap Add action → Adjust home devices → Adjust thermostat. Select your thermostat and set the temperature to your sleep setpoint (e.g., 18°C / 65°F).
- Tap Add action → Adjust lighting → Gentle Sleep. Select the bedroom light group. Gentle Sleep will automatically dim to warm white over 30 minutes.
- Optionally, add a second lighting action after a delay to turn lights fully off once the 30-minute dim is complete.
- Tap Save. You can also trigger Gentle Sleep manually at any time by saying "Hey Google, sleep my lights" or "Sleep the lights in the bedroom".
Apple HomeKit: Scene + Automation Pairing
HomeKit separates the desired device state (a Scene) from the trigger logic (an Automation). Build the Scene first, then attach an Automation to it.
- Open the Home app → tap + → Add Scene → Custom. Name it "Bedtime" or "Sleep".
- Add your thermostat to the Scene. Set it to your sleep setpoint (e.g., 67°F). Confirm the thermostat shows the correct mode (heat, cool, or auto).
- Add your bedroom lights to the Scene. Set brightness to 20% and color temperature to the warmest available setting (Warm White or lowest Kelvin). Tap Done.
- To add the gradual dim: create a second Scene named "Lights Off" with bedroom lights set to 0%. Then create an Automation that triggers "Lights Off" 30 minutes after "Bedtime" runs.
- Go to Automation → Create New Automation. Choose A Time of Day Occurs (e.g., 10:00 PM) or A Shortcut is Run (for Siri voice trigger). Set the action to Run Scene → Bedtime.
- Create a second Automation at 10:30 PM that runs the "Lights Off" Scene.
- Test by running the Bedtime Scene manually from the Home app.
Home Assistant: UI Automation with Optional YAML
Home Assistant's automation editor handles this recipe well without requiring YAML. Use the UI steps below; the YAML version follows for readers who prefer it.
- Go to Settings → Automations & Scenes → Create Automation → Start with an empty automation.
- Under Triggers, tap Add Trigger → Time → set to 10:00 PM (or your preferred time).
- Optionally, add a Condition: State → select a presence sensor or person entity → is home.
- Under Actions, tap Add Action → Call service → climate.set_temperature. Select your thermostat entity, set temperature to 19 (°C) or 67 (°F) depending on your unit setting.
- Add a second Action → Call service → light.turn_on. Select your bedroom light group. Set brightness_pct to 20 and color_temp_kelvin to 2700.
- Add a third Action → Delay → 00:30:00 (30 minutes).
- Add a fourth Action → Call service → light.turn_off. Select your bedroom light group.
- Save and name the automation "Bedtime Routine".
The equivalent YAML for readers who prefer to work in the configuration editor:
alias: Bedtime Routine
description: Thermostat sleep setback and warm dim-to-off light sequence
trigger:
  - platform: time
    at: "22:00:00"
condition:
  - condition: state
    entity_id: person.your_name
    state: home
action:
  - service: climate.set_temperature
    target:
      entity_id: climate.your_thermostat
    data:
      temperature: 19
  - service: light.turn_on
    target:
      entity_id: light.bedroom_lights
    data:
      brightness_pct: 20
      color_temp_kelvin: 2700
  - delay:
      minutes: 30
  - service: light.turn_off
    target:
      entity_id: light.bedroom_lights
mode: singleTrigger Alternatives: Four Ways to Fire the Same Recipe
A fixed schedule works well for households with consistent bedtimes, but it is not the only option. All four trigger types below invoke the same thermostat and light action sequence — only the activation method changes.
| Trigger type | How to set it up | Best for |
|---|---|---|
| Scheduled time | Set a fixed time in your platform's automation or routine builder | Households with consistent bedtimes |
| Voice command | Alexa: add a voice trigger phrase to the Routine. Google Home: use the Routine voice starter or say "Sleep my lights". HomeKit: create a Siri Shortcut. Home Assistant: use a conversation trigger. | Variable bedtimes or households that prefer manual control |
| Smart button (nightstand) | Pair a Zigbee, Z-Wave, or Wi-Fi button to your hub or platform; assign the bedtime routine to a single press | Anyone who wants a physical trigger without speaking |
| NFC tag (nightstand) | iPhone: write a HomeKit scene or Shortcut to an NFC tag using the Shortcuts app → Automation → NFC. Android: use NFC Tools or Tasker to trigger a Google Home routine or Home Assistant webhook. | Households where phones are placed on the nightstand each night |
The NFC tag approach is particularly low-friction for households where phones are always placed on the nightstand at bedtime: a single tap fires the entire recipe without opening any app or speaking a command.
Optional Enhancements to the Base Recipe
The base recipe — thermostat setback plus warm dim-to-off — is complete as described. The following additions extend it without changing its core scope. None are required.
- Bathroom nightlight motion carve-out: Configure a bathroom or hallway light to turn on at 5–10% brightness when motion is detected at night (between the bedtime trigger time and your usual wake time). This preserves safe navigation without disrupting the bedroom darkness.
- Pre-bedtime dim sequence: Add a separate automation that fires 15–30 minutes before the main bedtime trigger, dimming living room or common area lights to 30% warm white. This extends the wind-down period and reduces the contrast between the bright living space and the dark bedroom.
- Do Not Disturb on smart speakers: Add an action to enable Do Not Disturb mode on Alexa or Google Home devices in the bedroom. On Alexa, use the "Set Do Not Disturb" action in the Routine. On Google Home, use the "Manage notifications" action in the Routine.
- Smart lock append (optional): A smart lock can be added as an additional action to the same routine (lock the front door at bedtime). This is outside the core scope of this recipe but is a natural extension once the base recipe is working.
Troubleshooting: Lights That Won't Turn Off, Thermostat That Ignores the Recipe, and Competing Automations
- Lights don't turn off: Check the physical switch position first. Then open your platform's device list and confirm the light is showing as online. If it is offline, power-cycle the bulb. If it is online but not responding to the automation, check for competing automations that may be turning the light back on — look for any other routine that includes the same light group and runs at or near the same time.
- Thermostat ignores the recipe: Verify the thermostat's platform integration is active and showing as connected (not "offline" or "unavailable"). Check the thermostat's own schedule — if it has a built-in hold or schedule that conflicts with the setpoint sent by the automation, the built-in schedule may override it. On most thermostats, setting a "temporary hold" from the platform app will take precedence over the device's own schedule.
- Competing automations conflict: Open your platform's automation or routine list and look for any other automation that touches the same thermostat or light group within 30 minutes of the bedtime trigger. Time-overlap conflicts are the most common cause of unpredictable behavior. Use condition guards (e.g., "only run if no other routine has run in the last 30 minutes") or stagger trigger times to prevent conflicts.
FAQ: Heat Pumps, Shared Households, and Hub Requirements
- Does thermostat setback work on heat pumps? Not with a standard programmable or smart thermostat. Standard setback on a heat pump in heating mode can trigger backup electric resistance heat, which is expensive and cancels the energy savings. Use a thermostat specifically designed for heat pumps — one that uses algorithms to avoid backup heat activation during setback recovery. Check your thermostat's product page or the manufacturer's compatibility list.
- What if household members have different bedtimes? Replace the fixed-schedule trigger with a voice command or smart button trigger. Each person can fire the routine when they are ready for bed rather than at a shared fixed time. Alternatively, create separate per-person or per-room routines with different trigger times.
- Does this recipe require a hub? No, if your thermostat and lights connect via Wi-Fi directly to your platform (Alexa, Google Home, HomeKit, or Home Assistant). A hub is only required if your devices use Zigbee or Z-Wave protocols, which need a coordinator (such as a Zigbee USB stick for Home Assistant, or a Philips Hue Bridge for Hue bulbs).
- Do my thermostat and lights need to be the same brand? No. Any two devices that are both linked to the same platform account can be combined in one routine or automation, regardless of brand. Matter 1.5 extends this further by enabling cross-platform routines — an Ecobee thermostat and IKEA bulbs can be coordinated in a single routine even if they are on different native platforms, as long as both are Matter-certified.
Implementation Notes
Share platform-specific tips, report that a recipe no longer works after a platform update, or contribute variations for different device combinations.
Comments
Join the discussion with an anonymous comment.