
How to Set Up Home Internet in Alpharetta for Smart Homes
Setting up home internet in Alpharetta is less about finding the fastest plan and more about the order of setup: every address can get a 300+ Mbps plan, but router placement, band separation, and device capacity decide whether smart-home devices stay online. The sequence covers address-level provider checks, plan and install choices, fiber/cable/5G hookups, IoT-ready router configuration, and a final speed and dead-zone verification.
After you type an Alpharetta address into a provider checker, the tempting move is to sort by the biggest speed number and be done. For most smart homes here, that is the wrong place to spend all your attention. Allconnect’s 2026 city data says every Alpharetta address can access a plan of 300 Mbps or faster, while fiber access is available to about 40% of the population, depending on the exact location.[1] That is enough to change the setup question: first confirm what reaches your address, then design the Wi-Fi so cameras, bulbs, speakers, thermostats, hubs, laptops, and phones can all stay connected.
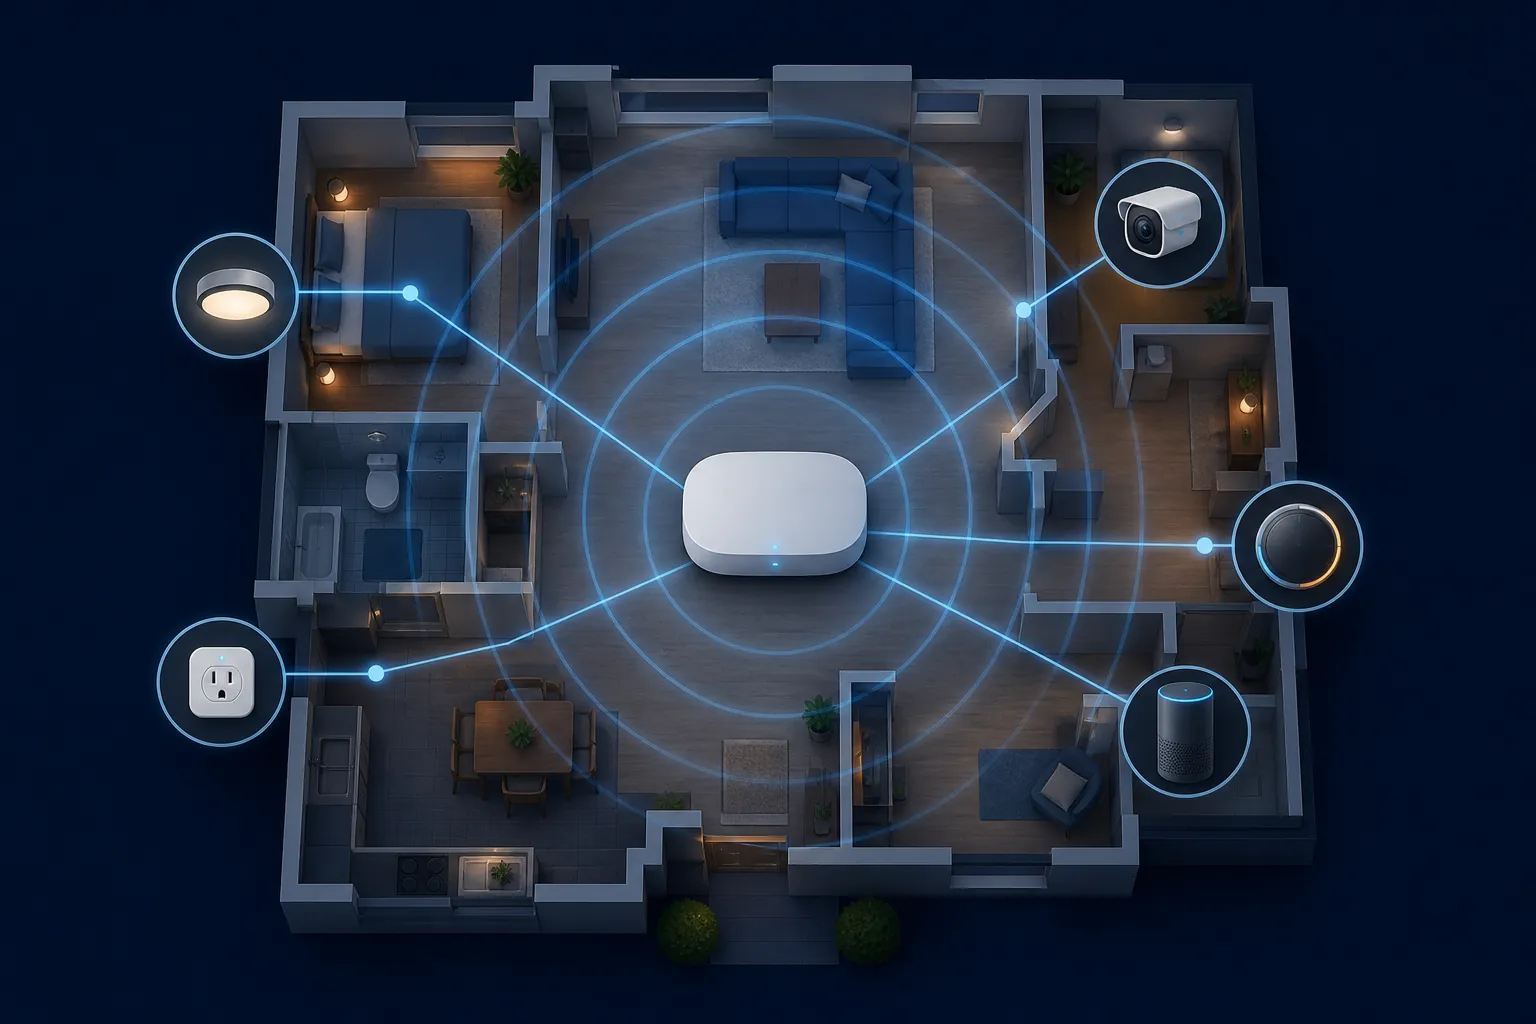
The local catch is that Alpharetta availability is not one clean citywide answer. BroadbandNow’s August 2026 Alpharetta page describes fiber availability differently than Allconnect, while BroadbandSearch reports a much smaller fiber footprint; those conflicts come from different data sources, dates, and coverage methods.[1][2][3] Newer corridors around downtown Alpharetta, Avalon, and Windward may see different choices than older streets still served mainly by coax. So the first useful tip is boring but non-negotiable: check the exact street address, unit, or lot number before you choose equipment or promise yourself a same-day smart-home install.
Start with the address check, not the router box
Run the address through at least the provider’s own site and one aggregator. Aggregators are useful for discovering likely options, but they are not a binding service order. Provider pages decide what can actually be installed, which speed tiers are being sold at that address, and whether the home already has usable service wiring.
| If the address checker shows | What to decide before ordering | Smart-home setup implication |
|---|---|---|
| Fiber | Whether a technician visit is required and where the ONT will go | Best candidate for high upload needs, clean latency, and long-term device growth |
| Cable | Whether the home already has an active coax outlet near a good router location | Often fast enough, but router placement may be constrained by the coax drop |
| 5G home internet | Which window or exterior-facing spot gets the strongest signal | Gateway placement may be excellent for cellular signal but awkward for whole-home Wi-Fi |
If several plans are available, do not treat the advertised download number as the whole decision. Count people, work devices, streaming TVs, game consoles, cameras, and always-on smart-home devices. A couple of people in a townhouse can live very differently from a family with outdoor cameras, video doorbells, cloud backups, and voice assistants in every room.
Promotional pricing should also be treated as temporary. Google Fiber’s Atlanta-area page lists Core 1 Gig at $70 per month, Home 3 Gig at $100 per month, and Edge 5 Gig at $150 per month with a Wi-Fi 7 router, free pro install with performance verification, and an uptime guarantee.[4] AT&T’s Alpharetta fiber page advertises fiber service locally, including a 5 Gbps tier.[5] Those are useful comparison points, especially if uploads and wired backhaul matter, but Q3 2026 provider pricing and availability can change by address and promotion window.
Choose self-install only when the physical path is already solved
Self-install can be quick when the line already exists. HighSpeedInternet’s setup guide says self-install may take as little as about 30 minutes where the connection is ready and activation can be completed through the provider’s app or portal.[6] That is a good fit for a rental or resale home with a known working coax outlet, existing Ethernet handoff, or previously active gateway location.
Fiber is the place to be less casual. The same guide notes that fiber installs usually require a technician to mount the ONT because the fiber drop is delicate, and that fiber self-install kits typically include the gateway or router and Ethernet cable rather than ONT hardware.[6] If a technician is coming, ask where the ONT will be mounted, where Ethernet can leave that ONT, and whether performance can be verified before the visit ends.
- For fiber: confirm the ONT location, connect the provider gateway or your router to the ONT by Ethernet, then activate service through the provider’s instructions. Do not accept an ONT placement that forces the only router into a metal media cabinet unless you already plan to add wired access points.
- For cable: connect the modem or gateway to the active coax outlet, power it up, activate it in the app or portal, and then test the modem before judging Wi-Fi. A bad splitter, old coax run, or inactive outlet can look like a Wi-Fi problem.
- For 5G home internet: place the gateway where the cellular signal is strongest first, usually near a suitable window, then decide whether that location also works for Wi-Fi. If it does not, you may need mesh or Ethernet from the gateway to a better access point location.
Put the router where Wi-Fi can actually leave the router
The fastest plan in the neighborhood will still disappoint if the gateway is stuffed in a low-voltage cabinet, behind a TV, next to a microwave, or in the far corner of the house because that is where the cable drop happened to be. Router placement is not decoration. It is the first coverage decision your smart home has to live with.
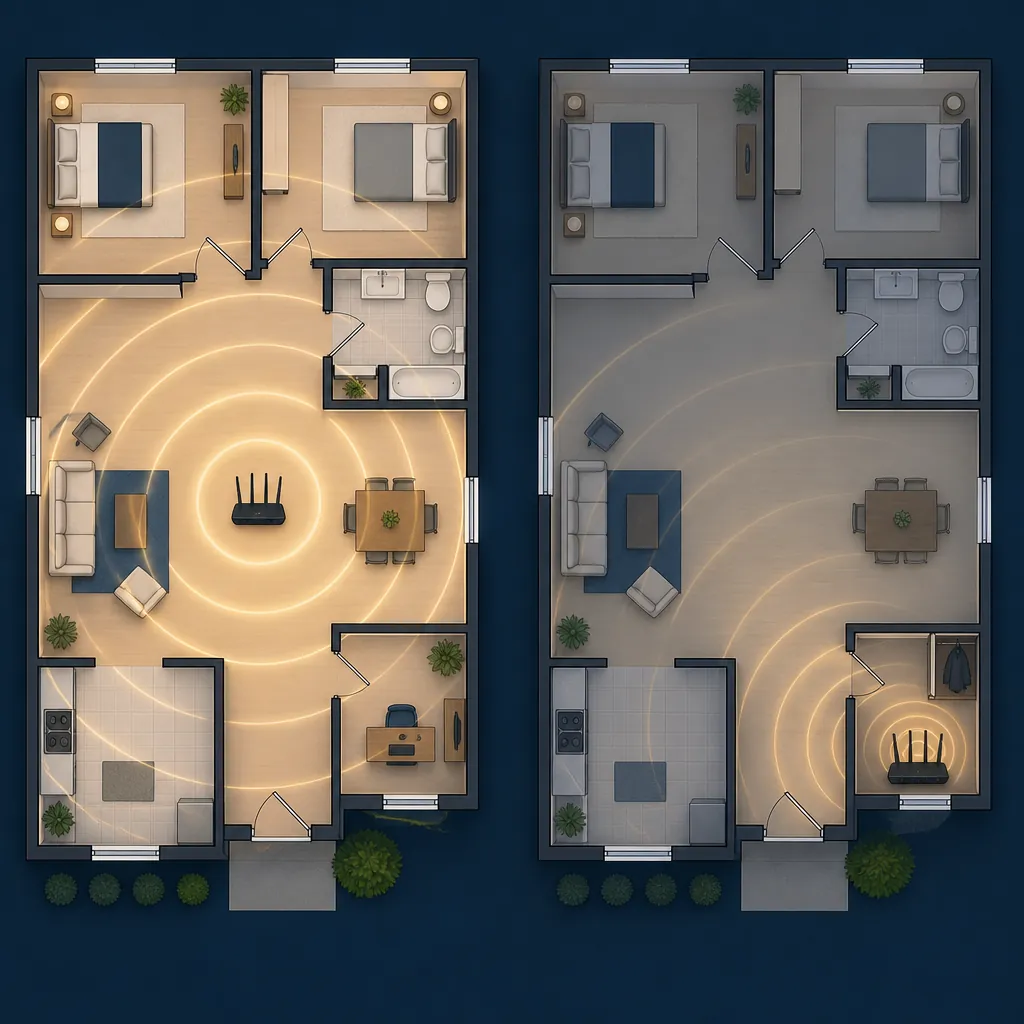
Use a central, open, elevated location when the wiring lets you. TP-Link recommends a central router location, antennas vertical for single-floor homes, and angled around 30 degrees for multi-floor homes.[7] NETGEAR and HighSpeedInternet also advise keeping routers away from interference and signal blockers such as metal, concrete, microwaves, and enclosed cabinets.[8][9] If the only internet handoff is in a cabinet, treat that cabinet as a service entrance, not automatically as the final Wi-Fi location.
A practical Alpharetta setup often looks like this: ONT, modem, or gateway at the service entry; Ethernet from there to a router or main mesh node in the open part of the home; then additional mesh nodes or wired access points only where the walkthrough proves they are needed. If the home is prewired with Ethernet, use it. A wired access point upstairs or across the house is usually cleaner than trying to shout Wi-Fi through walls from a closet.
Separate the smart-home traffic before pairing everything
Many smart-home devices still prefer or require 2.4 GHz Wi-Fi because it reaches farther and is common on low-power devices. That does not mean your phones and laptops should be forced onto 2.4 GHz. It means the network should be named and configured so each device joins the band that makes sense.
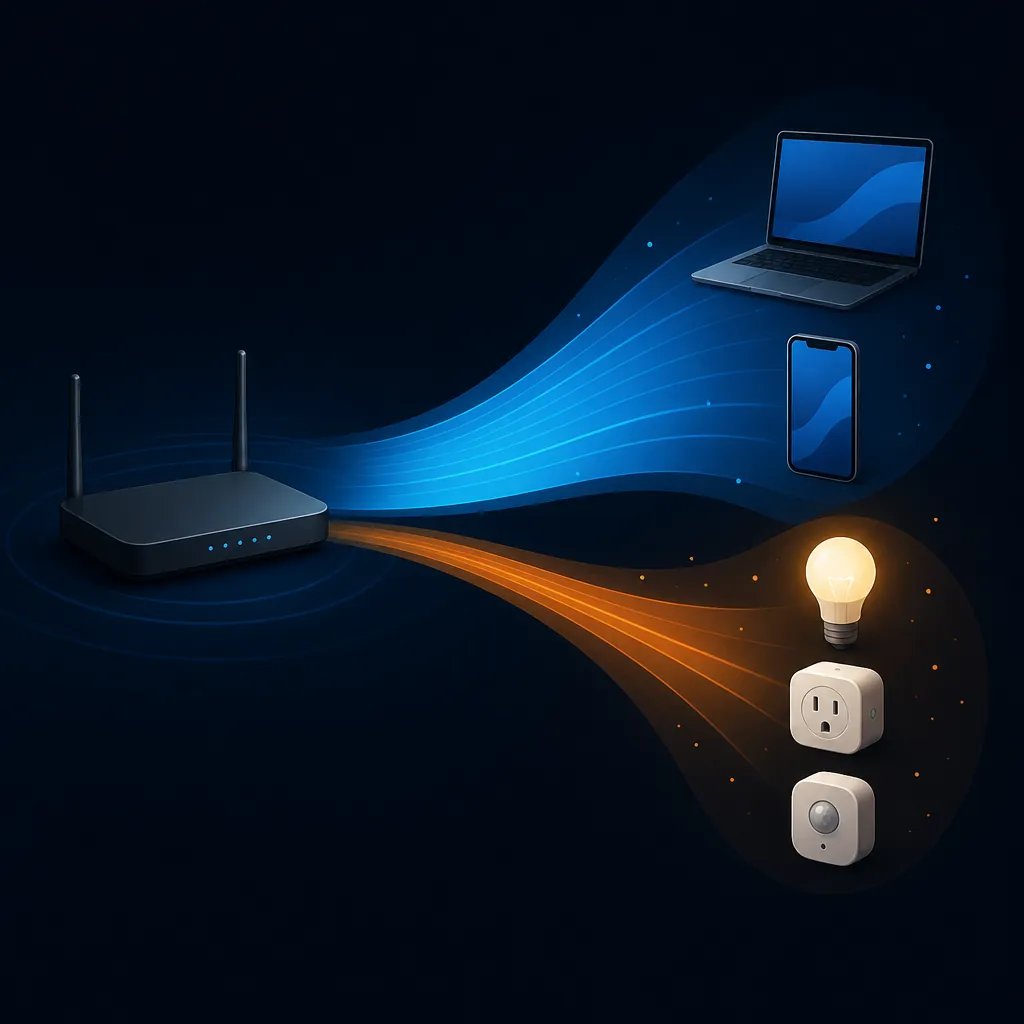
The cleanest smart-home pattern is usually one main SSID for everyday devices and one clearly named IoT or guest-style SSID for smart-home hardware. Keep the IoT SSID on 2.4 GHz if your router allows band-specific naming. Put phones, laptops, tablets, and streaming boxes on 5 GHz or 6 GHz where supported. If your router forces one combined network name, check whether it has an IoT network feature or a temporary 2.4 GHz pairing mode before you start adding devices.
- Use WPA2-Personal or WPA2/WPA3 transition mode if older smart-home devices fail on WPA3-only.
- Avoid special characters in the IoT SSID or password if a device’s app seems poorly built; some budget devices still behave badly during pairing.
- Name the IoT network something you will recognize two years from now, not the default gateway label printed on the box.
- Pair stationary devices only after the router or mesh layout is in its final place. Pairing everything beside the router and then moving devices to weak rooms creates false confidence.
If you are planning device protocols beyond Wi-Fi — Matter, Thread, Zigbee, Z-Wave, or hub-based systems — use the same discipline here. Decide which devices truly need Wi-Fi and which can live on a hub or border router. The device-planning work belongs with your Compatibility & Protocols notes, because it affects how many Wi-Fi clients your router has to carry.
Count connected devices, not just people
A smart home can quietly outgrow the free gateway before it outgrows the internet plan. Linksys says consumer routers generally handle roughly 20 to 50 connected devices comfortably, depending on the model and workload, while noting that Wi-Fi 7 routers can be rated for up to about 200 devices.[10] NETGEAR’s WiFi Device Calculator makes the same planning point from the other direction: device mix matters, not only the number of users.[11]
Do the count on paper before you pair the first switch. A modest smart-home list can reach 30 devices quickly: phones, laptops, tablets, TVs, printers, speakers, watches, thermostats, video doorbells, cameras, bulbs, plugs, robot vacuums, garage controllers, irrigation controllers, leak sensors, and appliances. WWT’s new-home setup guide specifically calls out smart devices such as cameras, thermostats, and voice assistants as part of the bandwidth and connection load a home internet setup has to account for.[12]
| Home profile | Likely network pressure | Setup choice |
|---|---|---|
| Apartment or small townhouse with a few smart plugs and one camera | Coverage may matter more than router capacity | A current ISP gateway may be fine if placed well and configured cleanly |
| Single-family home with cameras, speakers, thermostats, bulbs, and work-from-home devices | Both coverage and client count matter | Use a stronger router or mesh system with an IoT SSID and room-by-room validation |
| Large home, detached office, outdoor cameras, or many Matter/Thread/Wi-Fi devices | Dead zones, roaming, and device limits become likely | Prefer wired access points or wired mesh backhaul where Ethernet exists |
This is where paying for more speed can be a distraction. If the router is already dropping clients, struggling in the back bedroom, or combining every bulb and laptop onto one congested default network, a larger internet plan will not repair the Wi-Fi architecture inside the house.
Use mesh carefully; skip cheap repeater habits
Mesh is useful when the home’s shape, square footage, or construction makes one router unrealistic. The mistake is placing mesh nodes where Wi-Fi is already bad. A wireless mesh node needs a strong enough connection back to the main router; if you put it in the dead zone, it mostly repeats the dead zone.
Use the first mesh node halfway between the main router and the weak area, then test. If there is Ethernet in the wall, use wired backhaul. HighSpeedInternet warns that Wi-Fi extenders in repeater mode can double latency, which can hurt real-time apps and make some device responses feel sluggish.[9] That is why a mesh system or wired access point is usually the better whole-home answer than a bargain plug-in extender at the far end of the hallway.
Pair smart devices in the order the network will use them
Once the router location, SSIDs, security mode, and mesh layout are set, pair devices by room. Start with infrastructure and high-importance devices: hubs, border routers, thermostats, locks, cameras, doorbells, and leak sensors. Then add convenience devices such as bulbs, plugs, speakers, and decorative automations. If something fails, you will know whether the problem appeared after a specific room, device type, or distance from the access point.
Keep a simple record: device name, room, app, SSID, and protocol. It feels unnecessary during the first weekend. It becomes extremely useful when a camera drops offline after a router firmware update or a bulb refuses to re-pair six months later. For repeated drop-offs or pairing failures, move from this setup recipe into the Troubleshooting Center rather than changing five settings at once.
Verify before you add the rest of the house
The final walkthrough is not optional. It is the step that catches the bad cabinet placement, the weak upstairs node, the overloaded gateway, and the porch camera that only worked while you were standing beside it.
- Run a speed test near the router or main mesh node. This checks the service and gateway before walls and distance enter the story.
- Walk the house with a phone on the main Wi-Fi network. Test the office, bedrooms, kitchen, garage, porch, patio, and any room where a camera, speaker, or thermostat will live.
- Check the IoT SSID from the farthest smart-device locations. A laptop speed test on 5 GHz does not prove a 2.4 GHz plug in the garage will stay online.
- Open the router app and confirm devices landed where intended: phones and laptops on the main network, smart-home devices on the IoT network, and any hubs or bridges on the network required by their app.
- Watch cameras and voice assistants for delayed responses. A device that pairs once but drops during normal use is telling you more than a clean setup screen.
- Decide on mesh or a wired access point before adding another dozen devices. Fix coverage and capacity while the network is still small enough to understand.
A verified setup ends with enough speed at the router, usable signal in the rooms that matter, smart-home devices on the intended band or SSID, and a router or mesh system sized for the device count you actually plan to run. In Alpharetta, buying enough internet is usually the easy part. The smart-home-ready result comes from ordering the right service for the exact address, then being deliberate about coverage, bands, security, and capacity before the automations start depending on them.
References
- Compare Internet Providers in Alpharetta, GA, Allconnect, 2026.
- Top 11 Internet Providers in Alpharetta, GA (Aug 2026), BroadbandNow, Aug 2026.
- Top 9 Internet Providers in Alpharetta, GA (Aug 2026), BroadbandSearch, Aug 2026.
- Atlanta, GFiber.
- AT&T Fiber Internet in Alpharetta, Georgia, AT&T.
- How To Set Up Your Internet, HighSpeedInternet, Oct 2025.
- Router Antenna Position: Tips for the Best Wi-Fi Signal, TP-Link, May 2026.
- Boost WiFi Signal: Router Placement Tips, NETGEAR.
- Where Is the Best Place to Set Up Your Router?, HighSpeedInternet.
- Understanding Router Limits: How Many Devices Can Connect?, Linksys.
- WiFi Device Calculator, NETGEAR.
- How to Set Up Internet in Your New Home, WWT.